
The draft coming off the bottom of a window frame is a specific kind of cold. It is not the ambient chill of an unheated room. It is a focused stream, a thin blade of air that finds the back of a neck or the space between two sweater layers, and it operates with a persistence that makes a person want to burn the house down and start over. Before resorting to arson or a full window replacement, there is a cheaper, more satisfying fix. It involves weatherstripping, and it requires understanding that the material matters less than the fit.
The common mistake is buying the first roll of foam tape from the hardware store and jamming it into the gap. This works for about a month. The foam compresses, loses its spring, and turns into a hard little ridge of uselessness that still lets air through. The draft returns, and the person who installed it feels cheated. This is not a failure of the concept. It is a failure of material choice.
The Gap Determines Everything
Before buying anything, measure the actual gap between the sash and the frame. A dollar bill is a useful diagnostic tool. Slide it between the closed window and the stop. If it slips through with no resistance, the gap is too large for most adhesive foams. If it catches and requires a gentle tug, the gap is small, and a thin material will do. If the bill slides through easily but the gap still looks tight to the eye, the window is likely warped or the sash is sitting crooked.
Most double-hung windows have a gap between one-sixteenth and one-eighth of an inch. This is the range where adhesive-backed foam tapes actually perform. The tape needs to be slightly thicker than the gap so it compresses when the window closes. A quarter-inch thick foam tape squeezed into a one-eighth inch gap will crush and fail. A one-eighth inch tape in a one-sixteenth gap will create so much friction that the window becomes difficult to operate.
The measurement step is where most people quit. They eyeball the gap, guess at the size, and buy the wrong product. Then they blame the product. A cheap caliper or even a stack of index cards can give the precise dimension. It takes two minutes and saves an entire afternoon of frustration.
Foam Tape Is a Seasonal Fix, Not a Permanent One
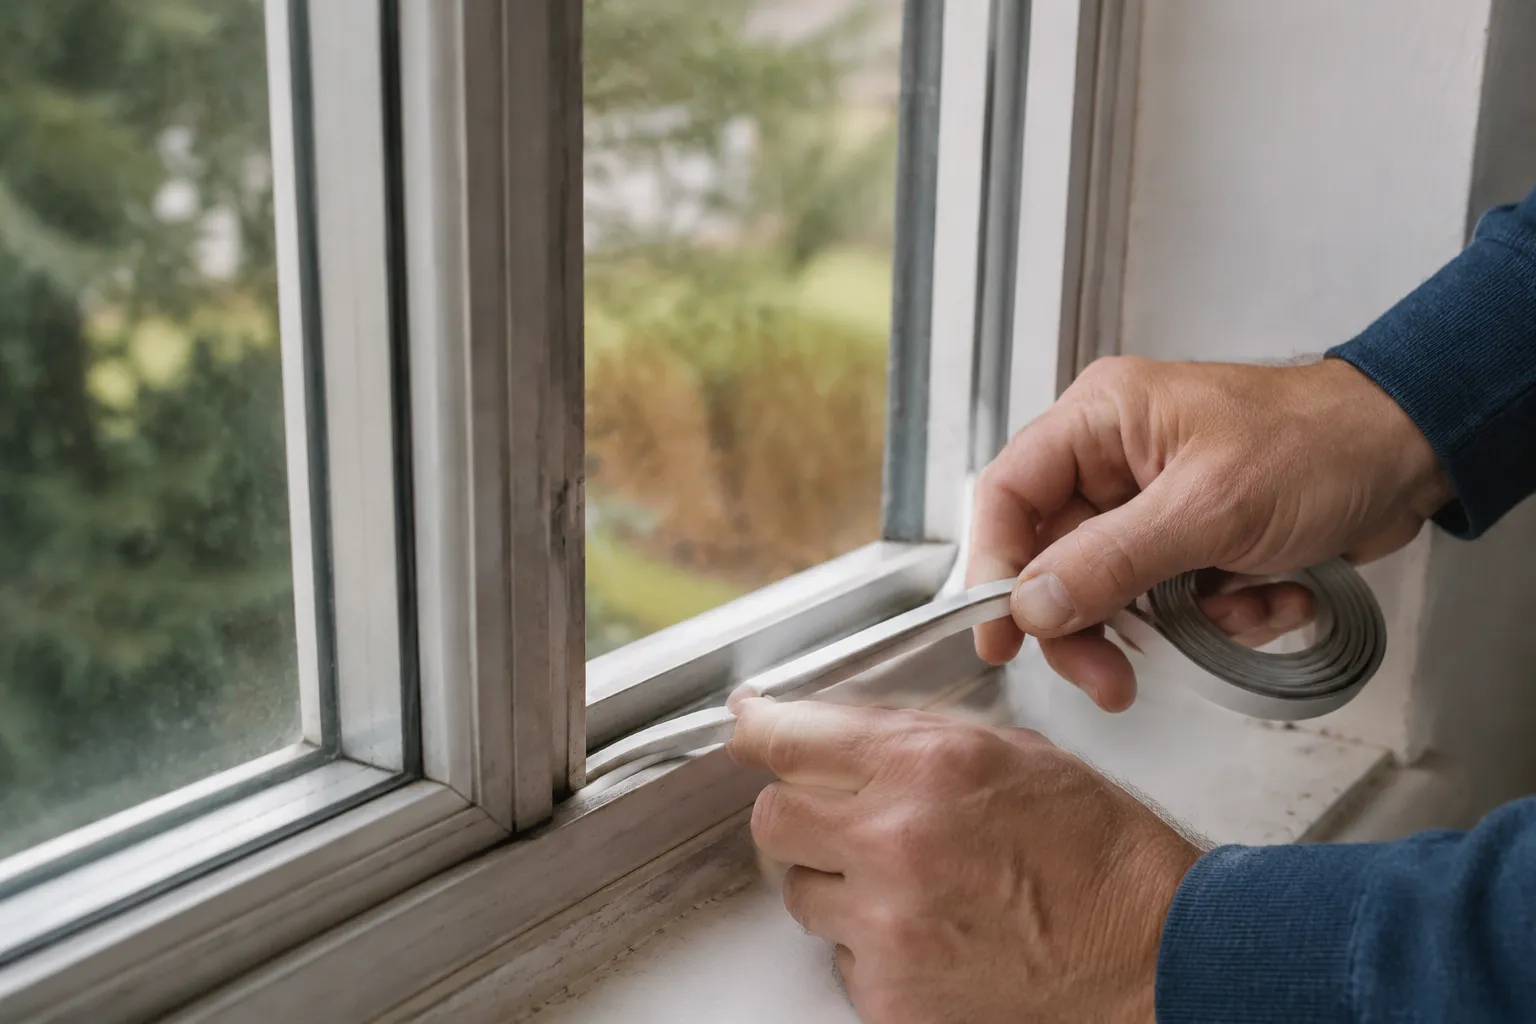
Adhesive-backed foam, usually EPDM or polyurethane, is the fastest fix available. Peel the backing, press it onto the clean frame, close the window. The whole job takes ten minutes per window. The foam seals the gap and stops the draft immediately. For renters or people who want one winter of relief, this is the right call.
The problems show up over time. Foam degrades with UV exposure, so windows on the sunny side of the house lose their seal faster. The adhesive can also fail when the window frame gets hot in summer and cold in winter, causing the tape to peel away at the corners. And when the time comes to remove it, the adhesive leaves a sticky residue that requires solvent and elbow grease to clean.
Foam tape also struggles with sliding windows. The friction of the sash moving against the foam can roll the tape or tear it loose. For windows that open and close regularly, a more durable material is worth the extra effort.
V-Strip Is the Quiet Workhorse
V-strip, sometimes called tension strip, is a folded piece of plastic or metal that creates a spring-loaded seal. It comes in a roll, and the installer cuts it to length and tucks it into the track or along the side of the sash. The V shape compresses when the window closes and springs back when it opens. This is the material used in many newer windows from the factory, and it works well.
Installation is fiddlier than foam tape. The strip needs to be cut precisely, and the adhesive backing on some versions is not strong enough to hold the strip in place on its own. Staples or small nails are often needed at the ends to keep it secure. The payoff is a seal that lasts several years and does not interfere with window operation.
For double-hung windows, the V-strip goes on the sides and the top of the bottom sash. The strip should be positioned so the open side of the V faces the exterior. This way, air pressure from outside pushes the strip tighter against the frame, improving the seal. Installing it backward reverses the effect, and the draft gets worse.
Metal V-strips, usually bronze or copper, are more durable than their plastic counterparts. They also cost more. For a homeowner planning to stay in the house for a decade or more, the metal version is a reasonable investment. The plastic version, typically clear or white vinyl, is cheaper and easier to work with, and it holds up acceptably for several seasons.
The Felt Option Still Has a Place
Felt weatherstripping is the oldest material in this category, and it gets dismissed as obsolete. That dismissal is not entirely fair. Felt is soft, compressible, and forgiving of uneven gaps. It does not create a perfect seal, but it does a reasonable job of slowing air movement, and it is cheap enough to replace every couple of years without guilt.
The main drawback is moisture. Felt absorbs water, and once it gets wet, it loses thickness and stops sealing. It also collects dust and debris, which makes it less effective over time. For windows in a dry climate or on a covered porch, felt works fine. For a bathroom window or a kitchen window that sees steam on a regular basis, it will fail quickly.
Felt with an adhesive backing is the easiest to install. The non-adhesive version, which is nailed or stapled in place, holds up better because the fasteners keep it from peeling. The installation takes longer, but the result lasts longer too. The felt should be installed so it compresses slightly when the window closes, creating a gentle resistance without binding the sash.
The Silicone and Rubber Options for Problem Windows
Tubular rubber or silicone gaskets, sometimes called bulb weatherstripping, are the heavy-duty option. These are hollow tubes of rubber that compress like a balloon when the window closes, creating a tight seal even on gaps that are irregular or wider than average. They come with a flange that can be nailed or stapled into the frame.
These materials handle extreme temperatures without losing their flexibility. Silicone stays soft in subzero cold, where some vinyl strips stiffen and crack. The downside is the cost and the visual bulk. A thick rubber bulb on a window frame is noticeable, and it can interfere with the operation of windows that have narrow stops or tight tolerances.
For windows that are rarely opened and sit in a drafty corner of the house, the rubber gasket is a strong choice. For windows that get opened every morning for fresh air, the added friction of a bulb gasket can make the operation feel heavy and awkward.
Adhesive Failure Is an Installation Problem
Most weatherstripping failures trace back to a dirty frame. Adhesive tape needs a clean, dry, oil-free surface to bond. Wiping the frame with a damp cloth and letting it dry is not enough. The surface needs to be wiped with rubbing alcohol or a degreasing cleaner, then allowed to dry completely. This takes five minutes per window and dramatically improves the lifespan of the adhesive.
Temperature also matters. Adhesive-backed products should be installed when the temperature is above 50 degrees Fahrenheit. Cold adhesive does not bond well. For a winter installation, a hair dryer can warm the tape and the frame just enough to get a solid initial bond. After the tape is in place, pressing it firmly along its entire length with a roller or a blunt object helps the adhesive flow into the surface texture.
Another common installation error is stretching the tape while applying it. Stretched adhesive tape will pull back, forming gaps at the corners. The tape should be laid down without tension, pressed into place, and cut with a sharp knife. This is a patience task, not a skill task.
The Weatherstrip That Works When the Window Never Closes
Some drafty windows are drafty because the sash does not sit flush in the frame. The window might be painted shut and pried open, bending the hardware. The wood might have swelled from humidity, or the sash cord on an old double-hung window might have broken, leaving the window off its track. Weatherstripping cannot fix a window that does not close properly. It can only seal a gap on a window that closes fully and evenly.
Before installing any material, check the window for square. Close the window and look at the gap between the sash and the frame. If the gap is wider at the top than the bottom, or if light shows through at one corner, the window needs adjustment, not weatherstripping. Shimming the sash, tightening the hardware, or repairing the frame are the real fixes. Adding weatherstripping to a crooked window will just leave a drafts at the wide spots and a squeeze at the narrow ones.
If the window has been painted shut for decades, the paint layer between the sash and the stop acts as a sealant. Once the window is broken free, that paint seal is gone, and the gap it leaves is often larger than expected. This is a common scenario in old houses. The homeowner finally gets a stuck window open, discovers the draft, and reaches for weatherstripping. The better move is to scrape and sand the old paint from the meeting surfaces before applying any new seal.
The Removable Option for Windows That Get Opened
For windows that are opened and closed frequently, permanent weatherstripping wears out. V-strip lasts a few years but loses tension. Foam crushes. Felt compresses. The solution some homeowners use is a removable weatherstrip that gets installed in the fall and removed in the spring. This is more work, but it keeps the window operating smoothly in the warmer months.
The removable category includes rope caulk, which is a soft, putty-like cord that gets pressed into the gap by hand. It sticks to the frame and the sash, seals completely, and peels off without damaging the paint. Rope caulk is the classic solution for old windows, and it remains one of the most effective. It is ugly, it collects dust, and it has to be replaced every year, but it works.
The rope should be pressed into the gap with a putty knife or a bare finger, working it into the joint until it is flush with the frame. It does not need to be forced deep into the gap. The goal is to fill the space between the sash and the stop. Applying it too aggressively can make the window difficult to open when the time comes to remove it.
Testing the Seal After Installation
After the weatherstripping is installed, the only test that matters is the draft test. A lit candle or an incense stick held near the window seam will reveal any remaining air movement. The smoke should rise straight up. Any flicker or sideways drift indicates a leak. It is worth walking the entire window perimeter with the flame, not just the obvious spots at the bottom corners.
The flame test is more reliable than the feel test. A person's hand is not sensitive enough to detect a thin stream of cold air moving through a tiny gap, especially when the room is already cool. The flame catches the movement immediately. A damp hand held near the frame might feel cool, but it cannot pinpoint the exact leak location. People who skip this step often leave a small gap at the top of the window that undoes half of the work they put in.
One pass around the perimeter with a flame is enough. After that, the window can be closed and left alone. The weatherstripping will compress, settle, and do its job for the rest of the season. The draft disappears, the room feels warmer, and the furnace runs a little less. The fix is not glamorous, and it is not permanent. But it is honest work, and it holds up as long as the material matches the gap and the frame is clean when the tape goes down.