
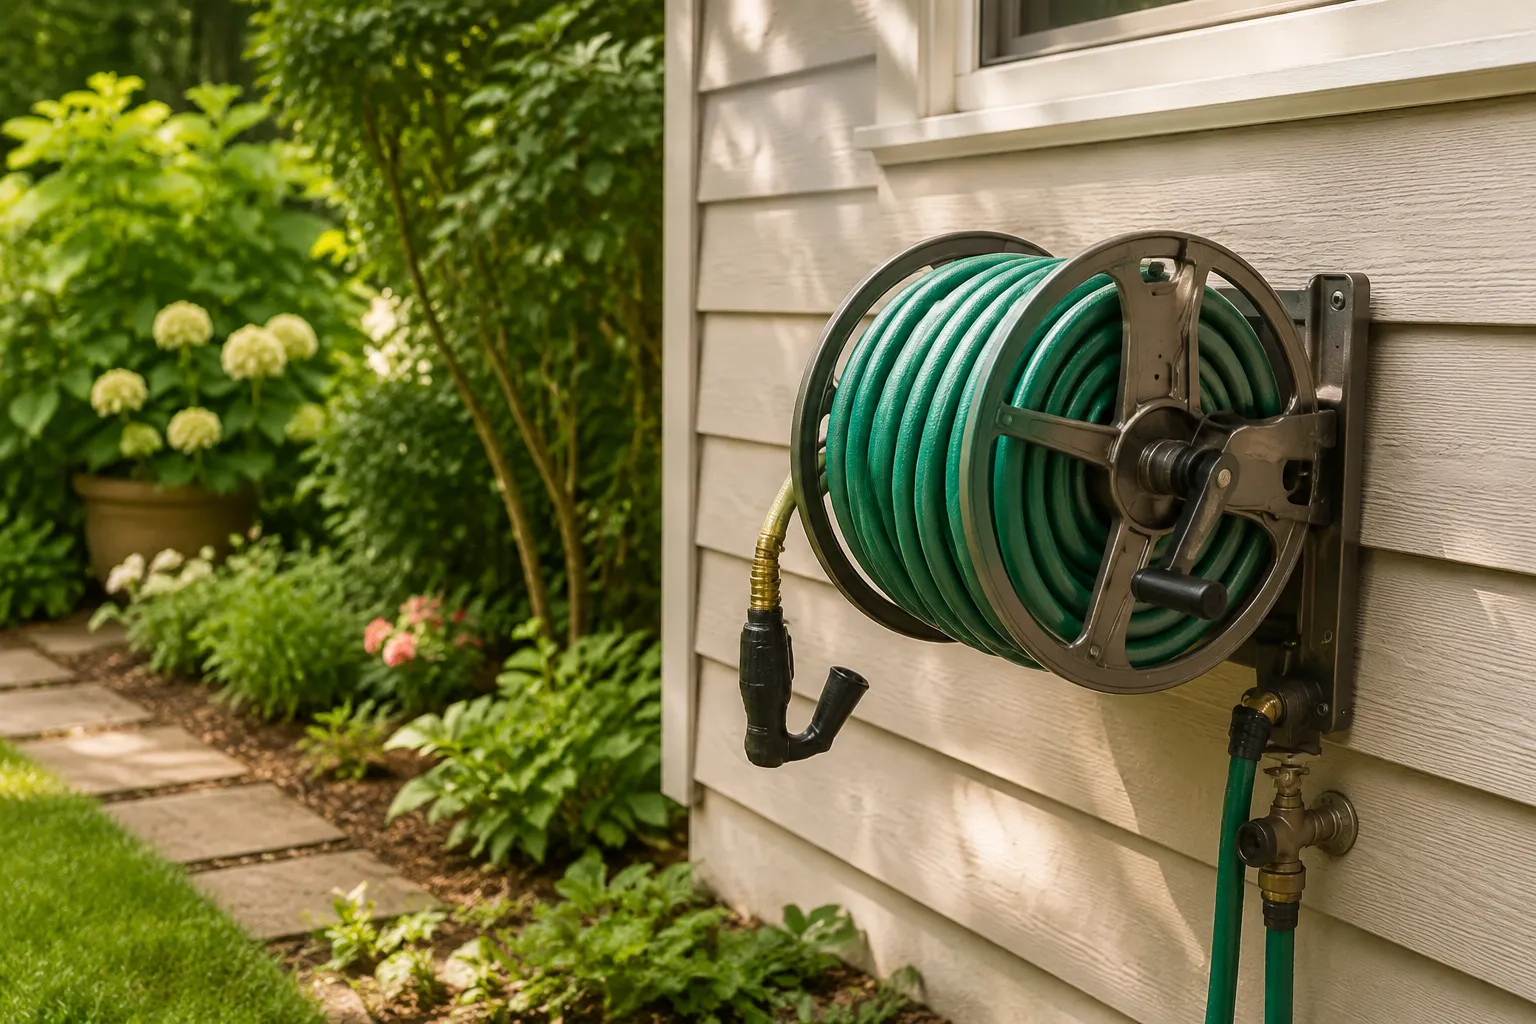
The humble garden hose reel sits in a category of objects that most people buy once, curse at for a decade, and replace with nearly the same model out of sheer inertia. The reel itself is rarely the problem. The problem is where it lives and how it is attached to that location, which determines whether watering the tomatoes feels like a small chore or an elaborate knot-untangling ritual that ends with a person standing in the spray, soaked from the knees down, muttering about the brass fittings.
Mounting a hose reel properly is a twenty-minute project that pays off every single time the hose comes out, which for most gardeners is several times a week from April through October. The difference between a reel that works and a reel that fights is almost never the brand. It is the height, the orientation, and the distance between the reel and the water source. Get those three things right and the hose will behave. Get them wrong and no amount of expensive rubber hose will save the operation.
The Height That Changes Everything
Most people mount a reel at waist height because that is where the wall is easiest to reach with a drill. That is a mistake. A hose reel mounted at the waist forces the hose to make a sharp upward bend immediately after leaving the spool, which creates a permanent kink point that will find a way to twist into a flat fold every single time the reel is used.
The better height is roughly 36 to 40 inches from the ground, measured to the center of the reel drum. This is the height at which the hose leaves the reel nearly horizontal, or with only a slight downward angle, so the weight of the hose itself pulls it smoothly off the spool. Gravity becomes an ally instead of an obstruction. The hose feeds out with a clean, even pull, and when it is time to rewind, the hose drops onto the drum in even layers instead of bunching up on one side.
There is a second reason for this height that has nothing to do with the hose and everything to do with the person using it. A reel mounted at 38 inches puts the crank handle at a comfortable position for an adult standing upright, which means the user does not have to bend over or reach up to wind the hose. That might sound trivial until a person has rewound 75 feet of wet rubber after a long evening of watering, at which point the difference between a natural wrist motion and an awkward bent-over twist becomes very real.
Wall Mounts versus Freestanding Posts
Wall mounting is the default choice because houses have walls and walls are convenient. But walls have a hidden drawback that only reveals itself after the reel is installed. A wall-mounted reel sits close to the building, which means the hose has to make a 90-degree turn the moment it leaves the reel to get out into the yard. That is a second potential kink point, and it is the reason so many wall-mounted reels develop a permanent crimp at the first foot of hose.
A freestanding post mount solves this by placing the reel out in the open, where the hose can leave the spool in any direction without rubbing against siding, trim, or a downspout. The tradeoff is that a post mount requires a bit more work to install, usually a 4x4 post set in concrete or a metal post driven into the ground. For a person with a large yard and a long hose, the extra effort is worth it. For a person with a small city yard of 20 feet, the post is overkill and a wall mount works fine.
The deciding factor is the path the hose needs to take. If the hose has to go around a corner immediately after leaving the reel, a post mount is the right answer. If the hose can run straight out into the yard, a wall mount is simpler and perfectly adequate.
The Distance to the Spigot Is a Design Decision
The distance between the reel and the outdoor faucet is often treated as an afterthought, a matter of how long the connector hose happens to be. It deserves more consideration than that. A reel mounted 15 feet from the spigot means 15 feet of connector hose lying across the ground, which is a trip hazard, a place for weeds to grow, and a spot where the hose will get stepped on and eventually develop a slow leak.
A reel mounted closer to the spigot, within 4 or 5 feet, keeps the connector hose short and out of the main walking path. This usually means mounting the reel on a wall near the faucet, or on a post placed right next to it. The shorter the connector hose, the fewer places for problems to hide, and the easier it is to drain the system at the end of the season.
There is a school of thought that says the reel should be mounted at the corner of the house farthest from the spigot, just to keep the connector hose out of sight. That is a decorating decision, not a functional one. It creates a permanent trip hazard across the entire length of the house for no functional benefit. A visible reel next to the spigot is a better trade than an invisible reel that requires a 20-foot hose run across a walkway.
Fasteners That Actually Hold
The mounting hardware that comes in the box with most reels is adequate for a light plastic reel holding 50 feet of lightweight hose. It is not adequate for a steel reel holding 100 feet of rubber hose, which can easily weigh 30 pounds when full of water. The hardware is the first thing to upgrade, and it is the cheapest upgrade available.
For a wall mount into wood siding or a wooden post, the right fastener is a lag bolt, not a sheet metal screw. A 5/16-inch lag bolt, at least 3 inches long, driven into a stud or a solid wood member, will hold a reel through years of use. The key is finding the stud. A stud finder is a tool that costs less than the replacement reel a person will buy after the cheap screws pull out of the siding and the reel crashes onto the patio.
For masonry, which is common on foundation walls and brick exteriors, the right fastener is a sleeve anchor or a concrete wedge anchor, not a plastic wall plug. The plastic plugs that come with consumer reels are designed for plasterboard, not for brick. A 5/16-inch wedge anchor set into a hammer-drilled hole will hold a reel securely for decades. The hammer drill rental fee, if a person does not own one, is a few dollars and is worth every cent.
The critical detail with any fastener is that the reel needs to sit away from the wall, not flush against it. A hose reel works by rotating, and the handle and the hose fittings need clearance to spin freely. Most reels come with a mounting bracket that spaces the unit an inch or two off the wall. If the bracket does not provide enough clearance, adding a couple of washers behind the bracket is an easy fix that prevents the handle from scraping against the siding every time the reel is turned.
The Swivel Fitting Is the Real Hero
The connection between the reel and the hose is where most tangles are born, and the culprit is almost always a fixed connector that does not rotate. A standard hose connection, tightened finger-tight, creates a fixed point. When the user pulls the hose out at an angle, the hose twists against that fixed point, and the twist travels up the hose and turns into a kink.
A swivel fitting, which is just a connector with a rotating collar, breaks that fixed point. The hose can rotate freely relative to the reel, which means the twist never builds up. The difference is immediate and dramatic. A reel with a good swivel fitting feeds hose out smoothly in any direction, and the hose rewinds without the persistent twisting that turns a 10-minute task into a 30-minute fight.
Many reels ship with a swivel fitting already installed, but not all of them. A person buying a reel should check for this specifically, because it is the single most important feature for tangle-free operation. If the reel does not have one, a third-party swivel connector can be added in minutes and costs less than a good pizza. There is no reason to own a reel without one.
Orientation: Vertical versus Horizontal
Wall-mounted reels typically come in two orientations. The first is horizontal, where the drum spins around a horizontal axis and the hose winds onto the drum like thread onto a spool. The second is vertical, where the drum spins around a vertical axis and the hose winds onto the drum like a rope coiled on a deck.
The horizontal orientation is the most common and works well when the hose pulls straight off the reel. The vertical orientation is better when the hose needs to come off in a specific direction, because the reel can be rotated on its mount to face the direction of pull. A vertical reel mounted on a post can be turned to face any part of the yard, which makes it a strong choice for a large or irregularly shaped space.
The vertical orientation has one drawback that becomes apparent during rewinding. A vertical reel tends to coil the hose unevenly, with the hose building up more on the bottom of the drum than the top. This creates a lopsided load that makes the reel harder to turn as it fills. A horizontal reel, by contrast, distributes the hose evenly across the drum width as long as the user guides the hose with a hand while winding.
The Ground underneath the Reel
A detail that gets almost no attention in any mounting guide is the surface directly below the reel. In most yards, this is bare dirt, grass, or a concrete patio. The surface matters because the hose drags across it every time the reel is used, and a rough surface will abrade the hose jacket over time.
A patch of smooth concrete or a paver stone set under the reel gives the hose a clean surface to slide over and prevents the bottom of the hose from picking up dirt and grit that then gets wound into the reel. A simple 12-inch square paver, set level with the surrounding ground, is enough. For a wall-mounted reel, a small strip of smooth material attached to the wall at the base can prevent the hose from rubbing against rough siding.
This is the kind of detail that seems minor until a person sees the wear pattern on a hose that has been dragged across a rough concrete edge for two seasons. The hose does not fail all at once. It develops a thin spot, then a weep, then a spray. A paver costs three dollars and takes four minutes to set.
Accessibility in Winter
The mounting decision that looks great in July can be a problem in November, when the hose has to be drained and disconnected. A reel mounted at the recommended height of 38 inches puts the hose connections at eye level, which makes draining the hose a two-hand operation with a person holding the hose end up and the connector end up at the same time.
This is a minor inconvenience, but it is worth thinking about ahead of time. A reel mounted with the connector pointed slightly downward, rather than perfectly horizontal, drains more completely on its own. Some reels have a drain port at the lowest point of the drum. If the reel has one, the orientation during mounting should account for it, so the port is actually at the bottom and not on the side.
In colder climates, a completely drained hose is the difference between a reel that lasts a decade and a reel that cracks in the first winter. The mounting angle is a small factor in that equation, but it is one that is entirely within a person's control at installation time.
What the Mounting Bracket Actually Carries
The mounting bracket is the piece of metal or plastic that transfers the weight of the reel and the hose to the wall or post. It is also the piece most likely to fail, especially on cheaper reels where the bracket is a thin stamped piece of steel attached to a plastic body.
When evaluating a reel before purchase, the bracket is worth examining with the same scrutiny applied to the hose fittings. A bracket that is welded to the frame, or that is a single piece of thick aluminum or steel, will hold up to years of use. A bracket that is bolted to a plastic housing with small screws is a future failure point, and the failure will happen at the worst possible moment, usually mid-summer with a full reel of water.
The bracket is also where the mounting height is actually set. The holes in the bracket are the anchor points, and the position of those holes determines how the reel sits. A bracket with slotted holes, rather than fixed round holes, allows a small amount of adjustment during installation. That adjustment range is useful for leveling the reel on an uneven wall, and it is worth paying a few extra dollars for a reel that has it.
The Ten-Minute Payoff
The real test of a mounting job happens on a hot evening in August, when a person is tired and the garden needs water and the hose has to come out and go back. A properly mounted reel, at the right height, with a swivel fitting and a clear path, makes that task almost effortless. The hose slides off with one pull, follows the person around the yard without snagging, and winds back up with a smooth cranking motion that takes seconds per length.
The difference between that experience and the alternative, the tangled, kinked, wrestling match with a hose that has been fighting back for years, is not a matter of buying a fancier reel. It is a matter of spending twenty minutes with a drill, a stud finder, and a few decent fasteners, and paying attention to height, orientation, and clearance. The tools are cheap. The time is short. The result is a small piece of the yard that simply works, every single time, without demanding attention or patience.