
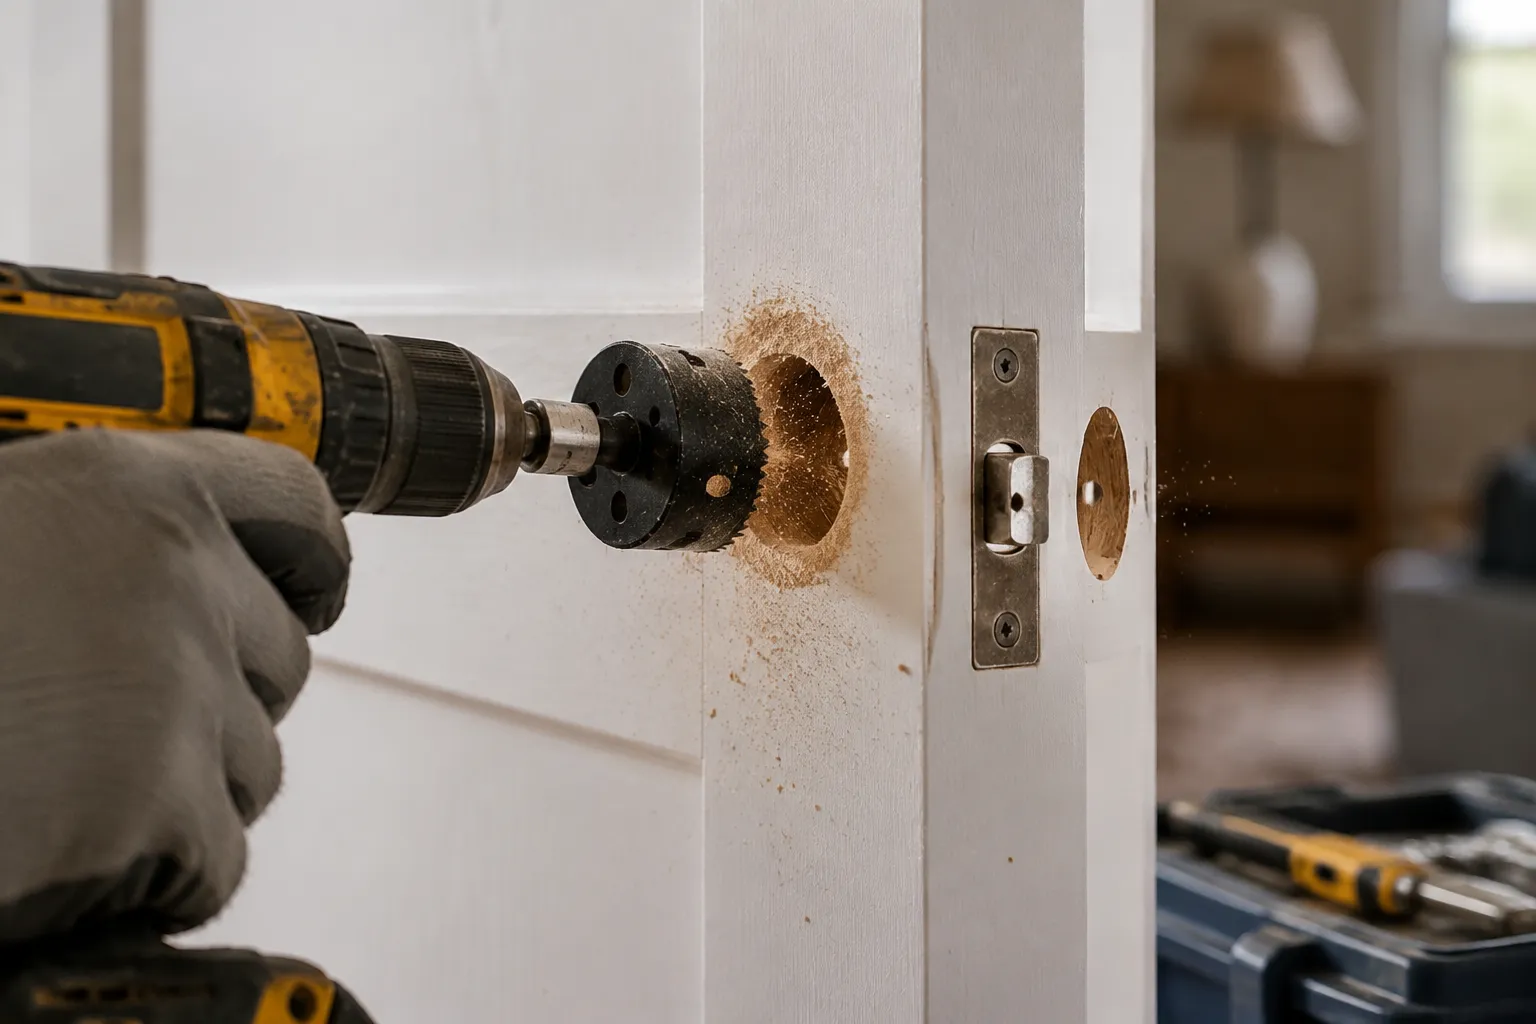
Boring a 2-1/8 inch hole through a solid-core door is one of the most unforgiving operations in residential carpentry. The hole saw wants to wander on the pilot bit, the veneer on the face of the door wants to splinter, and the slug of wood left inside the saw wants to catch fire. Most installs get away with it because the lockset covers the damage. But a clean hole is not about vanity. The fit of the latch faceplate, the travel of the deadbolt, and the life of the door itself all depend on how that hole was cut.
The common advice is to buy a better hole saw. That helps, but it misses the point. A premium carbide-tipped bit will not save a door from a dull pilot drill, a warped arbor, or an impatient feed rate. The tool matters less than the technique around it. A person can cut a perfect hole with a $20 bi-metal saw if they prepare the door and manage the cut. The reverse is also true: an expensive saw can tear up a door in seconds if it is pushed too hard.
The first thing to understand is that the hole saw is a series of small decisions, not one big swing. The pilot bit, the side of the door, the backing material, and the speed of the drill all behave differently. Each one is a variable that can be controlled. Most people only control one or two of them, and then they blame the saw when the wood splinters.
The Pilot Bit Is the Real Culprit
Hole saws come with a pilot bit that is an afterthought. It is usually a short, fat twist drill with a split point, and it does two jobs: it centers the saw and it pulls the whole assembly into the wood. Both jobs matter, but the pulling job is the one that ruins doors.
When the pilot bit breaks through the back side of the door, it stops pulling. The saw suddenly has no tension on it, and the teeth are still spinning at full speed. The result is a chatter that peels the veneer around the hole on the exit side. A person can feel it in the drill handle, a quick vibration that happens a half-second before the damage is done.
The fix is to use a longer pilot bit or to flip the door. A standard pilot bit is about 3 inches long, which is just enough to reach through a 1-3/8 inch door and into the backing board on the other side. But if the backing board is thin, or if the bit is dull, it will punch through before the saw teeth have finished their work on the face side.
Sharpening the pilot bit is the cheapest upgrade a person can make. A dull point wanders. It skates across the surface of the door for a half-second before biting, and in that half-second it scribes a circle of scratches around the hole location. That scratch is the starting guide for the saw teeth, and if it is off-center, the whole cut is off-center. A file or a bench grinder can put a fresh point on a pilot bit in two minutes.
The most consistent method is to start with a separate 1/8 inch bit and drill a clean guide hole all the way through the door. Then the hole saw's pilot bit drops into that guide hole instead of trying to drill its own. This removes the wander completely. The saw is forced to follow the guide hole, and the pilot bit is just a locator pin, not a drill. This is the single most reliable way to cut a centered hole in a door, and it costs nothing.
Back It Up or Watch It Tear
The exit side of the hole is where the veneer explodes. The saw teeth break through the last 1/16 inch of wood and instead of cutting it cleanly, they push it out. The fibers tear away from the face of the door, leaving a ragged ring of splinters. The damage is hidden when the lockset rosette is installed, but it is there, and it compromises the seal around the latch.
Backing material solves this. A scrap of plywood or MDF clamped tightly to the back of the door gives the saw teeth something to push against after they exit the door. The teeth cut through the door and then immediately into the scrap, which supports the wood fibers on the exit side and forces them to cut rather than tear.
The backing board needs to be clamped, not held by hand. A person's hand will flex and move, and that movement transfers to the cut. A solid clamp on each side of the door, or a single F-clamp in the middle, keeps the board immobile. The board should be at least 3/4 inch thick, because the saw teeth need something to bite into after they pass through the door. A thin sheet of hardboard will just flex with the teeth and defeat the purpose.
For people who install locksets regularly, a purpose-built door backing plate is worth the money. These are aluminum plates with a hole in the center that matches the hole saw size. They clamp onto the door with a threaded knob, and the hole saw runs through the plate. The plate supports the veneer around the cut and also serves as a drill guide. It is a niche tool, but for a person doing ten or more installs a month, it pays for itself in ruined doors avoided.
For the occasional installer, a scrap of plywood and two clamps do the same job. The key is that the backing must be tight against the door. Any gap, even a 1/32 inch gap, lets the veneer flex and tear. A person should press the board against the door, then tighten the clamps, then check the gap with a fingernail. If the fingernail catches, the board is not tight enough.
Speed and Feed: The Two Numbers That Matter
Drill speed is the most misread variable in hole saw work. The instinct is to run the drill slow, because slow feels controlled. But a hole saw needs a certain surface speed at the teeth to cut cleanly. Too slow, and the teeth just scrape the wood, generating heat and burning the edges of the hole. Too fast, and the teeth grab and tear.
A 2-1/8 inch hole saw at 600 RPM is about right for softwood and solid-core doors. At 1,000 RPM, the teeth are moving too fast for clean wood removal. The speed is not a matter of feel; it is a function of the saw's diameter. The larger the saw, the slower the drill needs to run, because the outer edge of the teeth moves faster at the same RPM. A 1-inch saw can run at 1,200 RPM. A 3-inch saw should run closer to 400.
The feed rate, how hard the saw is pushed into the wood, is the other half. The saw should be fed with steady, moderate pressure. A person should not lean into it. The teeth need time to cut, and the flutes of the saw need time to clear the chips. If the saw is pushed too hard, the chips pack into the gullets, and the saw stops cutting and starts rubbing, and the rubbing burns the wood.
The best way to judge feed rate is by the sound. A hole saw cutting properly makes a steady, rhythmic rasp. If the sound changes to a higher-pitched whine, the saw is spinning without cutting, which means either the feed is too light or the teeth are dull. If the sound becomes a low growl, the saw is binding, which means the feed is too heavy or the chips are clogged.
The burn mark around the edge of a hole is almost always a feed rate problem, not a speed problem. The saw's teeth are spinning fast enough, but they are not being fed into the wood quickly enough to actually cut. So the friction heats the wood to the point of scorching. The fix is to push a little harder, not to slow the drill down. A person can watch the burn happen in real time. The edge of the hole darkens from light tan to brown to black over the course of three seconds.
The Scrape-and-Clear Rhythm
Hole saws pack chips. The teeth cut, and the chips spiral up into the body of the saw, and if they are not removed, they weld themselves into a solid plug. The plug is the beginning of every bad cut. It stops the teeth from cutting and turns the saw into a friction heater.
The rhythm for a door is simple: cut for ten seconds, pull the saw out, clear the chips, go back in. On a 1-3/8 inch door, this means pulling out two or three times during the cut. It feels slow, but it is faster than dealing with a burned hole or a stalled saw.
Pulling the saw out while it is spinning is a mistake. The teeth catch the edge of the hole and cut a spiral groove into the side. A person should stop the drill, then pull the saw out. The pilot bit stays in the guide hole, so the saw goes back in the same place. This keeps the cut concentric and the edge clean.
Some hole saws have a slot cut into the side of the barrel that allows a person to knock the plug out with a screwdriver. These are useful. A saw without a slot requires a person to work the plug out with a pair of pliers or a punch, which takes time and risks bending the saw body. When buying a hole saw, the presence of a clearing slot is as important as the tooth count.
The chips that come out of a clean cut are distinct. They are small, individual shavings, like coarse sawdust. If the chips come out as a solid ribbon or a continuous spiral, the saw is cutting too aggressively or the flutes are too shallow. If the chips come out as fine dust, the saw is dull or the feed is too light.
Cutting from the Hinge Side, Not the Lock Side
Most instructions say to drill from the exterior side of the door, the side where the key goes in. This is usually correct, but not for the reason people think. It is not about the location of the hole. It is about which side of the door is visible when the door is closed.
The side of the door that faces the interior of the room is the side that will show the hole. If the hole is cut from the exterior side, the exit side of the hole is on the interior side, and the exit side is where the tearing happens. So the damage is hidden in a place most people do not look, on the edge of the rosette, facing the hinges.
Cutting from the interior side puts the clean entry side on the interior face and the torn exit side on the exterior face. This is worse, because the exterior face is what a visitor sees first. The fix is to use a backing board on the exit side, which makes the exit side as clean as the entry side. But if a person is cutting without a backing board, they should always cut from the side that matters least.
The door's construction matters more than the side. A hollow-core door has a thin skin of veneer over a honeycomb core. The hole saw will cut through the first skin, then drop into the hollow space, and then hit the second skin. The saw needs to be fed very lightly through the first skin, then pushed firmly through the hollow space, then slowed down again for the second skin. A person can tell where they are in the cut by the change in resistance. The saw will suddenly feel like it is spinning free, and then it will catch again.
Solid-core doors are more forgiving in the middle but more demanding on the faces. The density of the core means the saw has to work steadily through the whole cut, and the heat builds up quickly. A solid-core door will also produce a much finer dust, which packs into the saw's gullets faster. The scrape-and-clear rhythm is even more important on a solid-core door.
The Last 1/8 Inch Changes Everything
The moment the pilot bit breaks through the backing board, the saw is close to done. But this is the moment when most holes get wrecked. The saw has almost no resistance left, and a person's natural reaction is to push harder to finish the cut. That extra push makes the teeth grab the last bit of wood and rip it out rather than cutting it.
The correct move is to lighten the feed pressure dramatically for the last 1/8 inch of travel. The saw should be guided through the final bit of wood, not pushed. A person should feel the teeth cutting, not hear them tearing. The difference is audible.
Some installers stop the drill just before the saw breaks through, flip the door over, and finish the cut from the other side. This is the cleanest possible method, because both sides are cut as entry sides. But it requires the pilot bit to be long enough to reach through the door and into the backing board, and it requires a second backing board on the new exit side. For a single door, this is overkill. For a row of doors in a commercial job, it is the standard.
When the cut is finished, the slug of wood should fall out of the saw with a gentle tap. If it sticks, a person should not pry it out with a screwdriver, because that bends the teeth. The slug should be pushed out from the pilot hole side with a punch. The saw is then inspected for any wood packed into the gullets, which is removed with a small screwdriver or an awl.
A clean hole is round, smooth on both faces, and free of burn marks. The edges are sharp and crisp. When the lockset is installed, the rosette covers the hole with a few millimeters of clearance on every side, and the gap is uniform. A poorly cut hole shows in the rosette's fit. The cover plate sits slightly proud on one side and flush on the other, because the hole is not round or not centered. The fix for that gap is not a thicker gasket. The fix is a better cut.
The lathe work of a lockset install is a test of patience. The hole saw punishes impatience with burns, tears, and wander. A person who slows down, sharpens the pilot, and backs up the exit side will cut a hole that needs no cover-up. That is the whole craft.