
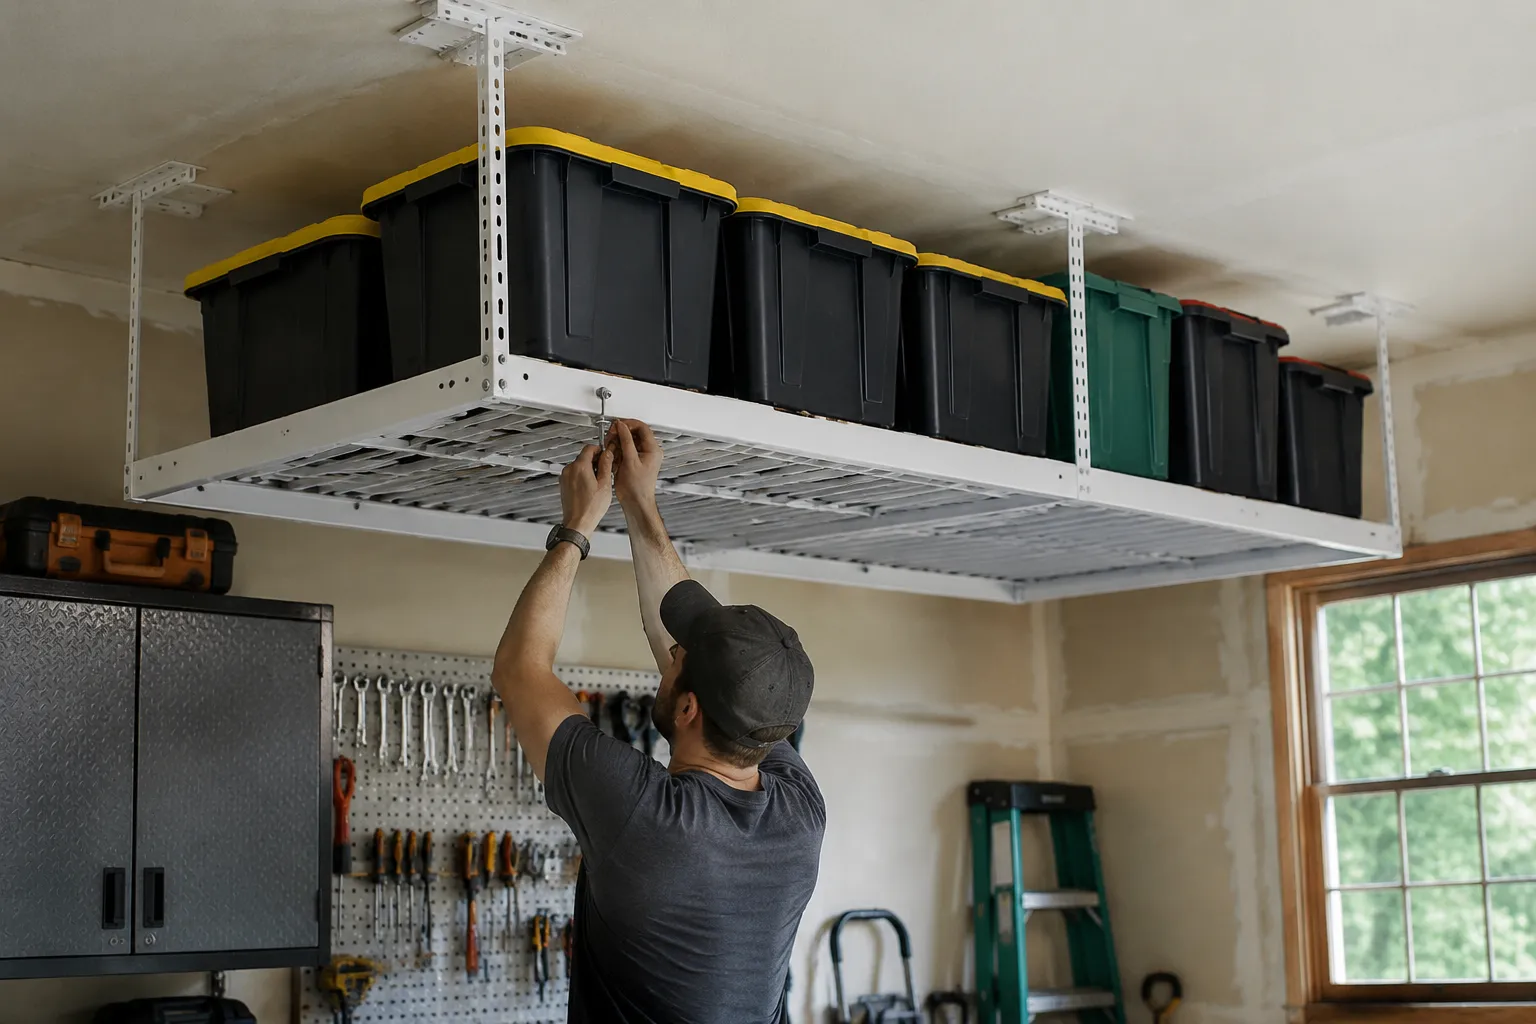
Hanging a storage rack from a garage ceiling is one of those projects that seems simple until the first heavy bin is lifted overhead. The hardware looks straightforward: four rods, some brackets, a wire grid. The installation instructions are usually a single sheet with small diagrams. Then the reality of a 50-pound tote full of holiday decorations changes the math. A ceiling rack is not a shelf. It is a suspended structure with a live load above a person's head, and the margin for error is measured in how much trust a person has in four lag bolts.
The most common mistake is treating the rack like a freestanding unit. It is not. The rack relies entirely on the ceiling structure it attaches to. A person can buy the best-rated rack on the market, one rated for 600 pounds, and still end up with a disaster because the ceiling anchors were placed into drywall with hollow-wall anchors. The rack is only as strong as the ceiling it hangs from. That sounds obvious, but walk through any hardware store and watch how many people buy ceiling racks without checking what is above their garage ceiling.
Before any shopping happens, the ceiling needs to be examined. In most attached garages, the ceiling is finished with drywall, and the framing above is either roof trusses or rafters. The distinction matters. Trusses are engineered components, typically spaced 24 inches on center, and they are designed to carry specific loads. Rafters in an older home might be spaced 16 inches on center and are often beefier. Neither type of framing should be drilled into blindly. A person needs to locate the actual wood members, not the drywall seam tape that sometimes hides a joint.
A stud finder is the obvious tool, but most cheap stud finders struggle with garage ceilings. The drywall is often textured, sometimes painted with a thick elastomeric coating, and there might be foil-faced insulation right above it. These conditions confuse basic magnetic and electronic finders. The more reliable method is a strong neodymium magnet on a string, swept across the ceiling to find the drywall screws. The screws are driven into the framing, so finding a line of screws reveals the joist or truss chord. It takes a few minutes, but it is free and accurate.
Once the framing is located, the next decision is whether the rack will mount flush to the ceiling or hang down on straps. Flush mounts keep the rack close to the ceiling, which maximizes headroom in a garage. Drop mounts, where the rack hangs 12 to 18 inches below the ceiling, are easier to load because a person does not have to lift a bin chest-high and then push it up another foot. The tradeoff is headroom. A garage with a 9-foot ceiling loses a lot of usable space to a rack that drops down 2 feet, especially for anyone taller than 5-foot-8.
The Fastener Argument Nobody Wants to Have
Every ceiling rack comes with hardware. That hardware is almost always the weakest link in the system. The included lag screws are typically 5/16 inch by 3 inches long, which is fine for a solid wood member. The included or recommended anchors, however, are often plastic expansion anchors meant for masonry or drywall. Using those in a ceiling is a gamble. A ceiling load pulls straight down, and most plastic anchors are designed for shear loads, where the force is parallel to the surface. A pull-out failure happens without warning.
For wood framing, the correct approach is simple: lag screws driven into the center of the wood member, no anchor needed. The pilot hole should be smaller than the lag screw's inner core diameter, and the screw should be driven with a socket wrench or impact driver, not a regular drill. The screw needs to bite into at least 1.5 inches of solid wood after passing through the drywall. If the ceiling has drywall that is 5/8 inch thick, a 3-inch lag screw provides roughly 2.4 inches of bite, which is adequate for most racks.
An often-ignored detail is the washer. The included fender washers are usually the right size, but they are sometimes too thin. A heavy load over time can pull the washer through the rack's mounting hole, especially if the hole is oversized. Replacing the included washers with larger fender washers, ones with an outer diameter of at least 1.5 inches, spreads the load and prevents the bolt head from sinking into the rack's frame. This is a 50-cent upgrade that prevents a catastrophic failure.
The mounting pattern also deserves scrutiny. Most racks use four mounting points, one at each corner. A four-point mount is fine when the ceiling is perfectly flat and the rack is square. In the real world, garage ceilings are rarely perfectly flat, and the rack's frame can twist slightly. A four-point mount that is unevenly tightened creates stress concentrations. A six-point mount, where two additional rods attach along the longer sides, distributes the load more evenly and reduces the chance of one corner carrying more than its share.
Weight Distribution Beats Weight Rating
The weight rating on the box creates a false sense of security. A rack rated for 600 pounds can hold 600 pounds only if the load is evenly distributed across the entire deck. Stacking four 50-pound bins in one corner of a 4-foot-by-8-foot rack puts the entire load on two mounting points. Those two points might handle it, or they might not. The rating assumes the load is spread out, not concentrated. A person who loads a ceiling rack like a game of Tetris, pushing heavy bins to one side and lighter boxes to the other, is creating an unbalanced condition that the rating never accounted for.
The bin orientation matters as much as the bin weight. A 27-gallon tote full of camping gear can weigh 60 pounds or more. Placing that tote widthwise across the rack's slats is different from placing it lengthwise. The rack's wire grid has a rated span between support beams, and a heavy bin placed perpendicular to the grid spans across multiple supports. Placed parallel, it rests on fewer crossbars and can cause the grid to flex. The flex is not immediately dangerous, but over months of temperature cycles and load shifts, wire fatigue can develop at the weld points.
People also forget that the load changes. A ceiling rack in a garage experiences temperature swings that a closet shelf never does. Plastic bins expand and contract. Metal racks expand and contract. The fasteners, assuming they are steel lag screws into wood, also shift slightly. The rack needs to be re-tightened after the first few months. The lag screws will take a small set as the wood compresses under the load, and the rack will develop a slight sag or a creak. Re-tightening the bolts once after 90 days is the single best maintenance practice for ceiling storage, and almost nobody does it.
The Loading Process Is the Real Test
Getting the rack installed is half the job. Getting a 50-pound bin up onto it without throwing a back out is the other half. A person standing on a step stool, arms extended overhead, lifting a tote that is wider than their shoulder span, is in a mechanically disadvantaged position. The bin wants to tip forward or slide sideways. The natural response is to jerk the bin up quickly, which adds dynamic load. A static load of 50 pounds can easily become a dynamic load of 80 pounds during a quick lift.
A drop-down rack with a hand crank solves this problem, but those racks cost significantly more and require more complex installation. For a fixed rack, the practical solution is staging. Place the bin on the top of a sturdy ladder or a workbench positioned close to the rack, then slide it onto the rack instead of lifting it straight up. This requires a second surface at approximately the same height as the rack deck, which most garages do not have. The alternative is to use a lightweight rope and a small pulley, which is overkill for most people.
The smarter approach is to keep the heaviest items off the ceiling entirely. A ceiling rack is a great place for bulky, lightweight items: empty suitcases, holiday wreaths, seasonal decorations, old sleeping bags. It is a poor place for canned goods, tools, or anything with high density. The common advice to put heavy bins overhead because they are "out of the way" ignores the physical strain of getting them down. A 60-pound bin that is easy to lift from the floor becomes a hazard when it is 7 feet in the air.
Trusses, Rafters, and the Unfinished Ceiling
An unfinished garage ceiling, where the rafters or trusses are exposed, changes the installation completely. No drywall means direct access to the framing, but it introduces a new problem: which framing member is safe to drill into. Attaching a rack to a rafter is generally safe because rafters are structural and sized to carry significant load. Attaching to a truss chord is riskier. Trusses are designed with specific forces in mind, and drilling through a bottom chord can compromise its structural integrity, especially if the hole is large or located near a joint.
People with exposed trusses often think they can just bolt the rack directly to the bottom chord and be done. That works only if the rack spans across multiple trusses, providing load sharing. A rack that attaches to a single truss and hangs between two others concentrates the load on one chord. A better approach for exposed trusses is to run a 2x4 or 2x6 ledger board perpendicular to the truss direction, attaching the ledger to multiple trusses, then mounting the rack to the ledger. This spreads the load across several trusses and gives more mounting options.
The spacing of trusses also determines the maximum size of the rack. A 4-foot-wide rack fits between two trusses spaced 24 inches on center only if it is oriented diagonally, which is impractical. Most people choose a rack that spans across the trusses, meaning the width of the rack is perpendicular to the truss run. The rack then attaches to multiple trusses, which is the correct orientation. The length of the rack, however, extends along the truss direction, so the ends of the rack are unsupported unless additional hangers are added at the ends.
The Concrete Ceiling Problem
Some garages, particularly in condos or newer townhomes, have concrete ceilings above the parking area. This is a fundamentally different installation. Concrete anchors require drilling with a hammer drill and a carbide-tipped masonry bit. The anchor of choice for overhead loads is a wedge anchor or a sleeve anchor, not the plastic expansion anchors that come with most racks. A wedge anchor rated for 1/2 inch diameter, embedded 2 inches into the concrete, provides a solid hold for most residential loads.
The problem with concrete ceilings is the hidden reinforcement. A drill bit can hit a rebar or a post-tension cable, and post-tension cables are serious business. Drilling into a post-tension slab without knowing where the cables run can be catastrophic. Most residential garage ceilings are cast-in-place slabs or precast hollow-core planks, which have different structural characteristics. A homeowner attempting a concrete ceiling installation without experience should hire a professional. The risk of hitting a cable or compromising the slab is too high.
For those who do proceed, the anchor spacing is critical. The rack's mounting holes determine the placement, but the concrete below might not be solid at every point. Hollow-core planks have voids running through them, and a drill bit can punch through into a void with no purchase for the anchor. Testing the drill for sudden loss of resistance is the only way to know. If a hole feels hollow, it likely is, and that mounting point needs to be relocated or the rack repositioned.
The Season of the Sag
Three months after installation, the rack will look different. The wire deck might have a subtle bow in the middle. The mounting rods might have a slight tilt. This is not a manufacturing defect; it is the rack settling under load. The lag screws have compressed the wood fibers, the wire grid has taken a set at the weld joints, and the entire structure has found its equilibrium. The question is whether the sag is cosmetic or structural.
A simple test is to lift a corner of the rack by hand. If the rack moves up and down with a springy feel, the fasteners are loose. If the rack is solid but the wire deck is sagging, the load distribution is off. The fix for loose fasteners is to back them out and re-tighten them with a torque wrench, not just a driver. The fix for a sagging deck is to redistribute the load so heavier items sit directly above the support beams, not between them.
Winter is the worst season for ceiling racks in an uninsulated garage. Temperature drops cause the metal to contract, and the lag screws in the wood to loosen slightly. The rack develops a creak or a groan when the garage door opens and the air pressure changes. That sound is a reminder to inspect the rack before the spring storage rush. A few minutes with a socket wrench and a level can prevent a 500-pound collapse onto a car below.
The Permanent Label Problem
Once a ceiling rack is installed and loaded, it becomes part of the garage's permanent landscape. The bins go up and never come down easily. The rack is too high to reach comfortably, so items stored there are effectively out of circulation. People say they will store seasonal items up there, but they rarely retrieve them until the season comes back around. The rack ends up holding the stuff that was too good to throw away but not good enough to keep accessible.
This is why the load should be planned before installation, not after. A person should know exactly what bins will go up and how much they weigh. A target list of items, written down and checked against the rack's weight rating, prevents the gradual accumulation of random junk. Without a plan, the rack becomes a catch-all. The 20-pound box of old tax returns sits next to the 30-pound bag of camping gear, and the rack is suddenly carrying 400 pounds of mixed items that no one remembers storing.
The final consideration is the ceiling itself. A garage ceiling is not designed to be a permanent storage platform. The framing is there to hold the roof up, not to hold holiday decorations. A ceiling rack distributes the load across multiple points, which is better than a single hook, but it still adds hundreds of pounds to the structure. In a well-built house with 2x6 or 2x8 ceiling joists, this is a non-issue. In a house with 2x4 trusses spaced 24 inches on center, the added weight is a real consideration. The load path matters, and anyone who ignores it is gambling with the structural integrity of their home.