
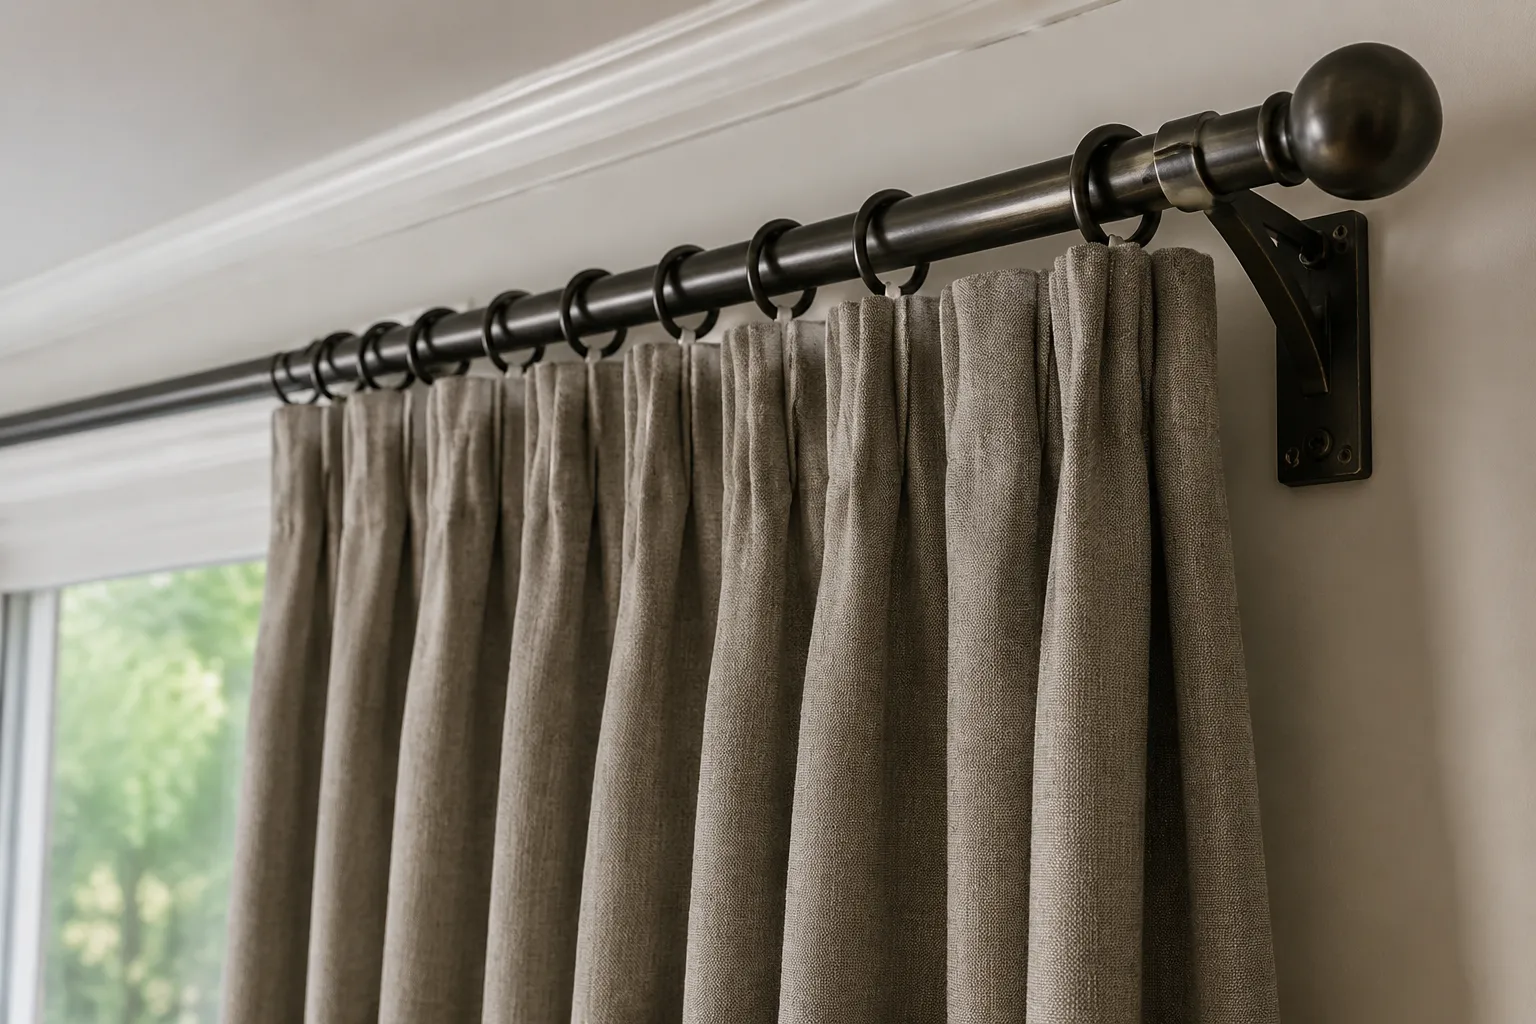
The plaster behind most curtain rods is not the problem. The problem is the hardware that came in the box, the one-size-fits-all bracket that assumes a wall is a wall and a drape weighs five pounds. Heavy drapes, the kind that block light and quiet a room, expose that assumption quickly. A rod that sags a quarter inch on day one will pull its anchors clean out of the drywall by month three, and the repair is never as simple as the installation was.
Before buying anything, a person should know what the drape actually weighs. Not the fabric weight listed on the product page, the finished weight of the assembled panel with lining, interlining, and header tape. A 54-inch-wide linen panel with a cotton sateen lining and a weighted hem can hit six or seven pounds. Two panels on one rod, plus the rod itself and finials, and the total load passes fifteen pounds with room to spare. The hardware aisle assumes eight. That gap is where every failure starts.
The mounting system, not the rod, carries the load. A beautiful 1.5-inch steel rod does nothing if its brackets are pressed sheet metal with a 90-degree bend holding a screw. The bracket is the structural member. The rod is just a tube. Most people replace the rod, keep the brackets, and wonder why the sag returns.
Bracket types that actually hold weight
The basic drywall bracket with a single screw into a plastic anchor is rated for maybe five pounds in ideal conditions, and ideal conditions mean a stud behind the anchor. The next step up is the two-screw bracket, which spreads the load horizontally but still depends on the anchors. The real upgrade is the three-screw bracket with a support leg that runs down the wall, or a bracket that bolts through the top plate of the wall into the framing above a window.
For heavy drapes, the bracket should fasten to a stud or to structural blocking. A stud finder is not optional here. Locating the studs, marking them with painter's tape, and aligning the brackets to that spacing matters more than the rod's finish or diameter. If the window is wider than the stud spacing, and it usually is, the brackets need to land on studs that are outside the window casing, which means the rod has to extend past the window frame by six to twelve inches on each side. That overhang is not decorative. It is where the brackets have to go.
When a stud is not available, a toggle bolt is the correct answer, not a plastic anchor. A 3/8-inch toggle bolt in 5/8-inch drywall holds remarkably well, often over fifty pounds in shear, because it spreads the load across a wide patch of the wall. The hole it leaves when removed is ugly, but a heavy drape is a long-term commitment. The toggle's spring wings open behind the drywall and grip from the back side. That is the only drywall-only method worth trusting for a fifteen-pound load.
Measuring and marking without a second trip
Measure twice, drill once, is a cliché because people still ignore it. The specific failure is mounting the brackets at different heights. A level is not enough when the floor is uneven, and it usually is. The correct procedure is to mark the height on the wall at the left bracket location, then use a long level or a laser line to transfer that mark across to the right location. A 48-inch level works for most windows. A laser level, even a cheap self-leveling one, removes the guesswork entirely.
The height itself matters. Mounting high, within four to six inches of the ceiling, draws the eye up and makes the ceiling feel taller, but it also increases the torque on the brackets because the drape hangs lower. The rod should sit high enough that the drape clears the floor by a half inch to an inch, and the bracket position follows from that, not from a standard 84-inch rod height that assumes an 8-foot ceiling and a sill-length drape. Measure the drape length first, then plot the rod height, then mark the brackets.
The depth of the bracket matters just as much. A typical drywall is 5/8 inch thick, and a bracket that expects a 2-inch gap between rod and wall will have a screw length that bottoms out before it bites. The screw should penetrate the drywall by at least one full inch, so a 1.5-inch screw is the minimum for a bracket with a 1/4-inch standoff. Anything shorter and the threads barely engage the gypsum. The same principle applies to toggle bolts; the bolt has to be long enough to reach through the bracket, the standoff, the drywall, and still have the wings open fully.
Masonry, tile, and the hidden surprises of a brick facade
Brick and concrete change the math entirely. A hammer drill with a carbide masonry bit is required, and the anchors are different. Sleeve anchors or wedge anchors, rated for the specific base material, are the right choice. A plastic anchor meant for drywall will spin in a brick hole and pull out under load. The hole should be drilled with a bit that matches the anchor's diameter exactly, not a bit that is close enough. Concrete dust piles up and makes the anchor sit shallow, so the hole should be blown out or vacuumed before insertion.
Tile is its own problem. A porcelain tile over drywall can crack if drilled without a diamond bit, and the crack runs through the glaze and ruining the entire wall. The safe approach is a diamond-impregnated hole saw or bit, run at low speed with water or a cooling paste, then switching to a standard masonry bit for the drywall behind it. The tile itself holds the anchor, but the grout line is a weak spot. A person should never mount directly into grout. The tile will hold, the grout will crumble, and the bracket will lean.
A brick facade over a wood frame wall is the trap that catches remodelers. The brick looks structural, but it is a veneer, one brick thick, with a half-inch air gap behind it. A long masonry anchor will blow through the brick and out the back, and the bracket will hang on a thin shell of clay. The right method is to use a shorter masonry anchor that stops in the brick, or to drill through the brick and into the wood stud behind it with a long lag screw and a sleeve. The second method is stronger but requires measuring the stud location from inside, which means a trip to the basement or attic to count the framing.
The rod itself and the brackets that grip it
The rod diameter matters less than the bracket's grip. A 1-inch rod in a bracket with a set screw will dent the rod if the screw is over-tightened, and a dented rod creates a rough spot where the drape catches. A 1.5-inch rod with a shallow socket bracket and a small set screw is more elegant, but the set screw must have a flat spot to bite into, or the rod will rotate and sag. The fix is to file a small flat spot on the rod where the set screw lands, or to wrap the rod in a thin layer of PTFE tape before tightening. The tape prevents slipping without damaging the finish.
Traverse rods with carriers and glides have a different failure mode. The carriers wear out, the glides catch, and the whole system binds, which puts horizontal stress on the brackets that they were not designed for. A heavy drape on a traverse rod needs brackets rated for the combined weight plus the friction of the pull cord. Most residential traverse rods are rated for ten pounds, and that rating is optimistic. A person who wants a traverse system for blackout drapes should buy commercial-grade track, mounted with the same heavy-duty brackets, not the residential version from a big-box store.
Ceiling mounts as the workaround for bad walls
A ceiling mount is the answer when the wall is brick veneer, when there is no stud within reach, or when the window goes almost floor to ceiling. The ceiling structure, whether floor joists above or trusses, is easier to locate and stronger than any wall. A ceiling-mounted rod uses a flange bracket with four screws into the ceiling, and the rod hangs down on downrods. The look is more commercial, like a hotel, but the holding power is unmatched. The downrod length determines the drape height, and the finial at the bottom of the downrod, not the rod itself, carries the sheer load. The brackets must be rated for the total weight, and the screws must hit the joist or use toggle bolts in hollow ceiling cavities.
The ceiling mount changes the drape's behavior. A drape hung from a ceiling rod stacks differently, with the fabric falling in a longer, unbroken line. That is often exactly what a tall room needs. The tradeoff is access; changing a drape on a ceiling mount requires a ladder, and the downrods make the whole assembly heavier. A person should not attempt a ceiling mount solo with a heavy drape. Two people, one to hold the rod and one to thread the bracket, is the minimum.
Loading the bracket and testing before hanging fabric
The single best habit is to test the empty rod before hanging a single panel. Pull down on the middle of the rod with a firm hand. A rod that flexes more than a quarter inch under that pull will sag under the drape. A rod that does not flex but has brackets that creak or shift is a bracket problem. Both should be addressed before the fabric goes up, because taking a heavy drape down to fix a bracket is a miserable job. The test takes ten seconds and saves an hour.
The drape should hang from rings or from a pocket? Rings distribute the weight evenly across the rod and reduce friction when drawing. A pocket-hung drape puts all the weight at the top edge and creates a pinch point that accelerates wear on the header. For heavy drapes, rings are the right call, and they should be large enough to slide freely over any finial or decorative end. A ring that binds at the finial will tear the fabric over time. The ring's eye should be closed, not an open jump ring, because an open ring catches on the bracket and yanks the drape.
The right anchor for the right wall every time
Anchors are not all the same, and the packaging lies. A #8 screw with a toggle rated for 50 pounds is only as strong as the drywall it bites into. Drywall that has been painted multiple times is weaker on the surface, and drywall that has water damage is weaker throughout. A person should press a finger into the wall near the bracket location. If it gives, the wall is soft, and no anchor will hold. The fix is to cut out the damaged section and patch in new drywall, or to find a stud behind it.
The fastest way to identify the right anchor is to read the weight rating on the box and then divide by four. A plastic anchor rated for 20 pounds will hold a 5-pound drape. A toggle rated for 75 pounds will hold a 15-pound drape with a comfortable margin. The division is a rule of thumb, but it accounts for the fact that a drape is a dynamic load, swaying when opened, tugged when adjusted, and pulled on by children and pets. The static rating on the package does not cover that.
When the bracket lands on the window casing
A window casing is hollow behind the trim, and a screw into the casing face holds almost nothing. The bracket has to span the casing to the wall beyond, or the casing has to be drilled through into the rough opening frame. A person who insists on mounting to the casing should use a Toggle bolt through the casing and into the hollow cavity, but the casing is often only 1/2 inch thick, and the toggle's wings will not open fully in a 1-inch gap. The better move is to extend the rod past the casing entirely, using a longer rod, and mount the brackets on the bare wall next to the frame. That makes the drape stack back onto the wall, not onto the glass, which also blocks more light at the edges.
The overhang also changes the drape's appearance. A drape that ends at the window frame leaves a gap of light on each side. A drape that extends 6 to 8 inches past the frame blocks that gap and makes the window look larger. The extra rod cost is trivial compared to the visual gain. The only person who loses is the one who buys a rod exactly as wide as the window, then has to mount brackets in the casing and watch the whole assembly wobble.
Heavy drapes deserve the same engineering consideration as a bookshelf or a heavy mirror. The wall is not a uniform surface, the studs are not where a person hopes they are, and the hardware that comes in the package is designed for the lowest common denominator. A weekend spent doing it right, with the right anchors and the right bracket spacing, is cheaper than a repair call later. The drape hangs, the rod stays level, and the wall stays intact. That is the entire job.