
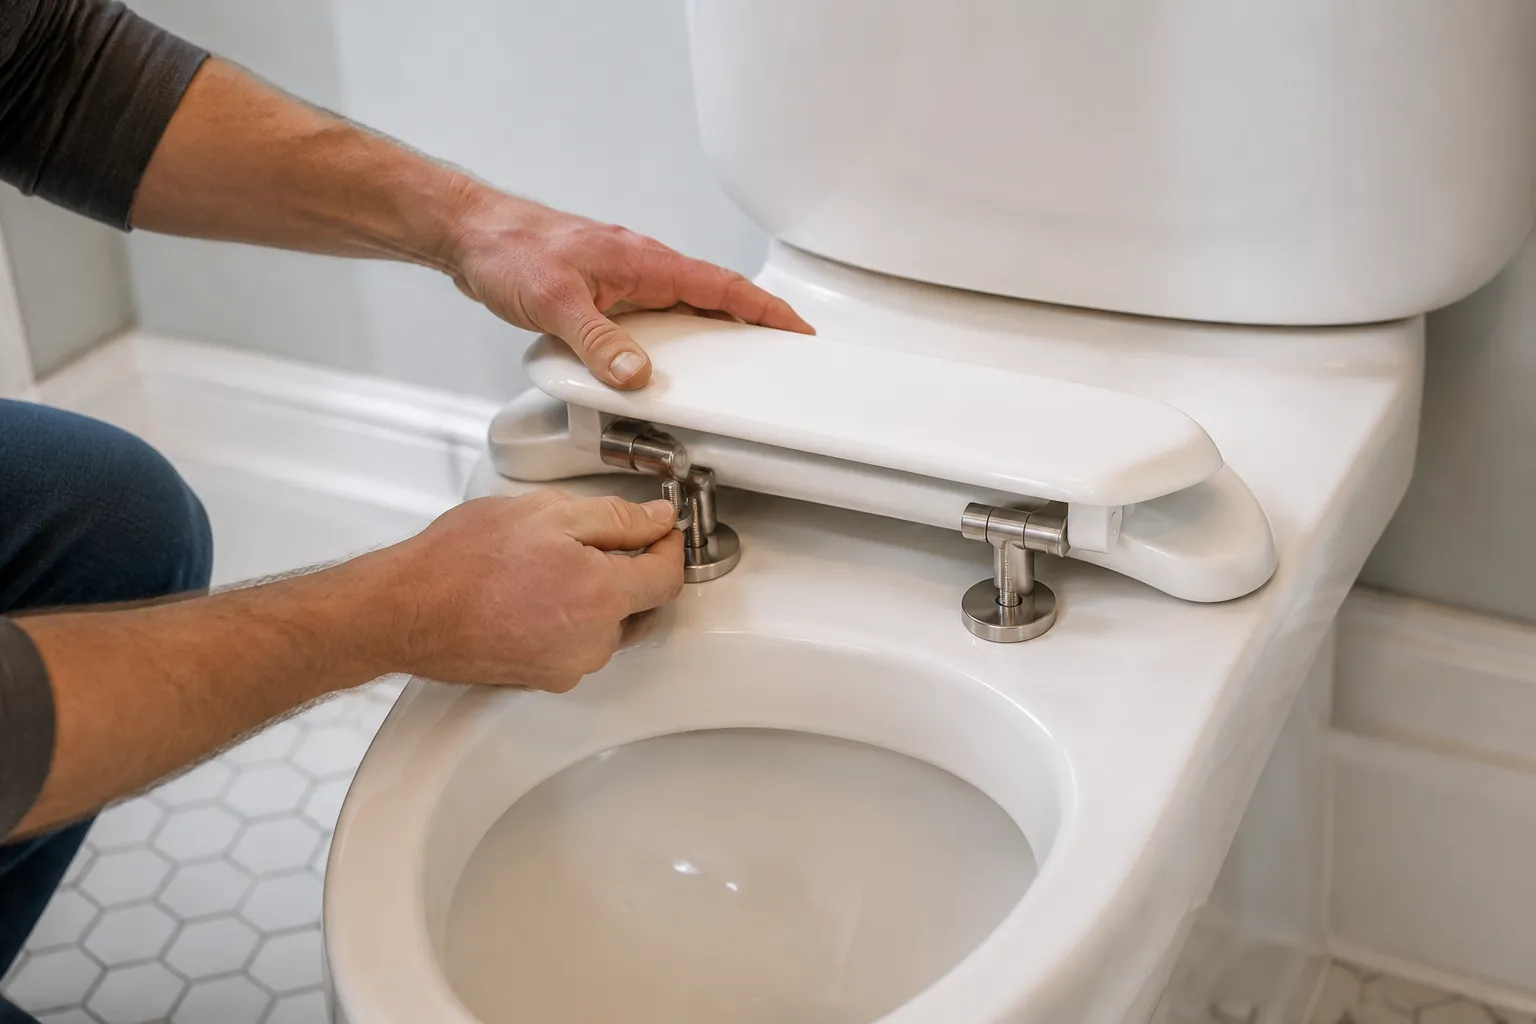
The toilet seat is the one piece of hardware in a house that nearly everyone has installed wrong at least once. The rocking happens immediately, or it shows up three weeks later, and the response is usually to crank the bolts until something cracks. The real problem is almost never torque. It is the assumption that a toilet bowl's rim is flat, which it is not, and that a seat's hinges will forgive that, which they will not.
Porcelain is fired in a kiln, and during that firing, the top edge of the bowl warps. Every single bowl does this. Some warp by a millimeter, some by five. The manufacturing tolerance is generous because the rim does not need to be perfectly flat for the toilet to function. It needs to be flat enough for a wax ring to seal and for a seat to sit level. That second requirement is treated as an afterthought by nearly every fixture maker, which is why the seat installation guide on the back of the box is so useless. It assumes a perfectly flat surface that has never existed outside of a CAD drawing.
The Warped Rim Is the Real Enemy
Before touching a single tool, a person should set the new seat on the bowl without any hardware. Just place it in position and press down on each corner. The rocking is instantly obvious. This test takes ten seconds and tells the installer exactly what they are fighting. If the seat rocks, the rim is the culprit, not the seat.
Most people skip this step. They bolt the seat down, feel the wobble, and assume the seat itself is defective. Then they return it, buy a different brand, and repeat the process with the exact same result. The seat was never the problem. The bowl's rim has a high spot or a low spot, and no seat on the market can compensate for that on its own.
Porcelain warpage is not a defect in the way a cracked tank is a defect. It is a normal consequence of the manufacturing process. The clay body shrinks as it dries and again during the glaze firing, and that shrinkage is never perfectly uniform. A bowl that is a quarter inch out of flat across its front edge would be considered wildly out of spec, but a bowl that is an eighth of an inch out is common and still passes inspection. The installer's job is to accommodate that eighth of an inch.
What the Hardware Actually Does
The standard mounting kit is a bolt, a rubber gasket, a metal washer, and a wing nut. The bolt passes through the seat hinge and into a hole in the bowl. The gasket sits between the bolt head and the hinge to keep water from creeping up through the bolt hole. The washer spreads the load, and the nut tightens everything down.
That system works fine when the rim is flat. When the rim is not flat, the bolts become the only thing holding the seat up, and they are not designed for that job. The bolt is not a jack. It is a fastener. Tightening it harder does not lift the low side of the seat. It just bends the hinge or cracks the seat base.
Here is the mechanical reality: a seat has four contact points, the two hinge bases at the back and the two corners of the seat ring at the front. If all four points do not touch the rim, the seat rocks. The bolts can pull the hinge bases down, but they cannot push the front corners down. The front corners only come down when the seat is shaped to follow the rim's actual contour, or when something fills the gap.
The Level Test Nobody Runs
After the seat is bolted down and the nuts are snug, the instinct is to grab the seat and wiggle it. That is the wrong test, because a slight front-to-back rock is easy to feel but hard to diagnose. The better test is a piece of paper. Slide a sheet of printer paper under each front corner of the seat. If the paper slides freely under one corner and catches under the other, the seat is not touching evenly. That gap is the entire problem.
This paper test is not about precision. It is about finding which corner is high. That information determines the fix. A seat that rocks diagonally needs a shim at one corner. A seat that rocks front to back needs a shim at both front corners or a different mounting strategy entirely.
The level itself is nearly useless here. A bubble level tells a person whether the seat is level with gravity, but a toilet seat does not care about gravity. It cares about contact with the rim. A seat can be perfectly level and still rock, or visibly tilted and rock solid. The paper test is the only one that matches the actual failure mode.
The Shim Fix and How to Make It Disappear
Plastic shims are sold in hardware stores in little packs, usually with a toilet repair kit or in the plumbing aisle. They are thin wedges of plastic meant to be stacked and trimmed. They work, but they are ugly, and the visible seam between the shim and the porcelain collects grime. A better option exists in most homes already: a rubber washer or a piece of vinyl floor tile.
The trick is to make the shim match the gap, not the corner. A single thick shim under one corner creates a hard point that the seat rocks against. A stack of thin shims, each one slightly smaller than the last, creates a gradual transition that spreads the load. The seat sits on a ramp, not a cliff.
Silicone caulk is the other option, and it is the one that produces the cleanest result. A bead of clear or white silicone applied to the underside of the seat base, exactly where it meets the rim, fills the gap and cures to a rubbery pad. The seat is then set in place with the mounting bolts only finger tight. Once the silicone sets, the seat is supported across its entire footprint, and the bolts are just there to keep it from sliding. This method has a downside, though: the seat becomes a chore to remove later. The silicone has to be cut with a razor blade, and the residue has to be scraped off the porcelain.
For most people, the vinyl tile shim is the right balance. A piece of vinyl flooring, the kind used for peel-and-stick tiles, is thin, slightly compressible, and easily cut with scissors. Stacking two or three layers under the low corner fixes the rock without leaving a visible wedge. The material is close enough in color to white porcelain that it disappears unless someone is looking for it.
The Hinge Bolt Is the Failure Point
The bolt holes in most toilet rims are oversized. They are drilled to accommodate a range of seat brands, which means they are bigger than the bolt that actually goes through them. This slop is fine when the seat is aligned, but it becomes a problem when the installer tries to correct a rock by nudging the seat sideways. The bolt ends up off-center in the hole, the gasket gets pinched, and water eventually finds its way through.
The fix is to center the bolt in the hole before tightening. A small detail, but it prevents the most common leak. The rubber gasket under the bolt head is not a seal against a wet floor. It is a seal against water that runs down the bolt shaft from the seat surface. If the bolt is off-center, the gasket does not cover the whole hole, and water drips down the outside of the bolt and onto the floor.
Another overlooked detail is the order of the washer and gasket. The correct order, from the top down, is bolt head, rubber gasket, metal washer, hinge, nut. The washer goes between the gasket and the hinge so the gasket does not get twisted when the nut is tightened. Many kits ship with the washer above the gasket, and people install it that way. It works for a while, then the gasket deforms and the leak starts.
The Unknown Factor: The Bowl Itself
Some toilet bowls are worse than others. Elongated bowls are more prone to rocking than round bowls because they have a longer front span, which gives the warpage more distance to express itself. Wall-mounted toilets are the worst, because the bowl hangs off a carrier and the rim is subject to flex from the entire assembly. A person who has fought a rocking seat for years might assume they are bad at installation when in fact they have been fighting a bad rim geometry all along.
There is also the question of the floor. A toilet that rocks on the floor will fake a rocking seat. If the bowl itself moves when a person shifts weight on it, no amount of shimming under the seat will help. The wax ring has compressed, or the flange bolts have loosened, and the bowl is moving on the tile. This is a different repair entirely, but it presents as a seat problem. The paper test catches this too, because the gap under the seat will change as the bowl moves.
A person can diagnose this by pressing down hard on the bowl's front edge. If the bowl rocks against the floor, the flange bolts need tightening, not the seat. The flange bolts are the two bolts at the base of the toilet, covered by plastic caps. Tightening them a quarter turn is often enough. If the bowl still rocks, the wax ring has failed and the toilet needs to be pulled and reset, which is a job for a plumber or a very patient homeowner.
The Expensive Seat Myth
A 200 dollar slow-close seat with stainless steel hinges will rock just as hard as a 20 dollar basic seat if the rim is warped. The price has nothing to do with the mounting surface. The expensive seat comes with better materials and a nicer finish, but the hinge geometry is the same, and the four contact points are the same. Buyers who shell out for a premium seat and then return it because it rocks are wasting their time. The shim is the same price either way.
The one upgrade worth paying for is a seat with adjustable hinge bases. Some premium models have a small set screw that raises or lowers the hinge base by a millimeter or two. This adjusts the back of the seat without shims. The front still needs a shim if the warpage is at the front, but an adjustable hinge solves the rear rock cleanly. Look for the set screw on the underside of the hinge. If it is not there, the seat does not have it.
The Actual Sequence That Works
The order of operations matters more than any single fix. Start with the dry test, placing the seat on the bowl without hardware to find the rock. Mark the low corners with a pencil on the underside of the seat. Then install the shims on those corners, using enough layers to make the paper test show even contact. Then bolt the seat down, centering the bolts in their holes and keeping the nuts only snug. Run the paper test again. If the paper slides under all four corners with the same resistance, the seat is done.
Hand-tighten the nuts, then give them an extra quarter turn with a wrench. Over-tightening is the most common mistake. The hinge base is plastic on most seats, and the plastic will crack long before the nut is truly too tight. A cracked hinge base is not repairable. The whole seat needs replacing.
The final step is the side-to-side test. A properly mounted seat will not move when a person pushes it sideways with force. If it does shift, the nuts are loose, not the bowl. This side-to-side play is the one thing that can be fixed by tightening, and it is the thing that gets ignored because everyone is focused on the front rock.
When the Fix Is a Different Hole
Some bowls have mounting holes that are not drilled in the same plane. One hole is a quarter inch further forward than the other, and the seat's hinge bases are set for a parallel pair. This is rare, but it happens, and it creates a diagonal misalignment that no shim can fix. The seat will sit straight on one hinge and crooked on the other. The only fix is to elongate the hole in the bowl with a round file, which is a scary operation on porcelain but actually quite manageable. Porcelain files slowly, and the risk of chipping is low if the work is done with water and patience.
This is the case where a person should check the hole spacing before buying any seat. The standard spacing is 5.5 inches on center, give or take an eighth of an inch. Most seats are designed for this. Some European bowls use 6 inches. If the measurement is off, the seat will never mount cleanly, and the installer will spend an hour chasing a rock that lives in the holes, not the rim.
The measuring tape is the tool that prevents the most frustration. It takes five seconds. A person who measures the hole spacing before buying the seat will never discover that the seat does not fit. A person who skips it will discover the problem while kneeling on a cold bathroom floor with a wrench in hand.
The Last Quarter Turn
Every toilet seat in the world loosens over time. The nuts vibrate loose, the shims compress, the silicone cures and relaxes. A seat that was rock solid in March rocks in September. The maintenance interval is not seasonal for most people, but it exists. A quarter turn on each nut, twice a year, prevents the seat from ever reaching the point where a person sits down and feels the dreaded diagonal shift.
This is the small truth at the center of the whole subject: the installation is never one-and-done. The seat is a wearing part, and so is its mounting. The person who understands this will check the seat the same way they check the smoke detector battery, on a schedule, and they will never have to learn what a cracked hinge base feels like. The person who does not check will blame the seat, then the bowl, then the plumber, and will never once look at the nuts that have been loose for six months.
The level fit is not a state. It is a habit. The shim goes in, the bolt centers, the nut snugs, and then, twice a year, a hand reaches down and gives it one more quarter turn. That is the entire craft.