
Thinset gets treated like an afterthought, the stuff that happens between the interesting parts of a tiling job. A first-timer will spend an afternoon agonizing over tile pattern and grout color, then grab whatever bag of mortar is closest to the checkout. That is backwards. The adhesive is the part that decides whether the expensive tile on the wall stays there. A poor bond fails slowly, invisibly, until one day a shower wall sounds hollow and the grout lines start to crumble. By then, the fix is demolition.
The good news is that the basics are genuinely basic. A person does not need to understand polymer chemistry to mix a bag of mortar correctly. What they need is a clear picture of which product does which job, and the discipline to follow a few rules that seem too simple to matter. Most adhesive failures come from skipping those rules, not from buying the wrong brand.
Two Products, One Name
Tile adhesive and thinset are often used as interchangeable words, but they describe different categories. Thinset is the cement-based mortar that comes in a bag and gets mixed with water. It is the standard for almost every floor and wall installation. Tile adhesive, in the retail sense, usually means a pre-mixed, ready-to-use paste sold in buckets. It is sometimes called mastic. The distinction matters because the two products fail in completely different ways.
Mastic is easier to work with. It spreads like thick paint, grabs tile immediately, and requires no mixing. For a small backsplash in a dry kitchen, it works fine. But mastic never fully cures like cement. It stays somewhat flexible and remains vulnerable to moisture. Put it in a shower or on a floor and the bond will eventually soften, the tile will shift, and the grout will crack. The failure is not dramatic. It is a slow, quiet loosening that turns a solid floor into a collection of loose tiles underfoot.
Thinset, by contrast, forms a rigid, permanent bond. It behaves like a very fine concrete, which is essentially what it is. Once cured, it does not care about water or temperature. That makes it the right choice for anything wet, anything heavy, and anything on the floor. A first project should probably default to thinset for everything except a small, dry, vertical surface where the convenience of mastic genuinely saves time.
Reading the Bag Without a Chemistry Degree
Walk down the mortar aisle and the packaging reads like a contest for the most alarming font. Words like "modified" and "polymer fortified" get thrown around with no explanation of what they mean for the person holding the trowel. The core difference is simple. Unmodified thinset is just cement, sand, and water retention agents. Modified thinset adds a dry polymer powder that makes the cured mortar stronger, more flexible, and more resistant to moisture.
For almost every first project, modified thinset is the safe pick. It bonds better to a wider range of surfaces and handles the slight movements that buildings make as they settle and shift with temperature. The price difference is small. The performance difference is large. There are specific cases where unmodified is required, mostly involving certain large-format porcelain tiles that need the mortar to dry slower, but a first-timer will not be installing those.
The other label worth noticing is the coverage rating printed on the bag. It looks like a simple number, usually expressed in square feet. Ignore it. That number assumes a perfectly flat floor, a perfectly sized notched trowel, and a person who spreads mortar with mechanical consistency. Real-world coverage is almost always lower, sometimes by a third or more. A 50-pound bag that claims 95 square feet of coverage will be lucky to do 60 square feet on a typical uneven floor with a standard trowel. Buy an extra bag and keep the receipt.
The Mixing Rules That Actually Matter
Thinset mixing looks like the easiest part of the job. Dump powder in a bucket, add water, stir. The result is often wrong. The two most common mistakes are adding too much water and mixing too little. Both produce mortar that looks fine but bonds poorly.
The water ratio on the bag is a starting point, not a law. Different bags of the same product can absorb slightly different amounts of water depending on humidity and age. The right consistency is often described as peanut butter, a comparison that is more useful than it sounds. The mortar should hold a peak when the mixer is lifted, but it should not be so stiff that it pulls away from the trowel in clumps. A person should be able to spread it smoothly and watch it hold a notch shape without slumping.
Mixing time matters more than most instructions admit. A quick two-minute stir leaves dry pockets of powder that never hydrate. Those pockets stay soft forever and create weak spots in the bond. The mortar needs a full five minutes of mechanical mixing, then a five-minute rest, then another stir. This is not fussy behavior. It is the difference between a uniform material and a lumpy one.
One more rule, and it is the one most people ignore. Thinset has a working time, usually printed on the bag, often around two hours. That clock starts the moment water touches powder. It does not pause while the phone rings or while the last tile gets measured. When the mortar starts to stiffen in the bucket, it is done. Adding water to revive it is a common hack and a reliable way to guarantee a weak bond. The chemical reaction that hardens thinset does not reset.
Trowel Size Determines Coverage, Not Speed
The notched trowel is where most first projects go sideways. A bigger notch does not mean better adhesion. It means a thicker layer of mortar, which means more time for the tile to sink before the mortar cures. A smaller notch risks leaving gaps in coverage. The right size depends entirely on the tile.
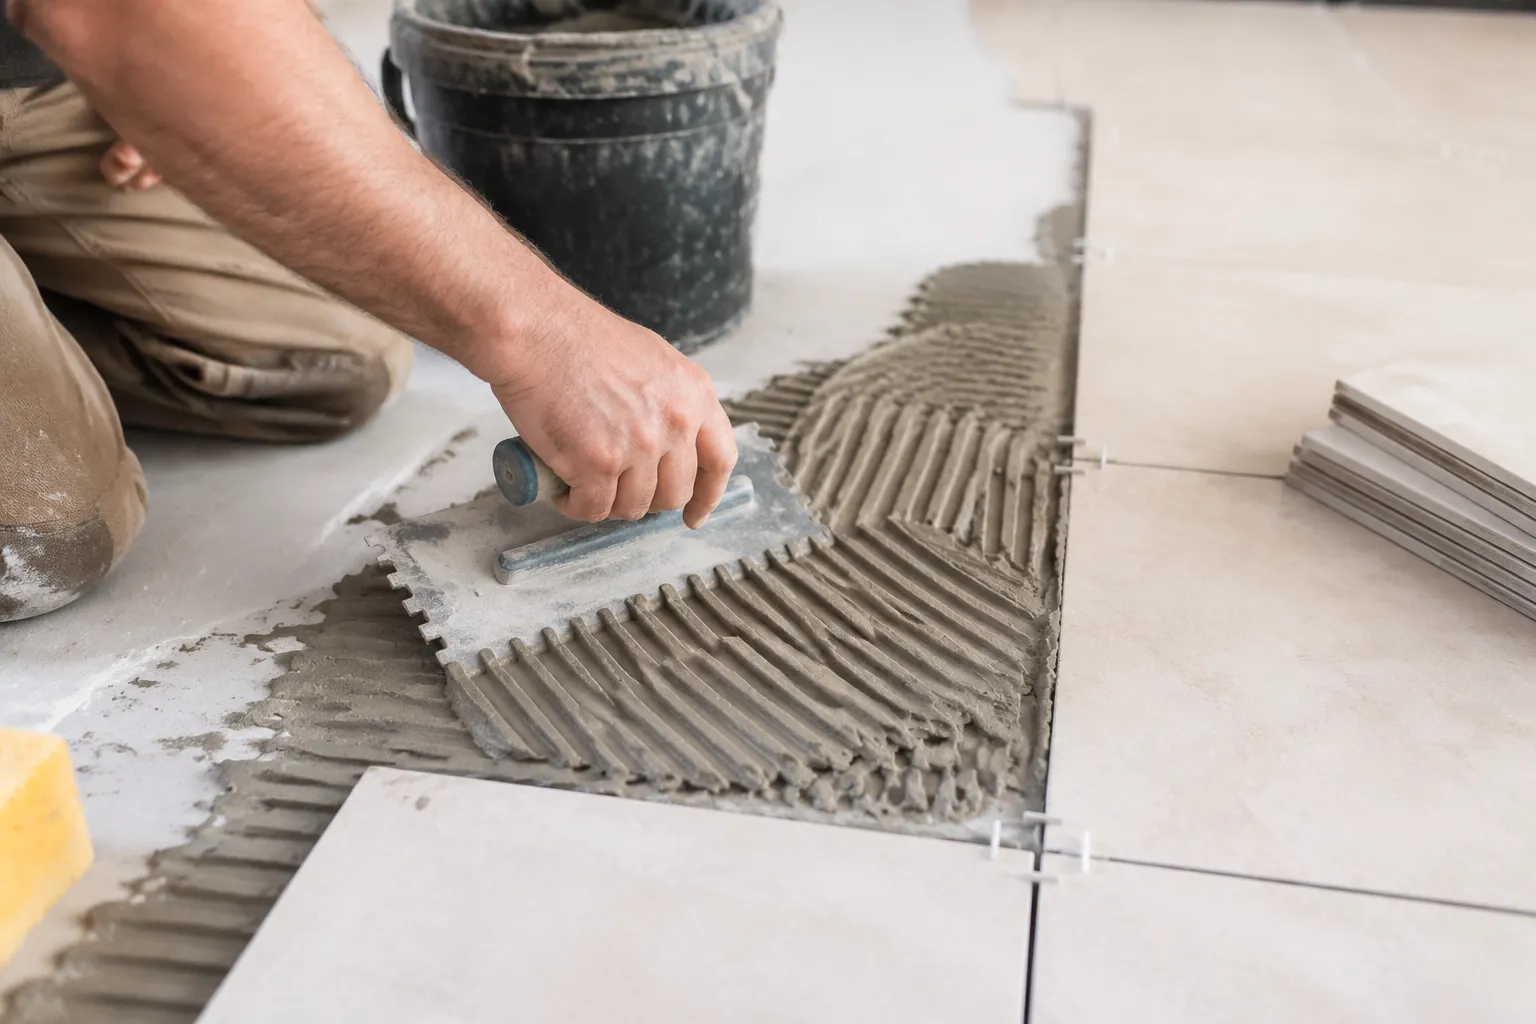
Small wall tile, like a 4-inch subway tile, needs a 1/4-inch square notch. That leaves a thin, even bed. Large floor tile, 12 inches or bigger, needs a deeper notch, usually 1/2-inch square or a 1/2-inch by 1/2-inch pattern. The rule of thumb that works: the notch depth should be roughly a third of the tile thickness. A heavier tile needs a deeper bed to support it evenly.
There is also the matter of how the trowel is held. A person who holds it at a steep angle scrapes most of the mortar off the floor. A shallow angle, around 45 degrees, lays down a full, consistent ridge. The ridges are not decoration. They collapse when the tile presses down and create a solid bed. If the mortar is too stiff, the ridges do not collapse fully, leaving air pockets. If it is too wet, the ridges flatten too fast and the tile sinks out of level.
Burnishing Sounds Fancy, It Is Just Smearing
Before spreading the full bed, the correct move is to trowel a thin layer of mortar onto the substrate and scrape it smooth with the flat side of the trowel. This is called burnishing, and it serves a real purpose beyond adding a step. The thin layer fills small pores and low spots in the surface. It gives the notched layer something solid to grip. Skipping it leaves tiny voids where the mortar touches the floor, and those voids become unbonded spots.
This step also reveals the true flatness of the surface. A floor that looked fine suddenly shows its dips and bumps when a thin coat of mortar is scraped across it. A person can feel where the trowel scrapes bare and where it floats over a low spot. That information is worth having before the tile goes down, not after.
Burnishing takes about two minutes per section. It is the difference between a tile floor with a few hollow-sounding tiles and one that is solid everywhere. The hollow sound is not a cosmetic issue. It is the first sign of a bond that will eventually fail.
The Back-Buttering Habit
Professional tile setters rarely discuss back-buttering because it is so ingrained in their process that it goes without saying. For a first-timer, the phrase is often unfamiliar. It means spreading a thin layer of mortar on the back of each tile before setting it in place. The purpose is not to add thickness. It is to guarantee that the tile surface is fully coated.
Tile backs are not flat. They have little lugs, raised edges, and subtle undulations from the manufacturing process. The notched bed on the floor contacts the high spots but leaves the low spots bare. Back-buttering fills those low spots with a thin, flat coat. The tile then presses into the bed with full contact, not point contact.
Some tiles need this more than others. Small mosaic tiles on mesh sheets usually do not need it because the mortar squeezes through the gaps. Large porcelain tiles often do, especially if the back has a deep grid pattern. A quick test: lift a tile after setting it and check the back. If mortar covers less than 80 percent of the surface, the tile needs back-buttering or a bigger notch. The 80 percent figure is not a style preference. It is a structural requirement for a bond that lasts.
The Cure Time Nobody Wants to Hear
Fresh thinset looks dry after a few hours. It can feel solid. It is not ready. The cement needs time to fully hydrate and reach its design strength. Walking on a floor after 24 hours is usually fine for light foot traffic. Grouting after 24 hours is a mistake. The mortar is still shrinking slightly as it cures, and grouting too early can crack the fresh bond lines.
The standard advice is 48 hours before grouting a floor, 24 hours for a wall. Some manufacturers recommend longer for large-format tile or in cold conditions. Cold is the hidden variable. Thinset cures slower when the temperature drops below 60 degrees Fahrenheit. A garage floor in early spring can take twice as long as the bag suggests. A person who rushes this step is undoing everything done right up to that point.
There is a way to check readiness without guessing. Tap a tile with a plastic handle. A solid, ringing sound means the bond is intact. A dull, hollow sound means there is air beneath the tile, and the mortar has not filled the gap. This test works at any stage, but it is especially useful before grouting. Finding a hollow tile after the grout is in is a much bigger problem than finding it before.
The Tools That Earn Their Keep
A tile job can be done with a margin trowel, a bucket, and a drill with a paddle mixer. Those three items are the minimum. A few more tools make the difference between a frustrating afternoon and a smooth one, and they are cheap enough that skipping them is false economy.
A 1/4-inch by 1/4-inch square-notch trowel and a 1/2-inch by 1/2-inch square-notch trowel cover most first-project tile sizes. One of each is better than a single adjustable trowel, which rarely holds a consistent notch depth across a full spread. The trowel should have a comfortable handle because the wrist will be working. The flat side of the trowel is used for burnishing, so it should be clean and free of dried mortar.
A pair of tile spacers is obvious, but the less obvious tool is a small level. A standard 2-foot level is fine for checking large areas, but a 6-inch torpedo level is better for checking individual tile edges as they go down. The difference matters because tile setters adjust constantly, tapping high corners down with a rubber mallet or a block of wood. The small level catches a high spot that a long level averages out.
A wet sponge and a bucket of clean water are for cleaning the trowel and the tile edges before mortar dries. Dried thinset is nearly impossible to remove from tile faces without scratching them. A person who wipes as they go spends less time chipping later. This is the least glamorous advice in the entire trade, and it saves the most frustration.
The Drying Gouge That Appears Overnight
One mistake shows up only the next morning. A person finishes a section, cleans the tile faces, and goes to bed satisfied. In the morning, there is a thin, pale film on the tile surface, or worse, a faint whitish haze in the grout lines. This is efflorescence, a salt deposit that forms when moisture migrates through the cement and evaporates at the surface. It is not a defect. It is a sign that the thinset or grout was left wet too long, or that the tile was not wiped down thoroughly.
The fix is not aggressive scrubbing. A dry cloth or a very lightly damp cloth will usually lift the film. A solution of water and white vinegar can handle stubborn deposits, but only after the mortar has cured completely. Rushing the cleanup risks pulling fresh mortar out of the joints. The haze is cosmetic, and it comes off with patience.
Preventing it is simpler. Wipe the tile faces with a damp sponge while the thinset is still workable, then go back with a dry cloth and buff the surface. The extra pass removes the thin film of mortar water that is left behind. It takes an extra minute per tile, and it eliminates the most common reason a first project looks amateurish the morning after.
The Cheap Bucket Trick for Small Jobs
A full bag of thinset makes far more mortar than a small backsplash or a bathroom floor needs. The bag will sit in a garage for years, absorbing humidity and slowly turning into a brick. The alternative is to buy a bag anyway and mix only part of it, which is harder than it sounds because the powder settles unevenly in the bag.
A better approach for small jobs is to use a 5-gallon bucket as a mixing container and a smaller bucket, like a 2-gallon paint bucket, as the measuring scoop. Scoop out the powder with the small bucket, level it off, and dump it into the mixing bucket. A half-bucket of powder takes roughly half the water the full bag calls for. The proportions are not exact, but they are close enough because the final consistency check is physical, not mathematical. The mortar should feel the same as a full batch, and a person can add powder or water in small increments to dial it in.
This trick also means the leftover powder in the bag stays dry and usable for the next project. Seal the bag tightly, fold the top over, and tape it. A bag stored this way can last a year or more. A bag left open with a folded top will absorb moisture from the air and form hard clumps within a few months. The clumps do not break down in the mixer, and each one is a weak spot in the bond.
When the Job Outgrows the Basics
The basics covered here handle a first backsplash, a bathroom floor, a laundry room, and most entryway tile. They do not handle everything. Large-format tile, 24 inches or bigger, requires a leveling system and a different trowel technique. Natural stone requires a different type of mortar and careful attention to moisture. A heated floor system changes the installation sequence entirely. A person who finishes a first project successfully will recognize the signs that the next project needs more research, and that recognition is the real skill.
What the basics do provide is a foundation that transfers to those harder jobs. The mixing discipline, the coverage test, the cure time, all of it applies regardless of scale. A person who learns to check the back of a lifted tile will never need to guess whether the bond is good. They will know. That knowledge is the difference between a tile job that looks fine for a year and one that survives a decade of use without a single hollow sound.