
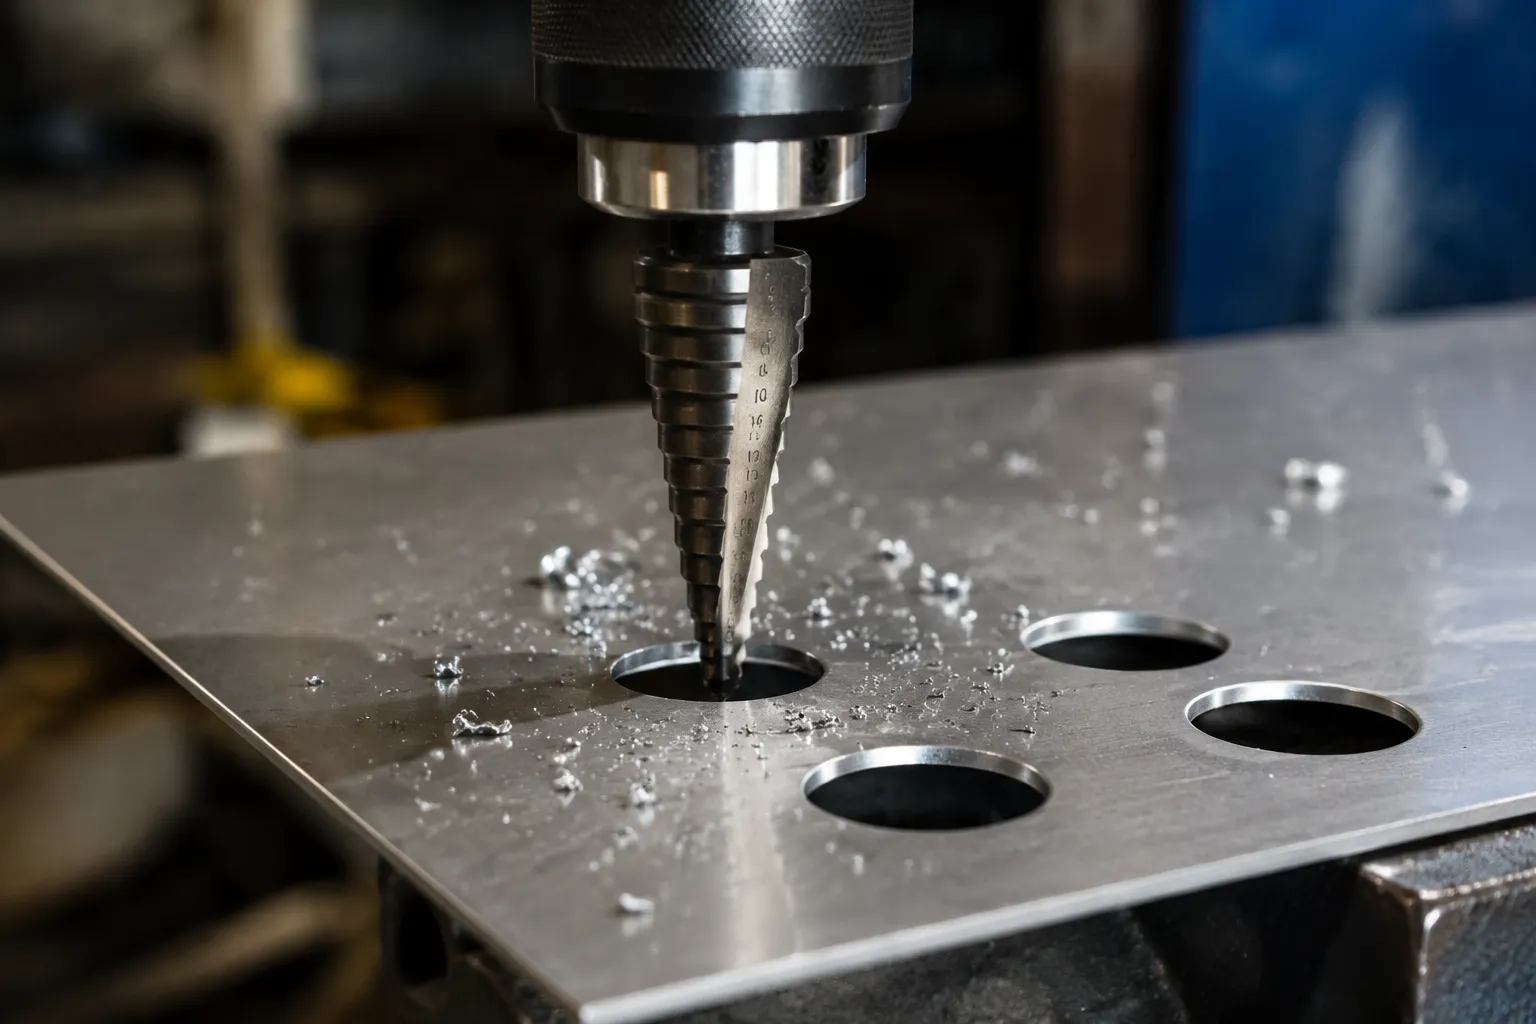
Step bits are the workhorses of the sheet metal shop, and they have a well-earned reputation for tearing up thin material. The geometry that lets a single bit drill a dozen hole sizes is the same geometry that grabs, chatters, and pushes a burr up around the hole like a volcano rim. The common wisdom says to just go slow, use oil, and deburr the mess afterward. There is a better way, and it starts with understanding what the cutting edges are actually doing to the metal.
Thin sheet metal, anything below roughly 1.5 mm, does not cut like a thicker plate. It flexes. When a step bit plunges into a piece of 0.8 mm galvanized steel, the material bows away from the cutting edge before the edge can shear it cleanly. That bowing is the root of the problem. The bit deflects the sheet, the cutting edge skips, and the metal tears along the grain instead of shearing. The result is a ragged lip and a hole that measures a few tenths of a millimeter larger than the bit's stated size.
The fix is not a faster spindle or a sharper bit, though both help. The fix is controlling the material's ability to flex. A step bit is only as good as the support behind the work. A person can sharpen the tool until it is surgical, and the sheet will still tear if it can move.
Why Tear-Out Happens on Thin Stock
The cutting action of a step bit is a shearing process, not a scraping one. Each flute edge peels a thin ribbon of metal away from the parent stock. For that peel to stay clean, the material must remain rigid at the point of contact. When the sheet is thin, the downward force of the bit exceeds the local stiffness of the metal. The sheet deflects, the tool loses its consistent depth of cut, and the edge tears instead of shearing.
Tear-out is worse near the exit side of the hole. As the bit breaks through the bottom face, the remaining material has less support. The cutting edge pushes the last sliver of metal downward, and without backup, that sliver bends and rips. It is the same reason a drill bit leaves a larger burr on the back of a hole than on the front. The front has the mass of the sheet behind it. The back has nothing but air.
Step bits add a second problem to this. The stepped geometry means the cutting edges are not continuous. Each step transitions from one diameter to the next with a shoulder, and that shoulder can catch on the edge of the hole as the bit feeds. The catch is worse in thin material because the shoulder is proportionally larger relative to the sheet thickness. A 6 mm step on a 1 mm sheet is a blunt obstruction. On a 6 mm plate, it is a minor transition.
The Backing Plate Changes Everything
The single most effective way to eliminate torn edges is to stop the sheet from flexing. A sacrificial backing plate, clamped or held firmly behind the work, does exactly that. The backing plate supports the exit side of the hole, absorbing the downward force of the bit and keeping the sheet flat against the cutting edges.
A piece of 12 mm plywood works for occasional jobs. A scrap of aluminum plate works better because it does not splinter and it dissipates heat. The key is that the backing material must be flat and the sheet must be pressed against it with firm, even pressure. A few spring clamps around the perimeter of a small panel are enough. For larger sheets, toggle clamps or a vacuum table are worth the setup time.
The backing plate does not just stop tear-out. It also extends the life of the bit. When the sheet cannot flex, the cutting edges take a consistent, uninterrupted cut. There is no chatter, no skipping, no sudden bite. The bit runs cooler and the edges stay sharp longer. It is the kind of improvement that makes a person wonder why the step bit was ever used without one.
Pilot Holes: The Unpopular but Necessary Step
Most step bit damage on thin sheet happens at the start of the cut, before the bit has established a full diameter. The center point of the bit, the small pilot tip, can skate across the surface if it does not have a dimple to bite into. A center punch mark helps. A proper pilot hole is better.
A pilot hole does not need to be large. A 3 mm hole is enough to give the bit's center point a positive location. The hole keeps the bit from wandering, and it reduces the initial cutting force because the center point is not driving a full-width cut from scratch. The bit engages the pilot hole, the steps start cutting from the inside edge of that small hole, and the transition is smooth.
Many operators skip the pilot hole because it adds a tool change and a few seconds of cycle time. That is a false economy. A single ruined panel costs more than the time saved. The pilot hole also gives a place for chips to escape at the start of the cut, which reduces the chance of a chip getting trapped between the step and the sheet and scoring the surface.
Feed Rate and Spindle Speed Are a Balance
There is a persistent myth that slow and steady is the only way to cut thin sheet with a step bit. Slow is correct. Steady is not. A slow, hesitant feed allows the bit to dwell, and dwelling generates friction heat that softens the metal and promotes tearing. The bit should feed continuously, without stopping, at a rate that keeps the cutting edges engaged without forcing them.
Spindle speed matters less than the ratio of speed to feed. For thin sheet, a moderate speed, around 1,000 to 1,500 RPM for a typical hand drill, with a firm, steady feed, produces cleaner holes than a high speed with a timid push. High speed with slow feed is the worst combination. It polishes the material, work-hardens it, and sets up the perfect condition for a torn edge.
A person can hear when the cut is right. The sound is a continuous, light hiss, not a choppy rattle. If the bit chatters, the feed is too light or the speed is too high. If the bit smokes, the feed is too heavy or the speed is too low. The audible feedback is reliable once a person learns to listen for it.
Lubrication Is Not Optional
Sheet metal does not need flood coolant, but it needs some form of lubrication. A few drops of cutting fluid, or even a smear of paste wax, makes a measurable difference in edge quality. The lubricant reduces friction between the cutting edge and the freshly cut surface, and friction is what generates the heat that softens the metal and causes it to tear.
The type of lubricant matters less than the fact of using it. A lightweight cutting oil works well on aluminum and steel. A wax stick, the kind used for router bits and saw blades, works well for quick jobs and leaves less residue. WD-40 is better than nothing, but it evaporates quickly and does not provide much film strength. The point is to keep the interface between the bit and the sheet slick.
Lubrication also helps with chip evacuation. Chips that stick to the flutes and get dragged back into the cut are a major cause of surface scoring and edge tearing. A lubricated flute sheds chips more readily, keeping the cutting path clear. The operator should also clear chips periodically by withdrawing the bit, especially when cutting deeper holes in thicker material.
The Right Bit for the Job
Not all step bits are the same, and the cheap ones are not worth the money for sheet metal work. A step bit intended for wood or plastic has a different edge geometry than one designed for metal. The metal-cutting version has a more acute cutting angle, which shears the material rather than scraping it. The difference is visible under a loupe: metal-cutting bits have a sharper, more defined edge, while general-purpose bits look blunt by comparison.
Coating matters. Titanium nitride and titanium aluminum nitride coatings reduce friction and keep the edge sharper for longer. Uncoated high-speed steel bits work, but they dull faster and require more frequent sharpening. For production work, a coated bit pays for itself in reduced downtime and more consistent hole quality.
The number of flutes also affects the cut. Two-flute step bits are common and work fine for most applications. Three-flute bits are available and they cut more smoothly because they have more cutting edges engaging the material per revolution. The tradeoff is that three-flute bits cost more and are harder to find. For thin sheet, the smoother cut is worth the premium.
Deburring Is a Last Resort, Not a Plan
A person who reaches for a deburring tool after every hole has accepted a process failure. Deburring adds time, adds a step, and leaves a hole that is slightly different from its neighbor. The goal is a hole that does not need deburring, and that goal is achievable with the right preparation and technique.
That said, even a perfect cut leaves a slight edge break. The difference between a hole that needs a heavy deburring pass and one that needs a quick swipe is the difference between a torn edge and a clean shear. The clean shear has a fine wire edge that a light touch with a deburring blade removes. The torn edge has a jagged lip that requires grinding or filing, and the hole is often oversized by the time it is clean.
If a hole comes out with a heavy burr, the correct response is not to deburr it and move on. The correct response is to fix the process. Check the backing plate, the pilot hole, the speed, the feed, and the lubrication. One of those variables is out of adjustment. Repeatedly deburring a torn hole is like smoothing a rough road with a shovel instead of fixing the pothole.
Testing the Setup Before Cutting the Panel
The best way to avoid a ruined panel is to test the setup on a scrap piece of the same material, same thickness, same condition. A test hole takes twenty seconds and answers every question about whether the backing plate is flat enough, the bit is sharp enough, and the feed rate is correct. The test hole should be the first hole of the job, not a separate step. It costs nothing and it prevents the most expensive mistake in the shop: a finished panel with a torn hole in the middle.
The test also reveals whether the material itself is the problem. Some sheet metal, particularly galvanized steel with a heavy spangle, cuts differently than bare cold-rolled steel. The zinc coating is soft and gummy, and it can load up the cutting edges and cause tearing. A test cut shows this immediately. The response is either a faster feed, a sharper bit, or a different lubricant.
Testing is not a sign of doubt. It is a sign of discipline. The operators who get clean holes every time are the ones who know what their setup does before they commit it to the real workpiece.
The Sound of a Clean Cut
There is a moment in a properly set up step bit cut on thin sheet where the bit passes through the last sliver of material and the hole opens clean. The sound changes, the resistance drops, and the operator feels a slight release. If the setup is right, the bit exits without a burr, without a tear, and without a fight. The hole is round, the edges are clean, and the piece is ready to use.
That moment is the benchmark. Every torn edge, every ragged hole, every deburring session is a deviation from it. The backing plate, the pilot hole, the feed rate, the lubricant, and the bit selection are all in service of that single clean pass. When they are all aligned, the step bit does what it was designed to do: make a series of clean holes in a single tool, without leaving a mess behind.
The operator who masters this setup does not need to think about it anymore. The hand finds the speed, the ears confirm the sound, and the hole comes out right. That is the goal of the whole exercise. Not to deburr faster, not to fix torn edges, but to have nothing to fix at all.