
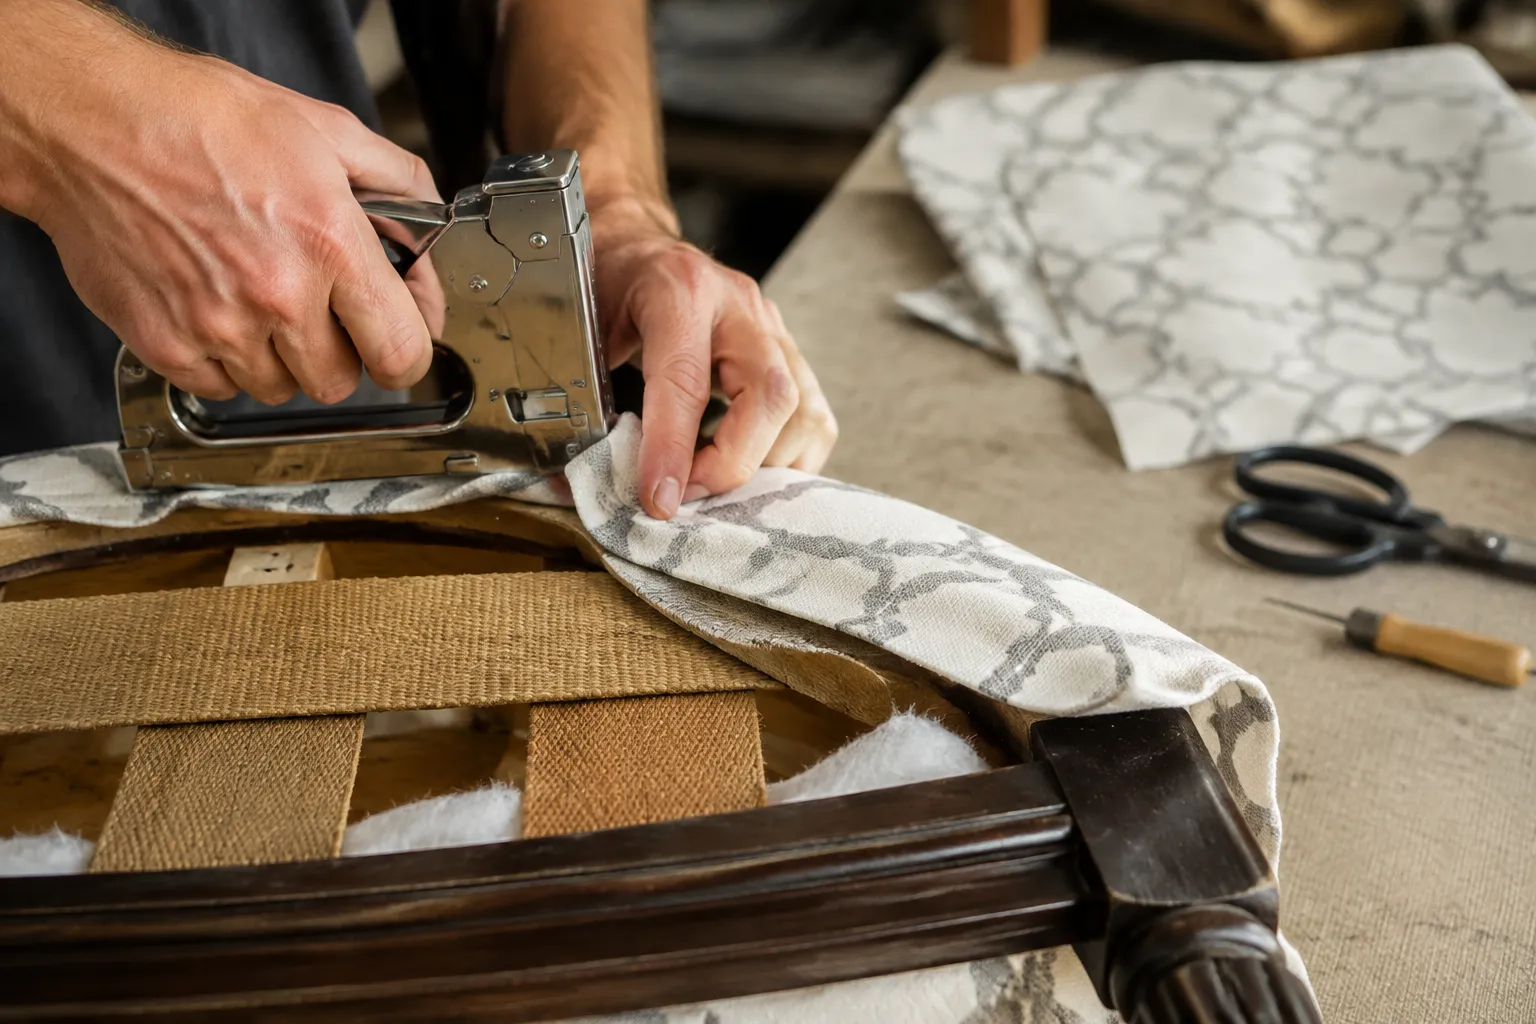
There is a chair in most homes that does not need to be thrown away. The frame is solid, the shape is right, and only the fabric has given up, sagging in the seat or peeling at the armrests. The fix is a staple gun, a roll of webbing, and a Saturday afternoon. Upholstery sounds like a trade reserved for workshops with pneumatic compressors, but the basics are closer to a home improvement project than a craft. A manual staple gun, a few yards of fabric, and the willingness to pull hard will restore most dining chairs, headboards, and footstools to a condition that does not embarrass the room.
The mistake most first-timers make is treating upholstery like sewing. It is not sewing. Sewing joins two pieces of fabric with thread. Upholstery wraps one piece of fabric around a frame and fastens it on the underside, where no one will ever see it. The entire skill set reduces to three actions: remove the old cover, lay down new padding, and stretch the new fabric taut before driving staples into the wood. Everything else, the pleating, the trim, the button tufting, comes later. None of it matters until the basic wrap is done correctly.
A person needs four things before starting. A staple gun, and not the electric kind. The manual, hand-squeeze models give a person control over each staple, and they are cheap enough to replace if dropped. An electric stapler fires too fast and too deep, and removing its staples is a punishment. The second tool is a flathead screwdriver, used for prying out the old staples. The third is a pair of fabric shears, because scissors that cut paper will dull on upholstery fabric within minutes. The fourth is a roll of 1/4-inch plywood or cardboard tack strip, which handles the tricky job of fastening fabric to a hollow frame edge.
The work begins with removal, and this is where patience pays. Flipping the chair upside down reveals a field of staples, some corroded, some buried in the wood, some snapped off at the head. Prying them out one by one feels tedious until the third or fourth one, when a rhythm appears. Slide the screwdriver under the staple, twist the handle, and the staple lifts. The old fabric then peels away in one piece if the original job was done well, and that old piece becomes the pattern for the new cover. Keep it. Measure against it. The original upholsterer already solved the geometry of the chair, and the old fabric holds those answers.
Under the fabric sits the padding, often a layer of foam over a web of jute or cotton. The foam has likely flattened to a quarter of its original thickness, which is why the chair feels like sitting on a board. Replace it. A 2-inch sheet of high-density foam, cut to the seat shape with an electric carving knife, restores the original comfort. A person can buy precut seat cushions, but cutting their own is not difficult. Trace the old foam, mark the new sheet, and slice slowly. The carving knife, the same one used for Thanksgiving roasts, makes a clean vertical cut that scissors crush.
New fabric should be chosen with a hand on the wallet and a thought to the future. The upholstery-weight cottons and linens sold at fabric stores handle a home stapler well. The drapery-weight fabrics do not. A tight weave, like a twill or a denim, stretches evenly and hides staple marks along the edges. Patterned fabric demands attention to centering. A stripe that runs crooked across a seat cushion looks like a mistake no matter how well the staples hold. Plain fabric forgives more, and for a first project, plain fabric is the wiser choice.
Stretching as the whole game
The act of stretching the fabric is where chairs are won or lost. Lay the fabric over the padded seat, smooth it with the palms, and begin stapling at the center of the front edge. One staple. Then pull the fabric to the center of the back edge, and one staple there. Then the center of each side. The fabric should feel drum-tight, like a snare head, before the next staple goes in. Work outward from those four points, alternating sides, pulling the fabric diagonally toward each new staple location. The corners are last, and they fold into neat pleats, or they bunch into ugly lumps depending on how the fabric is coaxed.
A common error is pulling too hard on one edge before the opposite edge is anchored. The fabric shifts, the pattern skews, and the seat looks like a parallelogram from above. The fix is to staple lightly at first, sinking each staple only halfway, and adjusting the tension before committing. Half-driven staples pull out with a fingernail. Full-driven staples require the screwdriver. A person who staples the entire perimeter halfway, checks the tension and the pattern alignment, then drives every staple home, produces a cleaner result than someone who hammers each staple in fully as they go.
The corners deserve their own technique. A mitered corner, folded like a hospital bed sheet, looks professional. The fabric is pulled tight over the corner, pinched into a triangle, and folded flat against the underside. The excess is trimmed, and the fold is stapled. This takes practice, and the first corner will look wrong. The second will look better. By the fourth, a person understands the geometry well enough to repeat it on the next chair.
Webbing and the sagging seat problem
Sometimes the fabric is fine, and the real culprit is the webbing underneath. The jute or polypropylene straps that support the seat have stretched, or one has snapped clean through. Replacing webbing is a separate job from reupholstering, but the two often happen together. The old webbing is stapled to the underside of the frame, crossing in a grid. Remove it, and the seat frame looks like a bare picture frame.
New webbing comes in rolls, and the tension required to install it surprises most people. The strap is pulled so tight that the weave stretches and the fibers whiten. A webbing stretcher, a small tool with teeth that grip the strap, makes this possible with one hand while the other hand staples. Without the stretcher, a person can use a block of wood and their body weight, but the stretcher is a ten-dollar tool that saves a sore back. The webbing is stapled at one end, stretched hard across the frame, and stapled at the other. The cross straps weave over and under the first set, and the whole grid should feel like a trampoline when finished.
A sagging seat is sometimes only a loose webbing issue, and re-tensioning the old straps works if they have not rotted. But old webbing that has stretched once will stretch again. Replacing it costs a few dollars and an hour, and the result feels like a different chair. A person who skips this step and only replaces the foam will sit on a firm cushion that sinks between the straps, which is its own kind of disappointment.
The tack strip trick for hollow frames
Dining chairs with solid wood rails are the easy case. The staples bite into the wood, and the job ends. But many mid-century and modern chairs have hollow frames, or frames with a groove where the upholstery is meant to be tucked. Stapling into a hollow frame is like stapling into air, and the fabric pulls loose within days. The solution is tack strip, a flexible strip of cardboard or thin plywood with staples pre-embedded along one edge.
The tack strip is laid along the frame edge, the fabric is wrapped over it, and the strip is hammered into the groove. The staples in the strip bite sideways into the frame walls. This is the technique used by professional upholsterers, and it solves the hollow frame problem completely. A first-timer might not encounter a hollow frame, but knowing the trick exists prevents the frustration of watching a freshly upholstered chair lose its cover within a week.
For frames that are solid but have a rounded front edge, the fabric needs to be pulled over the curve and stapled on the underside. The radius of the curve determines how much fabric is needed. A tight curve pulls the fabric more, and the weave will gap at the corners. A simple solution is to cut small notches in the fabric's edge at the curve, allowing it to spread flat. The notches are hidden on the underside, and they make the difference between a smooth curve and a puckered one.
Removing staples without damaging the frame
The removal phase injures more chair frames than any other step. A person in a hurry pries at a staple with too much force, and the screwdriver gouges the wood rail. The gouge is invisible once the new fabric is in place, but it weakens the frame at the exact point where the new staples need to bite. The careful method is to work the screwdriver tip under the staple's crown, not its leg, and to twist gently rather than lever hard. A staple that refuses to move can be cut with a flathead screwdriver and a hammer tap, splitting the crown so the two legs pull out separately.
An upholstery staple remover, which looks like a small crowbar with a forked tip, is worth buying if a person plans to redo more than one chair. It grips the staple's crown firmly, and the curved handle provides the leverage without gouging. The tool costs about the same as a takeout lunch, and it saves the frame from the screwdriver's slip-and-gouge cycle.
Staples that break off flush with the wood surface are the final annoyance. They leave a tiny metal nub that catches fabric and snags fingers. A pair of needle-nose pliers grabs the nub, and a twisting motion pulls it free. If the staple is buried too deep, leaving it is acceptable. The new fabric covers it, and the nub does not affect the new staple's hold. Chasing every last buried staple is a perfectionism that adds an hour and changes nothing.
Choosing the right staple length
Staple length is not a detail a first-timer thinks about until the first staple pokes through the wood. A 1/4-inch staple works for hardwoods, which grip the short leg firmly. A 3/8-inch staple is the general-purpose length for softwoods like pine, which need the extra depth to hold. Anything longer risks poking through the top of a thin rail, visible from the seat surface. Anything shorter pops loose under the tension of stretched fabric.
The width of the staple matters too. Narrow crown staples, about 1/4-inch wide, are standard for upholstery. They sink into tight spaces and hold fabric without leaving wide marks. The wider 1/2-inch crown staples used for house wrap are wrong for upholstery. They bend on hardwoods and leave a wavy line on the fabric edge. A person should buy staples specifically labeled for upholstery, and test one on a scrap of the frame wood before committing.
Testing the staple on scrap wood is the kind of step that saves a whole project. The staple should sink flush with the wood surface, not stand proud and not bury itself so deep the crown disappears. If the staple stands proud, the gun is not being pressed hard enough, or the staple is too long for the wood's density. If it buries itself, the staple is too short to hold under tension. A flush staple with a firm grip is the target, and finding it takes five minutes and prevents an afternoon of frustration.
The fabric store trip and what to bring
A person walks into a fabric store with a chair seat and a plan, and the fabric options overwhelm. The upholstery section, separate from the garment fabrics, holds rolls of velvet, linen, and performance polyester blends. The performance blends, treated to resist stains and fading, cost more but handle a home with children or pets. The natural fibers breathe better and feel more expensive, but they stain easily and fade in direct sunlight.
The best test for upholstery fabric is the crush test. Grab a handful of the fabric and squeeze hard for ten seconds. Release and look at the crease. A fabric that holds a deep crease will wrinkle in the seat and look rumpled within a week. A fabric that springs back, with only a faint line, will stay smooth. This test works in the store and takes less time than reading the care label.
Bring the old fabric to the store. Unfold it next to the new rolls and compare the weights. The new fabric should feel as heavy or heavier than the old. A lighter fabric will not stretch the same way, and it will not hold its shape over the foam. A heavier fabric might be too stiff to wrap around tight curves. Matching the weight of the original, not the color, is the priority for a first project.
When the frame needs more than fabric
Upholstery hides a multitude of sins, but it does not fix a broken joint. A chair that wobbles before the fabric is removed will still wobble after the new cover is stapled in place. The glue joints at the legs and the stretchers need attention first. A bottle of wood glue and a bar clamp, applied and left to dry overnight, turns a wobbly chair solid again. This is not upholstery, but it is the prerequisite to upholstery, and skipping it means the new fabric will stretch and shift as the frame flexes.
A cracked rail, one that has split along the grain, needs a different repair. The crack is cleaned of old glue, clamped shut, and reinforced with a small metal plate or a dowel. A person without woodworking experience can manage a glued and clamped crack, but a completely broken rail, one that separates into two pieces, is a job for a shop with a jointer. Knowing the difference saves a person from stapling new fabric over a frame that will fail within a year.
The wood itself, if it is a nice oak or walnut, deserves a quick sanding and a coat of finish while the foam and fabric are off. This is the moment when the chair's legs are accessible, and a person can refinish them without masking tape or careful brushwork. A dining chair with freshly upholstered seat and scratched, dull legs looks unfinished. The extra hour spent sanding and applying a wipe-on polyurethane makes the whole project look like it was done by someone who knew what they were doing.
A first project worth choosing
A dining room chair with a removable seat cushion is the ideal first project. The seat lifts off, the fabric is attached to a separate plywood board, and the whole piece is worked on a table, not on the floor. A person can flip the seat, staple, and inspect without crawling under furniture. The skills transfer directly to the harder projects: the armchair with tufted back, the headboard with curved top, the bench with a padded top and skirt.
The chair in the corner of the living room, the one with the faded floral print and the lumpy cushion, is the one to practice on. It is small enough to handle, and its failure costs nothing but a few dollars of fabric and an afternoon. The first staple gun purchase, a basic manual model with a comfortable grip, pays for itself on that one chair. The next chair is easier. By the third, a person starts to recognize the difference between a chair worth reupholstering and a chair that should have gone to the curb years ago. That judgment is the real skill, and it only comes from having spent the time with the staple gun in hand.