
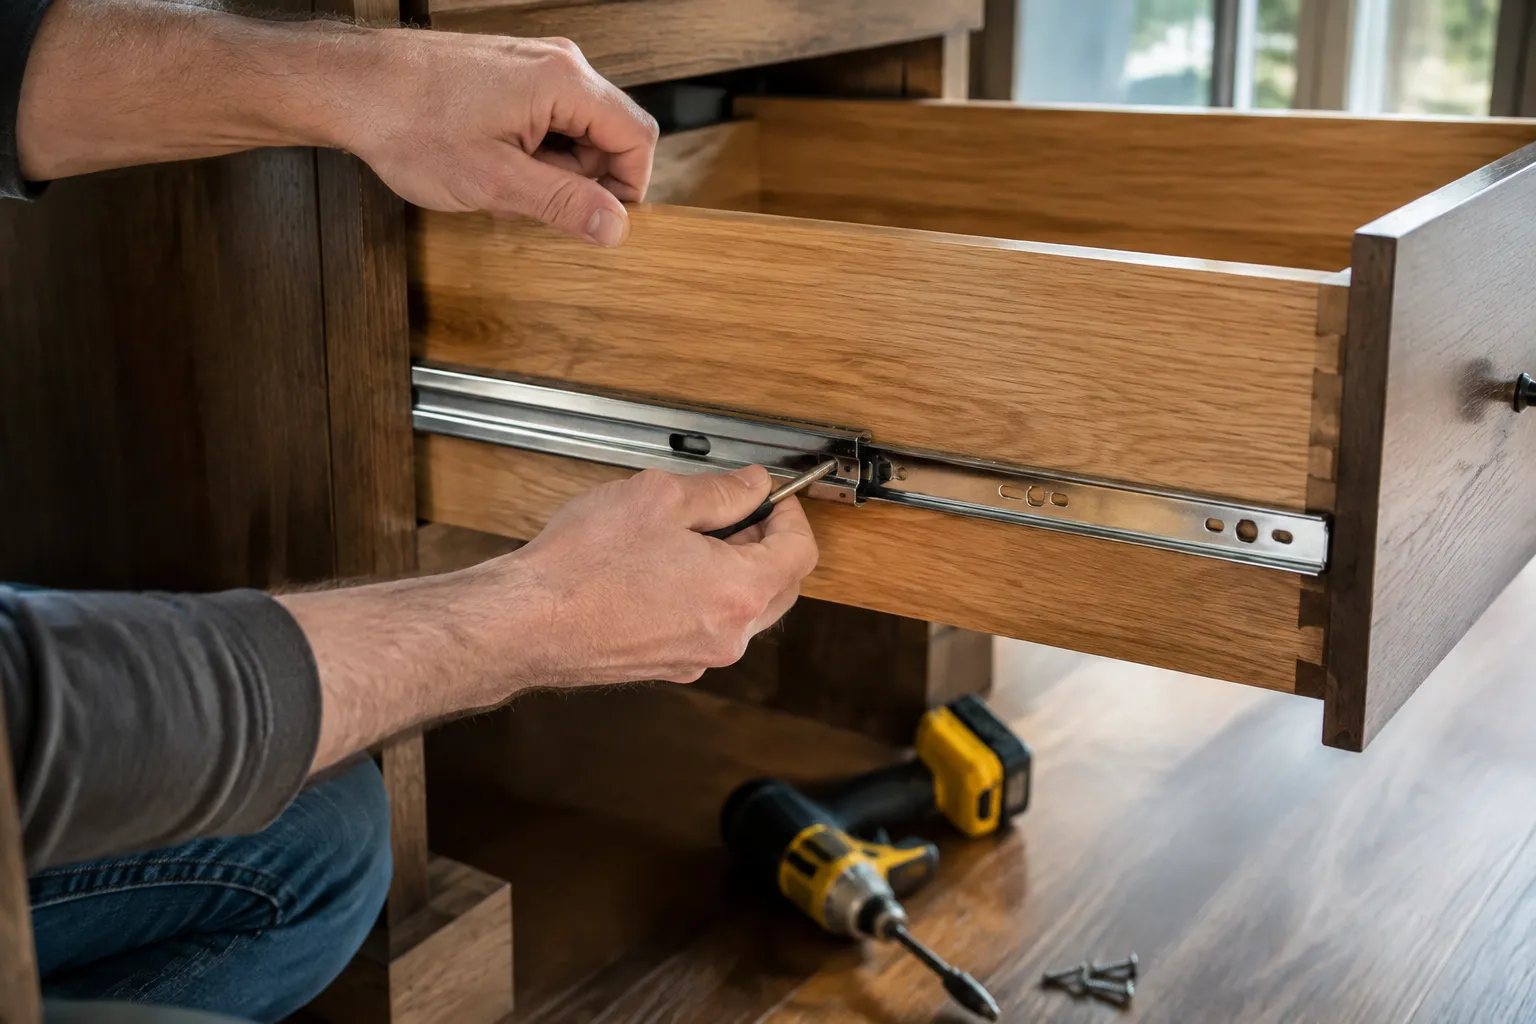
There is a moment in every kitchen renovation when the homeowner realizes the drawers are the problem. The cabinets were refaced, the countertops replaced, the backsplash laid, and then the old drawer slides give out one by one, or they never worked properly in the first place. A drawer that slams shut, or rattles open on its own, or catches on a warped track, undoes the entire room. The fix is not a new kitchen. It is a Saturday afternoon, a screwdriver, and a pair of soft-close slides.
The standard retrofit is the side-mount slide, commonly called a full-extension ball-bearing slide. It is the workhorse of the drawer world. A pair of these, rated for 100 pounds, costs between twelve and twenty dollars at any hardware store. They come in a box with a template printed on the side, a bag of screws, and a set of plastic brackets that are supposed to make installation foolproof. The brackets are not foolproof. They are a starting point.
Measuring Before Buying
The first mistake people make is buying slides by the drawer face width. A drawer that looks like it is eighteen inches wide is often only sixteen inches deep, because the face overlaps the cabinet opening. The slide must match the drawer box depth, not the visible front. Measure the drawer box itself, from the back edge to the front edge, excluding the face. That number, rounded down to the nearest even inch, is the slide length to purchase. A 17.5-inch box gets a 16-inch slide. A 21-inch box gets a 20-inch slide.
The second measurement is the width of the opening. Standard side-mount slides require roughly a half-inch of clearance on each side of the drawer box. This is where older cabinets fail. Many frameless European cabinets from the 1990s were built with a different slide system, one that mounts underneath the drawer and attaches to a single central track. The drawer boxes in those cabinets are cut for that system, and a side-mount slide will not fit without building out the sides. A person needs to check the gap between the drawer box and the cabinet side before buying anything. If the gap is under a quarter-inch, the side-mount route requires either a different drawer box or an under-mount slide, which is a more involved project.
Most American cabinets from the last forty years, though, have the half-inch gap. The side-mount slide drops in with a few screws and a little patience.
The Difference Between Cheap and Mid-Range Slides
Hardware stores stock two tiers of side-mount slides. The cheap tier, often under ten dollars a pair, uses thinner steel and a simpler ball bearing arrangement. The slides work when new, but they develop side-to-side play within a year. The drawer begins to wobble when pulled out to full extension. The soft-close mechanism, a small plunger that catches the drawer in the last two inches of travel, starts to miss on one side. The drawer closes crooked.
The mid-range tier, from brands like Blum, Knape & Vogt, or Richelieu, costs about twice as much and uses thicker steel with a captive bearing system. The drawer rides on four bearings per slide instead of two. The difference is immediately apparent on installation. The mid-range slide feels solid when the drawer is extended. There is no wiggle. The soft-close catch is a separate cartridge that can be replaced if it wears out, rather than a molded plastic tab that snaps off.
For a kitchen that gets opened twenty times a day, the cheap tier is a false economy. The labor of installing slides is the same whether the slide costs eight dollars or sixteen. Spending an extra sixteen dollars per drawer to avoid redoing the job in eighteen months is one of the better deals in home improvement.
Removing the Old Hardware
The old slides come out with a cordless drill and a Phillips bit. Most are held in with six to eight screws per side. The screws are often stripped, because someone over-torqued them during a previous installation, or they are painted over, or they are corroded from years of dishwasher steam. A manual impact driver, the kind struck with a hammer, is the right tool for the stubborn ones. It seats the bit into the screw head and breaks the bond without stripping the head further.
Once the screws are out, the drawer box will still be stuck in the cabinet. This is normal. The slides have a friction detent that holds the drawer closed. A hand placed inside the drawer, pushing against the back panel, with a gentle upward lift on the front, will pop it free. Do not yank. The detent releases with a click, and the drawer slides straight out.
The cabinet side will have old screw holes, sometimes in a pattern that does not match the new slide's mounting holes. This is the point where many people panic. They think the new slide has to hit the exact same holes. It does not. The new slide's mounting bracket is a long slot, and the screws can land anywhere within that slot. As long as two screws per side bite into solid wood, the slide is secure. If the old holes are completely stripped out, a toothpick dipped in wood glue, hammered into the hole and snapped off flush, provides fresh material for the screw threads.
The Template That Lies
The paper template included with most slide boxes has a diagram showing the bracket positioned at a specific height on the cabinet wall. It tells the installer to align the template's bottom edge with the bottom of the drawer opening. This works only if the drawer box is perfectly square, the cabinet opening is perfectly level, and the floor is perfectly flat. None of those conditions exist in a house built before 1990.
The better method is to ignore the template and use the drawer itself as the gauge. Place the drawer box on a flat surface. Measure the distance from the bottom of the drawer box to the center of the slide mounting hole. Transfer that measurement to the inside of the cabinet, measuring up from the opening's bottom edge, and mark the line. This accounts for any sag or warp in the cabinet. The slide mounts at the height the drawer actually sits, not the height a perfectly square cabinet would suggest.
A second trick involves the front and back positions of the slide. The slide's mounting bracket has slots, not round holes, which allow fore-and-aft adjustment. When screwing the bracket into the cabinet side, leave the screws slightly loose. Install the drawer, close it, and check the gap between the drawer face and the cabinet face. Adjust the slide forward or backward until the gap is even across the top and bottom. Then tighten the screws fully. This adjustment, done once, is what makes new slides look factory-installed rather than retrofitted.
The Soft-Close Mechanism and Alignment
The soft-close feature works through a plunger that extends from the back of the slide toward the front. The drawer has a small catch on the rear of the drawer-mounted rail. When the drawer is pushed closed, the catch meets the plunger, which compresses a spring and a hydraulic damper, slowing the drawer to a gentle stop in the final two inches. If the drawer closes with a bang, or if it bounces back open, the plunger is not aligned with the catch.
Misalignment has two causes. The first is that the left and right slides are at different heights, so the drawer sits at an angle and only one catch meets its plunger. The fix is to loosen the screws on the higher slide, drop it a millimeter or two, and retighten. The second cause is that the drawer box itself is racked, meaning it is twisted slightly out of square. This is common in older drawers that have been exposed to humidity. The fix is a diagonal brace across the back of the drawer, a thin strip of plywood screwed from the bottom edge of one side to the top edge of the other, pulling the box back into square.
There is also a small adjustment on the plunger itself. A tiny hex screw on the side of the cartridge changes the plunger's extension length. Turning it clockwise makes the plunger stick out farther, which catches the drawer earlier in its travel and slows it more gently. This is a fine-tuning adjustment, not a fix for a fundamental alignment problem. It is tempting to fiddle with it before checking the slide heights. Do the heights first.
Drawer Face Reattachment
The drawer face is usually attached to the box with screws from the inside, through a pair of vertical rails on the box's front. When the slide project is done, the face needs to go back on, and it will never line up on the first try. The face has a tendency to sit proud of the cabinet, or angled, or too high on one side.
The installation sequence matters. Put the face screws in loosely, just enough to hold the face against the box. Close the drawer. Look at the gaps around the face. Adjust by tapping the face with the heel of a hand, or by using a rubber mallet, moving it a hair at a time. Open the drawer, tighten the screws, close it again, and check. This cycle, repeated three or four times, is the difference between a drawer that looks aligned and one that looks like it was hung by a person in a hurry.
When the face is aligned and the screws are tight, the drawer should close with a soft hiss and a click. The hiss is the hydraulic damper doing its work. The click is the detent seating. If the drawer closes with a hiss but no click, the face is slightly off, and the detent cannot fully engage. A drawer that does not click will slowly drift open on its own, especially if it has heavy contents.
One Drawer Per Hour as a Rule of Thumb
The full job, from removing the first screw to the final face alignment, takes about an hour per drawer for a competent amateur. The first drawer takes longer, closer to ninety minutes, because the measuring and the adjustment process are new. The second drawer goes faster. By the third drawer, the routine is set: measure, transfer, screw, adjust, close, check. A kitchen with eight drawers is a full afternoon, and a kitchen with twelve drawers is a long day.
The most common reason the job stretches past the afternoon is that the installer tries to do all the drawers at once, removing every drawer and every slide before installing anything. The cabinet sides remain, but the visual reference of the drawer is gone. The better pace is one drawer at a time, removed, fitted, adjusted, and closed, before moving to the next. This keeps the face alignment reference intact and prevents a floor full of parts from becoming a jigsaw puzzle.
The second most common reason is the stripped screw. When a screw will not bite, the natural reaction is to push harder. That makes it worse. The fix is to step back, pull the screw, fill the hole with a glued toothpick or a small hardwood dowel, and try again. Ten minutes of repair saves an hour of frustration.
The Last Drawer and the Kitchen Drawer Test
The last drawer in the kitchen, usually the one near the sink that holds sponges and scrub brushes, is the one that gets the most abuse. It is opened and closed a hundred times a day, often with wet hands, often with a towel in the way. It is also the drawer that was most likely broken in the first place, because the moisture from the sink corrodes the slide bearings over time.
When the last drawer is installed and aligned, the kitchen drawer test is simple. Stand at the sink. Fill a hand with utensils, or a stack of plates, or nothing at all. Push the drawer shut with one finger. The drawer should glide, slow, and settle without a sound. Then pull it open and let go. It should stay open, not roll back on its own, and not wobble.
That one-finger close is the measure of the whole afternoon. It is also the reason the job gets done. A drawer that closes itself with a firm click, every time, without a slam, is the small luxury that makes a kitchen feel like it was built properly. The slides are hidden, the mechanism is invisible, and the only evidence of the work is the silence where a bang used to be.