
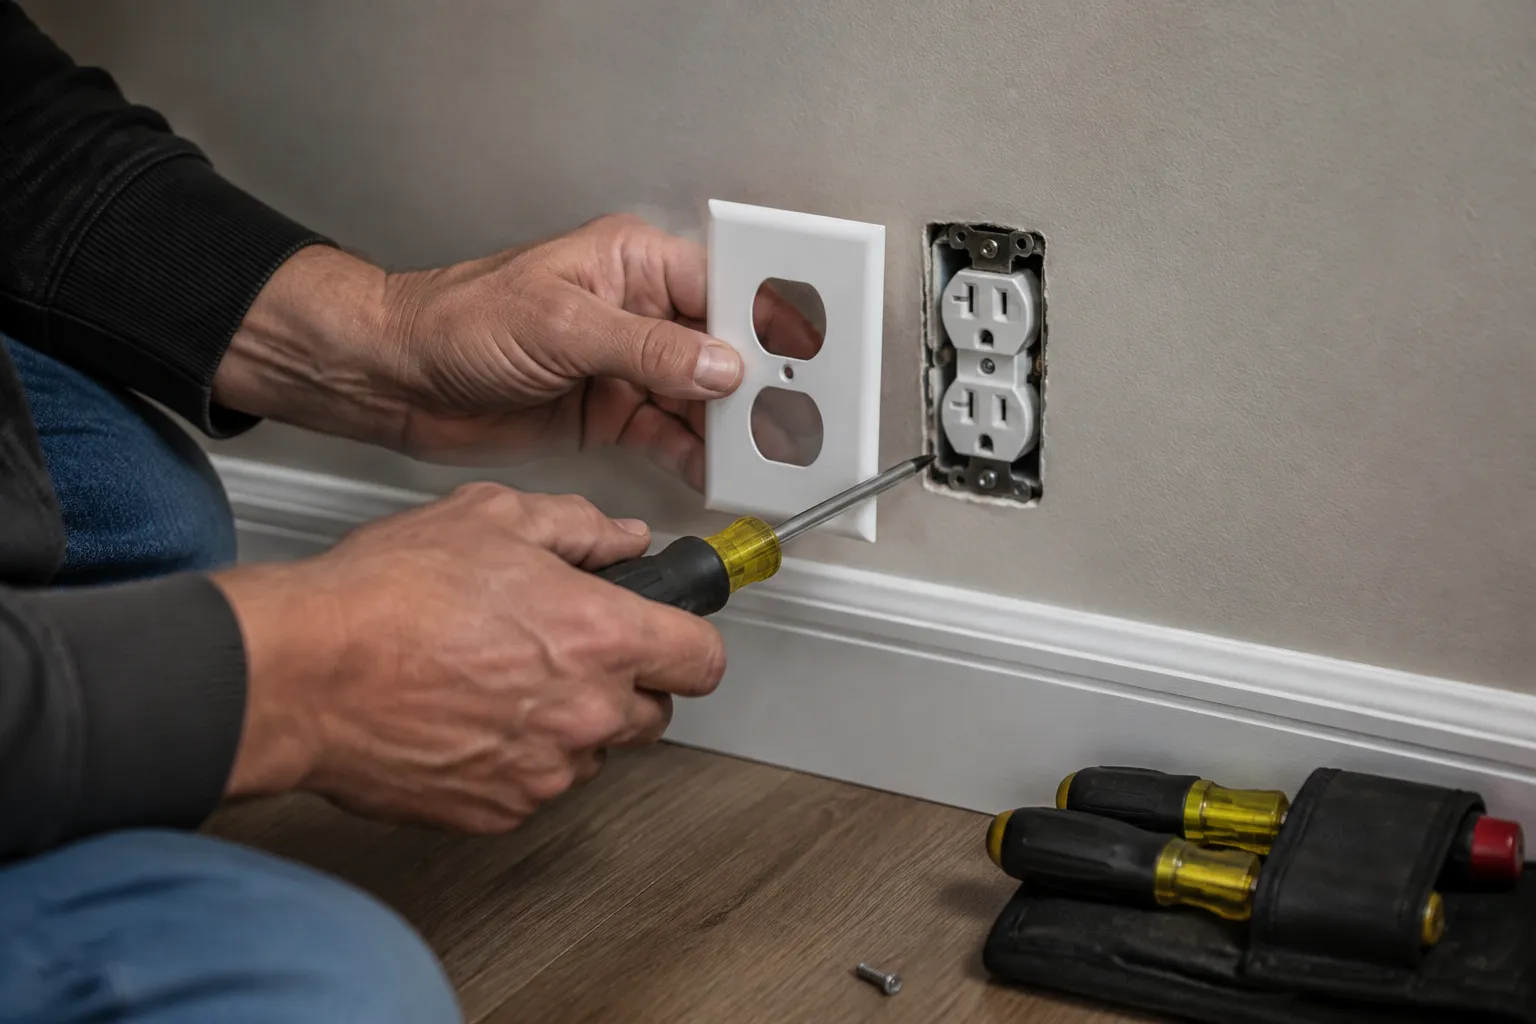
The plastic plate around an outlet is the most ignored piece of hardware in a typical home. It sits there for decades, yellowing slowly, collecting the faint gray film of hand oils and dust, until someone finally notices that the one in the kitchen has a crack running through the top screw hole. Replacing it takes about four minutes and costs less than a dollar. Almost nobody does it, because the task sits in a strange category: too simple to call an electrician, but just electrical enough to make a cautious person hesitate.
That hesitation is reasonable. Outlets are connected to wires that carry enough current to hurt a person badly, and the people who work on them for a living carry a healthy respect for that fact. But a cover plate is not an outlet. It is a piece of molded plastic or metal that screws onto the face of the receptacle. Nothing about the job requires touching a wire, loosening a terminal screw, or even turning off the power. The entire operation happens on the surface, and the only tool required is a screwdriver that fits the screws holding the plate in place.
The first step is figuring out what kind of screws are on the existing plate. Most older homes have slotted flathead screws, which demand a driver that fits the slot completely. A worn or wrong-size screwdriver will strip the soft metal of the screw head, turning a four-minute job into a frustrating exercise in vice grips and creative cursing. Newer plates often use Phillips-head screws. A #2 Phillips is the standard size for outlet covers, and a good one will seat firmly in the screw head without wobbling.
One screw sits in the center of the plate, between the two receptacles. On a standard duplex outlet, that is the only screw holding the cover on. Some decorative plates have screws at the top and bottom corners, and some oversized plates meant to cover old paint lines have four. The center screw is the one that matters for most homes. It should turn counterclockwise to loosen. If the screw is painted over, which happens constantly in rental properties and older houses, the paint bead around the head needs to be broken first.
A sharp utility knife solves the painted-over problem. Running the blade around the perimeter of the screw head, pressing just hard enough to cut through the paint film, frees the screw from the dried layer holding it in place. Without this step, the screwdriver will cam out of the slot and leave a mangled mess. The same trick applies to the edges of the plate where it meets the wall. Paint often seals the plate to the drywall, and prying against the wall with a screwdriver will chip the surrounding paint. A quick pass with the knife around the plate edge prevents that damage.
When the Screw Strips and Other Small Disasters
Stripped screws happen. The old plate has been on the wall for fifteen years, the previous owner used the wrong screwdriver, and now the head is a rounded divot that offers no purchase. The standard fix is a trick that sounds unlikely but works reliably: place a wide rubber band over the screw head, press the screwdriver firmly into the rubber, and turn. The rubber fills the stripped recess and gives the driver enough grip to bite. A flathead screwdriver pressed hard into a stripped Phillips head also works, provided the head has any metal left at all.
When the screw is completely rounded out, the rubber band fails, and the screw still will not budge, the next move is a small pair of pliers. Grab the outer rim of the screw head and turn it counterclockwise. The head of an outlet cover screw is slightly raised above the plate surface, which gives pliers something to grip. If that fails, the screw is likely corroded or the threads are seized in the metal mounting strap behind the outlet. A drop of penetrating oil, left to sit for ten minutes, usually frees it.
The last resort involves drilling the screw head off, which sounds terrifying but is actually a controlled operation. A small drill bit, around 1/8 inch, is used to bore into the center of the screw head until the head separates from the shaft. The plate comes off, the stub of the screw remains in the outlet, and the new plate covers the stub completely. The new plate's screw threads into a different location on the mounting strap, so the leftover stub causes no problems. It is a hack, but it works in the worst cases.
Selecting a Replacement Plate That Does Not Look Terrible
The hardware store aisle offers an overwhelming wall of options. Thermoplastic plates in white, ivory, and almond dominate the selection, sold in clear plastic bags for under two dollars. The white ones are bright and clean but show every speck of dirt. The ivory ones warm up a room but clash with white trim and white appliances. The almond ones sit somewhere in between and rarely match anything exactly. The color mismatch problem is real: a new white plate on a wall that has been painted around an old ivory plate will look like a bandage.
Matching the existing plate's color is the safest choice. If the old plate is a warm ivory, buy ivory. If the room has been painted recently and the outlets were removed for painting, the wall color around the old plate is clean and the new plate will blend in. If the old plate is so yellowed that color matching is guesswork, the honest solution is to replace every plate in the room at the same time. A room full of uniform plates looks intentional. A single bright white plate among yellowed ivory ones looks like a mistake.
Metal plates cost more and feel better. Stainless steel and brushed nickel plates run five to eight dollars each, and they hold up to cleaning better than plastic. They do not yellow, they do not crack, and they resist the buildup of grime at the edges. The tradeoff is that metal conducts electricity. A metal plate with a loose screw touching a live wire inside the box becomes a live surface. The risk is small, but it exists, which is why the National Electrical Code requires grounding for metal plates in newer installations.
The Screw Orientation Question, Settled
Every replacement plate comes with the center screw already installed. The screw slot angle matters to exactly one type of person: the one who notices. Electricians debate whether the screw slot should run vertically or horizontally, and the debate is about aesthetics, not function. Vertical slots look tidier to some. Horizontal slots look tidier to others. The only real rule is consistency. If every plate in the house has the slot running vertically, keep it that way. A single horizontal slot in a sea of vertical ones is the kind of detail that catches the eye and refuses to let go.
The orientation of the screw slot has no effect on the plate's performance. It does not indicate the polarity of the circuit. It does not signal whether the outlet is tamper-resistant. It is purely visual, and treating it as a matter of personal preference is the correct stance. The screw should be snug, not torqued down like a lug nut on a car wheel. Over-tightening a plastic plate causes it to bow in the middle, which looks worse than a slightly loose screw.
A properly tightened plate sits flat against the wall with no visible gap. The screw should be turned until it is just snug, then given a quarter turn of extra pressure. If the plate rocks when pressed at a corner, the screw is too loose. If the plate curves away from the wall at the top and bottom edges, the screw is too tight. The correct tension is somewhere in between, and it takes a minute of fiddling to find it on the first attempt.
GFCIs, Tamper-Resistant Outlets, and Odd Duck Configurations
Some outlets are not standard duplex receptacles. A GFCI outlet, the kind with the Test and Reset buttons in the middle, uses a rectangular cover plate that is taller than a standard one. These plates are sized specifically for the GFCI's elongated face, and a standard plate will not fit. The replacement process is identical, but the plate selection is narrower. The center screw sits between the two buttons, and the plate's top and bottom edges align with the outlet's face.
Tamper-resistant outlets, which have been required in new construction since 2008, look nearly identical to standard outlets from the front. The difference is internal, involving spring-loaded shutters behind the slots. The cover plate that fits a standard outlet also fits a tamper-resistant one, because the mounting dimensions are identical. This means a person can swap a plate on a tamper-resistant outlet without any special consideration, which is the best possible outcome.
Old homes throw curveballs. A two-plug outlet mounted sideways, with the slots running horizontally instead of vertically, was a common installation style in the mid-20th century. The cover plate for a horizontal outlet is the same size as a standard one, but the receptacle opening is rotated 90 degrees. Some plates are labeled as "horizontal" or "vertical" on the packaging, and buying the wrong one means the plate covers part of the slots. Check the orientation before leaving the store.
Then there are the oddballs: outlets in baseboards, outlets inside cabinets, outlets behind appliances that never get unplugged. These all use the same mounting dimensions, so the plate is standard. The only difference is accessibility. A plate behind a refrigerator, where the outlet is tucked into a cramped space, is harder to reach but no more difficult to replace. The same screwdriver work applies, just with the appliance pulled out of the way.
Paint Lines, Wallpaper, and the Art of a Clean Edge
Removing an old plate often reveals a strip of unpainted wall around the outlet. The plate covered that strip for years, protecting it from rollers and brushes, and the result is a slightly lighter rectangle of bare drywall or old paint. The new plate will cover most of this strip, but not all of it. A standard plate overhangs the outlet by roughly a quarter inch on each side, which means a thin line of unpainted wall can peek out at the edges.
Oversized plates, sometimes called "jumbo" or "wall plate" covers, solve this problem. They measure about a half inch larger in each direction, which is enough to cover the unpainted strip in most cases. They look slightly bulky, like a bandage over a wound, but they are the practical choice when the wall has not been repainted since the original plate was installed. The alternative is repainting the room, which is a much larger project than a plate replacement.
Wallpaper presents a different challenge. The plate sits on top of the wallpaper, and the seam where the wallpaper meets the plate edge is usually cut with a utility knife. Removing the plate reveals the edge of the wallpaper cut, which is often rough or slightly curled. A new plate covers it, but the cut edge of the wallpaper is now exposed to air and can peel back over time. Running a thin bead of wallpaper seam adhesive along the edge before installing the new plate prevents this. It is a small step that saves a future headache.
Where to Buy and What to Avoid
Hardware stores and big-box home centers carry the standard selection. Online retailers offer a wider range of colors and materials, including plates in obscure shades like "biscuit" and "light almond" that attempt to match discontinued paint colors. The online listings are honest about dimensions, which helps when replacing an odd-sized plate from a defunct manufacturer. The tradeoff is waiting for shipping and paying more for a single plate than the shipping costs.
The cheap plastic plates sold in multi-packs at the big-box store are fine for a rental property or a utility room. The plastic is thin and slightly flexible, and the finish is a flat matte that shows fingerprints immediately. The slightly more expensive plates, often from brands like Lutron or Leviton, use a denser plastic with a subtle gloss that resists smudging. The price difference is a dollar or two, and the feel difference is noticeable the moment the plate is held.
Avoid the novelty plates, the ones shaped like animals or sports logos or covered in rhinestones. They are a momentary amusement that becomes an embarrassment within a year. The same goes for the glow-in-the-dark plates, which stop glowing after a few months and then sit there looking like ordinary white plates that were left in the sun too long. A plain plate in a neutral color is the right choice for every room, and the money saved goes toward a nicer plate in a room that actually matters.
A Note on Turning Off the Power
Turning off the power for a cover plate replacement is unnecessary. The plate is not part of the electrical circuit, and no screw on the plate connects to anything live. That said, there is a specific scenario where shutting off the breaker is the smart move: when the existing screw is so corroded or stripped that prying or drilling becomes necessary. A drill bit slipping off a screw head can easily poke into the gap between the outlet and the box, which is exactly where live wires live. The few seconds it takes to flip the breaker are insurance against a bad moment.
The breaker for a specific outlet is usually labeled in the panel, but labels are often wrong. A non-contact voltage tester, a small pen-shaped tool that beeps near live wires, settles the question in seconds. Touching the tester to the face of the outlet and the screws on the outlet's sides reveals whether power is present. It costs about fifteen dollars and works for a lifetime. For anyone planning to do more than swap a plate, it is the single best tool to own.
The finished job should be invisible. The plate sits flush, the screw is snug, the color matches the room. A person walking into the room should not be able to tell that anything was replaced, because the new plate looks exactly like the old one did when it was new, decades ago. That is the quiet goal of the whole exercise: to restore a small piece of the home to its original state, without drama and without a trace of the work.