
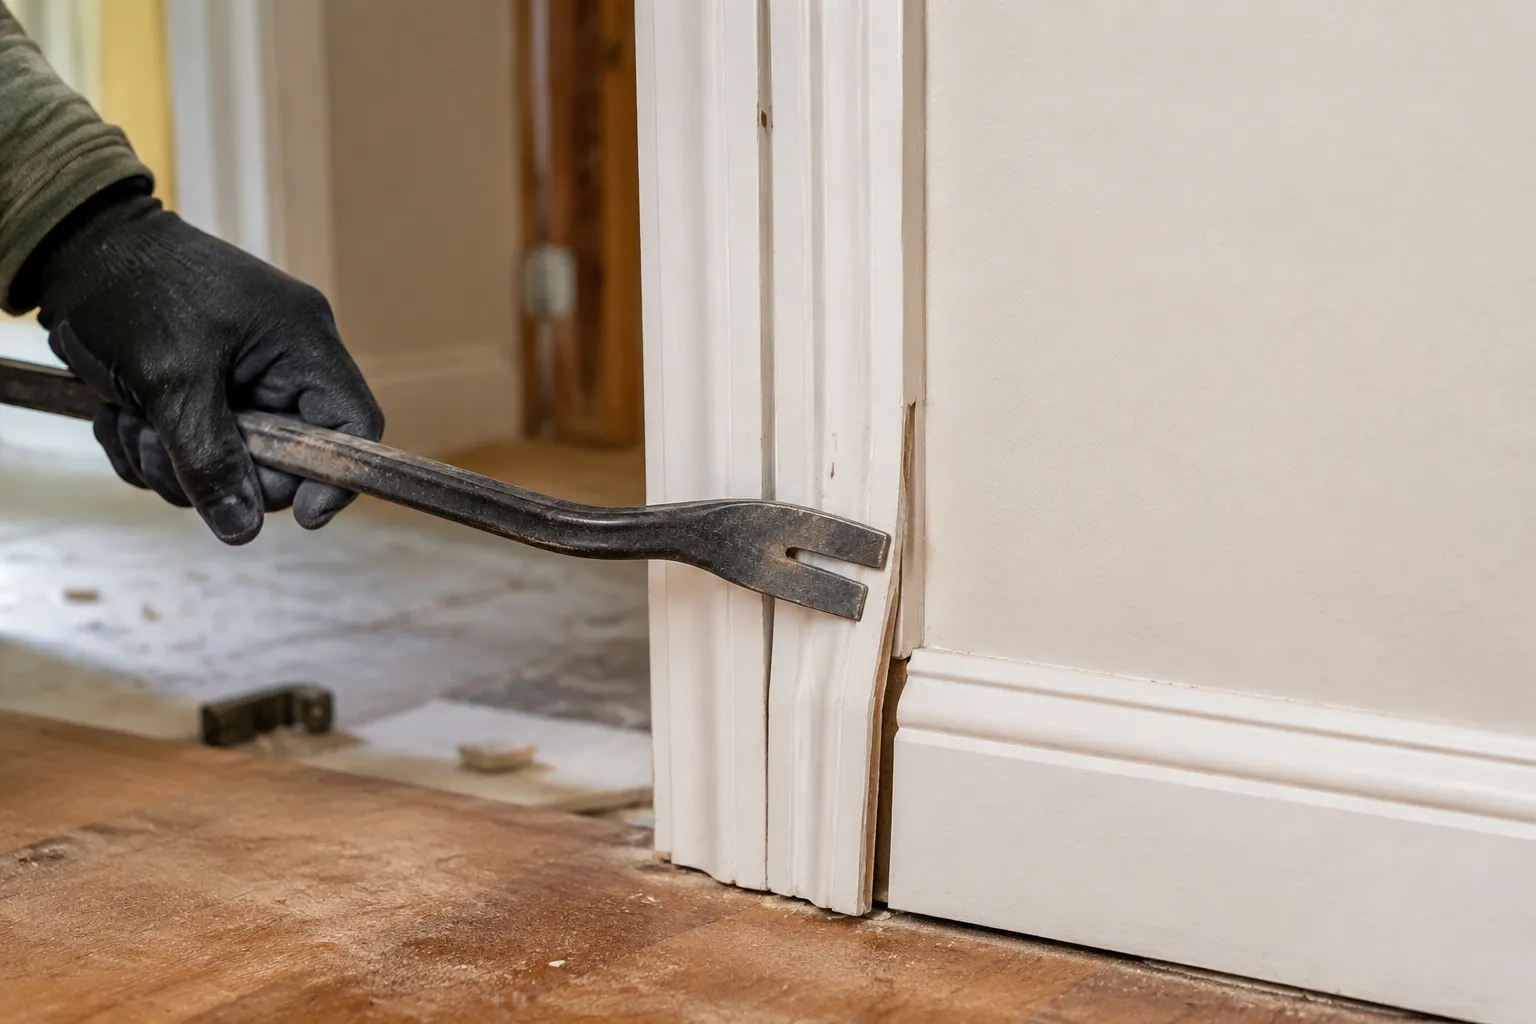
The pry bar has a branding problem. Walk down the tool aisle and the options divide into two camps: the crowbar, that hulking curved thing with a claw that looks like it belongs in a medieval siege, and the trim puller, a delicate little flat bar that snaps when a person actually leans on it. Neither one answers the question most homeowners actually have, which is how to pull apart something stuck without simultaneously destroying the wall it happens to be attached to.
That middle ground exists. It is a demolition tool that respects the surface it pries against, and it has been sitting in plain sight for decades. The flat pry bar, sometimes called a wrecking bar, sometimes a ripping bar, sometimes just a flat bar, is the tool that does the job. The catch is that most people buy the wrong length, use it the wrong way, or give up after the first pass because they expected it to behave like a crowbar. It does not behave like a crowbar. That is the point.
Crowbars are for breaking things. Flat pry bars are for separating things. The distinction sounds like semantics until a person has spent an afternoon trying to remove baseboard trim without gouging the drywall behind it. A crowbar's curved claw concentrates force into a small point, which is excellent for ripping nailed boards loose from studs and terrible for preserving the surface underneath. The flat bar spreads that same force across a wider face, and the angle of the bend changes where the pressure lands.
The Geometry That Keeps Drywall Intact
The defining feature of a flat pry bar is not the flat end, though that helps. It is the offset. The tool bends at a shallow angle, usually somewhere around 20 degrees, so the working end sits nearly parallel to the surface being pried. That shallow angle is what saves the wall. When the bar is pushed under a piece of trim and levered back, the force travels along the length of the trim board, not into the drywall behind it.
A crowbar's claw comes in at a much steeper angle, often 45 degrees or more. That steepness makes it a powerful lever but a poor surface protector. The claw digs in, lifts, and the pivot point becomes a dent in the wall. Flat pry bars avoid this by making the pivot point the tool's own body, which rests flat against the wall and spreads the load over several square inches instead of a single sharp edge.
There is also the matter of the fulcrum. A person using a flat bar correctly does not actually pry against the wall at all. The bar rests against the wall, sure, but the real fulcrum is the bar's own bend, which sits just above the surface. The lever action happens in the bar itself, not against the wall. This is why a properly used flat bar leaves the drywall untouched even when the trim is nailed on tight.
The practical result is that a person can remove baseboard, door casing, and window trim without a single patch job afterward. The drywall paper stays intact, the joint compound stays put, and the wall is ready for new trim or paint with zero repair work. That is the entire value proposition, and it is why the flat bar deserves a place in every basic toolkit.
Length Matters More Than Brand
The most common mistake is buying a bar that is too long. Hardware stores stock flat bars in lengths from 6 inches up to 36 inches, and the long ones look like they must be more powerful. They are more powerful, in the sense that a longer lever multiplies force. But they also destroy walls, because the extra length makes it nearly impossible to control the angle of the pry.
For trim removal, the sweet spot is 12 to 15 inches. This length provides enough leverage to pop most nails without requiring a person to put their full body weight on the tool, and it keeps the bar's angle shallow enough to protect the wall. A 12-inch bar fits in a tool belt, reaches into tight corners, and gives the user precise control over exactly where the force goes.
The longer bars have their place. A 24-inch flat bar is useful for pulling apart pallets, opening crates, and general demolition where the surface underneath does not need to survive. But for the specific job of removing trim and casing without wall damage, the shorter bar wins every time. Anyone who has wrestled with an 18-inch bar while trying to ease off a piece of quarter round knows the feeling of watching the bar flex and the drywall crumble simultaneously.
The other mistake is choosing a bar with a overly sharp edge. Some manufacturers grind the working end to a knife-like edge, which helps the bar bite into wood but also makes it bite into drywall. A slightly dull edge, one that is flat rather than sharp, slides under trim without digging into the wall when the angle goes wrong. The edge should be square, not sharpened.
The Technique of Working Along the Grain
Tool selection matters, but technique matters more. The same 12-inch flat bar that saves a wall in one pair of hands will wreck it in another. The difference comes down to how the bar is inserted and how the leverage is applied.
The correct approach is to start at one end of the trim piece and work along its length, not to attack the middle. The end of the trim board is where the nails are typically closest together, and it is also where the bar can get its first bite without bending the wood. A person slides the flat end under the trim at the bottom corner, taps it in with a hammer if necessary, and then pulls back gently on the handle.
Once the first section is loose, the bar moves a few inches along and repeats the process. The trim lifts gradually, nail by nail, with each section coming free in sequence. This approach distributes the stress along the board and keeps the trim from cracking, which matters if the goal is to reuse it.
Prying at the middle of a long board is the fast path to a splintered mess. The wood flexes, the nails hold, and the bar ends up gouging the wall because the trim does not give. Working from the end means the bar is always levering against a section of wood that has already been freed, so the force stays on the trim, not on the wall.
A piece of scrap wood or a shim placed behind the bar changes everything. This is the trick that separates people who do this work regularly from people who do it once and swear off the tool. Slip a thin piece of plywood or a plastic paint scraper between the bar and the wall, and the bar now pivots against the scrap instead of the drywall. The wall never even feels the pressure.
Why the Wonder Bar Deserves Its Name
One specific design deserves special mention, and it is the one that most often gets called a wonder bar. This is a flat bar with a notch cut into one end, shaped like a shallow V or a cat's paw. The notch is the secret. It allows the bar to hook around a nail head that is flush with the wood surface, which is a situation that stops every other pry bar cold.
Trim nails are almost always set below the surface with a nail set, precisely so a pry bar cannot grab them. The wonder bar's notch solves this by sliding over the nail head and biting into the wood around it. It pulls the nail out from the side, rather than trying to lift it from underneath, and it does so without requiring the wall to serve as a fulcrum.
This makes the wonder bar the best first tool for any trim removal job. The nail pops, the trim lifts, and the wall stays flat. The notch also works for pulling finish nails out of furniture, removing staples from wood, and extracting the occasional bent nail that refuses to come out cleanly.
The wonder bar is not perfect. Its short length, usually around 7 inches, limits leverage, and a person will sometimes need to switch to a longer bar for stubborn nails. But it is the right tool to start with, and it handles the majority of trim removal jobs on its own.
When the Wall Is Already Damaged
There is a common situation where the flat bar is the wrong choice, and it is worth naming it plainly. When the drywall is already crumbling, the paper is torn, and the joint compound is flaking off in sheets, the flat bar will not save the wall because there is nothing left to save. In that case, the goal shifts from preservation to removal, and a crowbar or a reciprocating saw becomes the better tool.
The flat bar is a preservation tool. It assumes the wall is worth keeping, which is true in most cases where a person is updating trim, replacing door casing, or fixing up a room rather than gutting it. But if the wall is beyond saving, the careful technique that makes the flat bar effective becomes unnecessary caution.
There is also the matter of painted shut windows and doors. A flat bar can wedge between the window sash and the frame to break the paint seal, and it does so without gouging the frame itself. This is a demolition-adjacent use that still respects the surfaces involved. The bar slides into the seam, twists slightly, and the paint pops free with a satisfying crack.
The Two-Bar System for Stubborn Nails
Even with the right technique, some nails refuse to budge. The nail is rusted, the wood is dense, or the nail was driven at an angle. This is where a second bar earns its keep. Using two flat bars together, one to hold the trim up and another to work along the length, gives a person the ability to maintain tension while moving down the board.
The process is simple. The first bar pries the trim up a quarter inch or so and stays in place, holding the gap open. The second bar slides in next to it, finds the next nail, and pops it. The first bar then moves ahead, and the pattern repeats. This keeps the trim under constant tension, which prevents the board from settling back down and re-engaging nails that were already loosened.
This two-bar method also prevents the trim from cracking. When a single bar is used, the trim flexes around the pry point, and the stress concentrates at the nearest nail. With two bars, the trim is held at two points, distributing the stress and allowing the board to come off in one piece.
The second bar does not need to be fancy. A cheap 10-inch flat bar works fine as the helper. What matters is that both bars have the same shallow offset angle, so they work together without fighting each other.
Sharpening and Maintenance That Keep the Edge Honest
Flat pry bars are simple tools, but they still need occasional attention. The working end will eventually round over, especially if it is used against concrete or brick. A rounded edge is less effective at sliding under trim and more likely to slip, which is when accidents happen. A few passes with a flat file restores the square edge in under a minute.
The trick is to file the edge flat, not sharp. Many people make the mistake of trying to restore a knife edge, which was never there in the first place. The factory edge on a good flat bar is a clean 90-degree corner, slightly broken, and that is exactly what should be maintained. Filing to a sharp edge makes the bar bite into drywall and wood alike, and it creates a tool that damages the very surfaces it is meant to protect.
Rust is less of a concern than a person might think. A light coat of oil on the bar prevents rust, but even a rusted bar can be cleaned with steel wool and returned to service. The tool is simple enough that it does not need much care, but the edge is the one part that should never be neglected.
Hammers and pry bars have a natural partnership. A hammer is needed to tap the bar under tight trim, and the bar does the pulling. The two tools together form a complete trim removal kit, along with a nail set for driving nails below the surface. A person with these three tools and a piece of scrap wood can remove and reinstall almost any trim in a house.
What the Flat Bar Does Not Do
The flat bar has limits, and respecting them keeps the tool from becoming a disappointment. It is not a nail puller in the traditional sense. The claw end, when it has one, is not shaped like a hammer's claw and will not grip a nail head the same way. For pulling nails that are proud of the surface, a hammer or a dedicated cat's paw is the right tool.
The flat bar is also not a scraper, though it gets used as one constantly. The edge is too thick for scraping paint or adhesive, and forcing it into that role will round the edge and make the pry bar worse at its actual job. A stiff putty knife or a proper scraper costs a few dollars and does the scraping task better.
It is not a chisel either, despite the temptation. The flat end can be driven into a seam with a hammer, and it works in a pinch for splitting wood or breaking a glued joint. But the bar is not hardened like a chisel, and repeated hammer blows will eventually mushroom the end. Once the end is mushroomed, the bar no longer fits into tight spaces, and the tool is effectively ruined.
The discipline of using the right tool for each task is what keeps a flat bar working for decades. A person who treats it as a precision instrument, using it only for prying and leveraging, will find it lasts a lifetime. A person who uses it as a scraper, chisel, and hammer all in one will replace it within a year.
The last thing the flat bar does not do is create a perfect result on every wall. Old lath and plaster walls behave differently from modern drywall. Plaster is brittle, and even the gentlest pry can crack it if the trim is nailed into the lath with long ring-shank nails. In those cases, a person may need to cut the nails with a reciprocating saw instead of prying, and no pry bar design will change that outcome.
For the vast majority of modern homes with drywall and standard trim nails, the flat bar delivers. It is the difference between a weekend spent patching and repainting drywall and a weekend spent installing new trim on a wall that looks like nothing ever happened. The tool is cheap, the technique is learnable in an afternoon, and the payoff is measured in rooms that do not need to be repaired before they can be improved.