
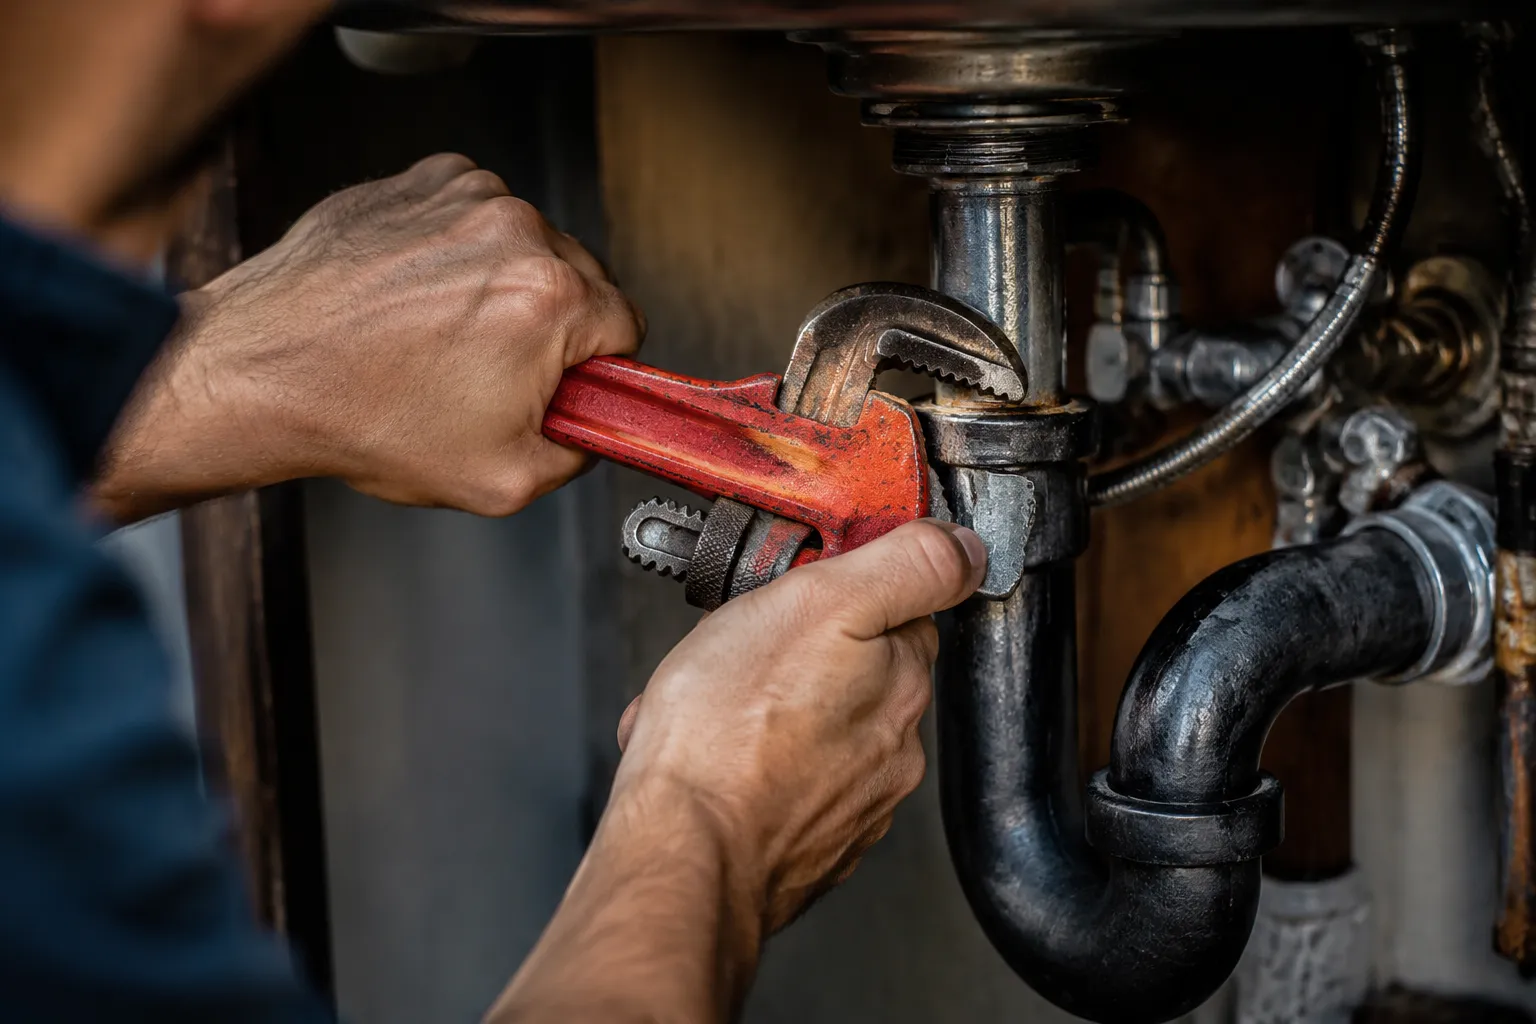
The pipe wrench is the most misunderstood tool in a plumber's bag. Most people treat it as a giant clamp: put it on the pipe, crank it down, and turn. That approach works until it doesn't, and when it fails, it fails loudly. The wrench slips, the pipe gets chewed, the knuckles meet the nearest edge. The problem is not the tool. The problem is the grip.
Good pipe wrench technique is less about strength and more about geometry. The wrench has one job: convert the force from a pair of arms into rotational torque on a round, often slippery, sometimes rusty surface. How that conversion happens determines whether a stubborn fitting gives way or whether the plumber spends the next hour filing down burrs. The grip is everything.
How the Jaw Actually Bites
The pipe wrench jaw is not a flat surface. It is a set of serrated teeth, usually cut at a specific angle, designed to bite into the metal of the pipe. Those teeth are the entire point of the tool. They are also, on most job sites, completely clogged with paint, rust, or old thread sealant.
Before any grip technique matters, the teeth need to be clean. A wire brush run across the jaw face takes ten seconds and changes the wrench from a smooth-jawed curiosity into a working tool. Plumbers who skip this step are fighting with one hand tied behind their backs. The teeth cannot bite through a layer of dried pipe dope.
The bite angle matters too. The jaw does not close parallel to the pipe like a vise. It closes at a slight angle, roughly 10 to 15 degrees off the centerline. That angle is deliberate. It lets the teeth dig in harder as more force is applied. A person who understands this can make a cheap wrench perform like a professional model. A person who ignores it will wonder why the wrench keeps slipping.
The Direction of Pull Rule
Every pipe wrench has a direction, and the direction is not negotiable. The bottom jaw, the one that pivots, must face the direction of rotation. If a person is turning a pipe clockwise, the bottom jaw should be pointing clockwise. Reverse it, and the wrench becomes a rounding-off tool.
This is the single most common error among people who pick up a pipe wrench once a year. They flip the wrench around, hook it on, and pull toward themselves. The jaw pops off. The pipe gets scored. The fitting stays put. Then they blame the tool or the pipe, when the real fault was the orientation.
Checking the direction takes one glance. Looking at the bottom jaw, if the pivot is on the left, the wrench turns left. If the pivot is on the right, it turns right. This rule never changes, regardless of pipe size or how much cheater pipe is attached to the handle. Get it wrong once and the lesson tends to stick.
Snap It, Do Not Crank It
The most common grip mistake is squeezing the handle as hard as possible before even starting the turn. People treat the pipe wrench like a pair of locking pliers. They clamp down until the teeth are buried, then they heave. This is wrong on two counts.
First, over-clamping distorts the pipe. On thin-walled copper or soft galvanized pipe, the teeth can crush the material inward, creating a weak spot that fails later. Second, over-clamping makes the wrench harder to release. When the fitting finally gives, the wrench is stuck fast, and the plumber has to hammer it loose.
The correct approach is a snap. The wrench goes on the pipe, the jaw is snugged up by hand, and the turning force is applied in a quick, controlled burst. The initial snap seats the teeth into the surface. After the first movement, the wrench can be reset and the process repeated. This is how experienced plumbers work a stubborn fitting: a series of small, sharp turns, not one long, grinding pull.
The Two-Hand Position
For a pipe that refuses to move, two hands are required. But where those hands go matters more than how much force they apply. The hand closest to the jaw is the guide hand. It should sit near the upper end of the handle, not on the jaw itself. The hand furthest down is the power hand. It does the pulling.
Many people put both hands at the bottom of the handle, stacked together. That gives maximum leverage but zero control. The wrench is more likely to slip off the pipe because the jaw is not being guided. The guide hand does not add force. It maintains the angle. It keeps the jaw seated. It feels the bite.
The power hand should pull, not push. Pulling brings the body's weight into the movement. Pushing relies on arm strength alone and tends to lever the jaw off the pipe. When a plumber pulls, the natural arc of the motion keeps the jaw digging in. This is the difference between a smooth, effective turn and a jerky, slipping mess.
Working With a Cheater Pipe
A cheater pipe is a length of steel slipped over the handle to extend it. It multiplies torque, which sounds great until someone realizes they have also multiplied the risk of rounding off the pipe completely. The grip technique changes when the handle gets longer.
With a cheater, the guide hand becomes even more important. The extra length amplifies any wobble. A slight misalignment at the jaw becomes a violent shake at the end of the pipe. The plumber needs to grip the handle closer to the jaw with the guide hand, almost cradling the wrench head, to keep everything steady.
Also, with a cheater, the snap technique is mandatory. A slow, steady pull with a long lever simply shears the teeth across the pipe surface. The snap, the quick burst of force, gets the teeth seated before the lever can do damage. Plumbers who learn this early can break loose fittings that look welded in place. Plumbers who skip it spend the afternoon with a hacksaw.
Gripping Different Pipe Materials
Not all pipe is the same, and the grip needs to adjust. Galvanized steel is hard and unforgiving. The teeth bite cleanly, but they also leave deep marks. A firm grip, snapped into place, works well. There is no risk of crushing galvanized pipe with a normal wrench.
Black iron pipe is similar but slightly softer. The teeth bite well. The risk is not crushing, but slipping, especially if the pipe has been painted. Scrape the paint off first, or the wrench will skate right over the surface.
Copper is a different game entirely. The thin wall means the pipe can be crushed with surprising ease. The grip should be light, almost delicate. The wrench is set, the teeth just touching, and the turn is made with a smooth, even pressure. A person who grabs copper pipe like it is steel will end up with a dented pipe and a leak.
Plastic pipe, such as PVC or CPVC, should rarely see a pipe wrench at all. The teeth will shred the surface. A strap wrench or a pair of channel locks is the right tool. But when no other option exists, the grip has to be feather-light, just enough to turn the fitting, and a piece of rubber or cloth should sit between the teeth and the plastic.
When the Pipe Is Round and Slippery
Old pipe gets smooth. Years of handling, moisture, and minor corrosion wear down the surface until the teeth have nothing to grip. A pipe wrench on polished pipe is like a tire on ice. Something needs to change.
The first option is to rough up the surface. A few strokes with a file or an angle grinder creates a fresh bite point. This is quick, permanent, and effective. The downside is that it damages the pipe, which matters if the pipe is going to be reused.
The second option is to give the teeth something to sink into. Wrapping the pipe in a strip of emery cloth or coarse sandpaper, grit side against the pipe, gives the teeth traction. The paper sacrifices itself, but the pipe stays intact. This trick works surprisingly well for chrome fixtures and other soft, finished surfaces.
The third option is the strap wrench, which is the right tool for smooth, round surfaces. It wraps around the pipe and grips by friction over a broad area. It will not damage chrome or polished brass, and it will not slip on a smooth surface the way a toothed jaw will. The trade-off is that a strap wrench cannot deliver the same raw torque as a pipe wrench. For a truly stuck fitting, it may not be enough.
The Adjustable Jaw Trap
Every pipe wrench has a threaded collar that adjusts the jaw opening. This collar is a trap. People fiddle with it constantly, loosening and tightening it in search of a perfect fit. That fiddling wastes time and sets up the next slip.
The collar should be set once, just slightly wider than the pipe, and then left alone. The wrench should drop onto the pipe with a small amount of play. The snap of the turn takes up that play and seats the jaw. If the collar is tightened down to the exact pipe diameter, the jaw has no room to bite, and the wrench will slip under load.
There is also the matter of the collar itself loosening during work. Vibration and turning force can spin the collar, widening the jaw. Checking the collar every few turns is part of the rhythm. A quick glance, a quarter turn of the collar if needed, and back to work.
The Stance That Saves Knuckles
Grip is not only about hands. The feet and body position determine whether the wrench stays put. A person standing directly in front of the pipe, pulling straight toward their body, has set up a collision course. When the fitting finally breaks free, the wrench comes flying back into their shins or chest.
The better stance is offset. Stand to the side of the pipe, with the body positioned so the pull direction is across the torso, not into it. This changes the failure mode. If the wrench slips, it moves away from the body, not through it. It sounds like a minor detail until the first time a stubborn fitting lets go.
Also, the legs should do the work, not the back. A pull that comes from the legs, with a slight bend in the knees, is stronger and safer. A pull that comes from the lower back, with straight legs, is a trip to the chiropractor. This is not about looking tough on a job site. It is about finishing the job and still being able to work the next day.
The Double Wrench Method
Some jobs require two pipe wrenches. This happens when a fitting must be loosened without twisting the pipe it is attached to, or when there is a union to break apart. The grip technique here is straightforward: one wrench holds the pipe, the other turns the fitting.
The holding wrench needs the same snap grip as the turning wrench. It is not just a passive anchor. It has to bite and hold against the torque of the second wrench. The two wrenches should be oriented so they pull in opposite directions, creating a balanced force that neither twists the pipe nor racks the joint.
For a union, both wrenches often need to be on the same piece, one on each side of the joint, pulling in opposite directions. The left-hand threads on a union mean the wrench direction rule flips. A person who forgets this will spend a long time tightening a union they are trying to loosen.
When to Use the Strap Wrench
There is a reason a strap wrench belongs in every serious toolkit, and it is not for the pipe wrench grip techniques discussed above. The strap wrench is for the jobs where a pipe wrench is too destructive. Polished brass, chrome, soft copper, plastic fittings, anything with a finished surface that must stay finished.
The grip on a strap wrench is entirely different. The strap wraps around the pipe, and the handle is pulled in the direction of rotation. The friction of the strap against the pipe does the work. There are no teeth, no bite, no snap. The force is smooth and continuous.
The common mistake with a strap wrench is not pulling the strap tight enough before turning. The strap needs to be snug, wrapped fully around the pipe, with no slack. A loose strap slips immediately. A tight strap grips like a handshake. The handle length determines the torque, so a person should match the strap wrench size to the job.
One more strap wrench tip: a rubber strap will leave black marks on light-colored pipe. Wrap the pipe in a thin cloth first, or accept the marks. Most plumbers accept the marks because the alternative, a scratched chrome fixture, is worse.
The Cold Galvanized Problem
Galvanized pipe that has been in service for decades develops a specific failure mode. The threads corrode and fuse with the fitting. The pipe itself becomes brittle. A pipe wrench grip that works on new pipe will crush or crack old galvanized pipe if too much force is applied.
The grip for old galvanized pipe is about finesse, not force. The wrench goes on, the snap is applied, and the plumber listens. A creak or a groan from the pipe means the metal is stressed. At that point, the plumber has a choice: apply heat or cut the pipe. Continued wrenching with a cheater pipe is how pipes split.
Heat is the better option. A propane torch applied to the fitting, not the pipe, expands the fitting and breaks the corrosion bond. The wrench grip stays the same, but the force required drops dramatically. Plumbers who learn this sequence, heat first, then snap, save themselves hours of frustration.
Grip Maintenance Keeps the Bite
The teeth of a pipe wrench wear out. It takes years of hard use, but it happens. When the teeth are worn smooth, no grip technique in the world will help. The wrench needs either new jaws or a trip to the scrap bin.
Replacement jaws are cheap and easy to install. A person can refresh a wrench in minutes with a screwdriver. This is not a repair job for a professional shop. It is routine maintenance, like changing the oil in a truck.
The pivot pin, the joint where the lower jaw swivels, also needs attention. It collects dirt and grit, which makes the jaw sluggish. A drop of oil on the pin, worked in by moving the jaw back and forth, keeps the action smooth. A smooth jaw seats faster and bites more reliably.
The handle takes abuse too. A bent handle destroys the geometry of the wrench. The jaw may look fine, but the angle is off, and the grip will slip. Straightening a bent handle by hammering it is a temporary fix at best. Replacement is the honest answer.
The Right Sized Wrench for the Pipe
A 24-inch wrench on a half-inch pipe is comedic and dangerous. The wrench has so much leverage that it can crush the pipe before the fitting even thinks about moving. A 10-inch wrench on a two-inch pipe is equally wrong. The jaws cannot open wide enough, and the user ends up forcing the tool.
The pipe wrench should match the pipe size. A 14-inch wrench handles most residential work, from half-inch to one-inch pipe. An 18-inch wrench covers the one-inch to one-and-a-half-inch range. The two-inch and larger pipe calls for a 24-inch or 36-inch wrench, usually with a cheater pipe for assistance.
Matching the wrench size is a grip technique in itself. The jaw opening, the handle length, and the weight of the tool all affect how the grip feels. A properly sized wrench feels balanced in the hand. An oversized wrench feels clumsy. An undersized wrench feels weak. The plumber who carries three sizes in the truck is not showing off. They are prepared.
The pipe wrench rewards attention. It is a simple tool with a specific geometry that must be respected. Clean the teeth, check the direction, snap the grip, and pull with the body. A plumber who does these things can break loose almost any fitting. One who does not will keep buying new wrenches, blaming the tool for what was always a grip problem.