
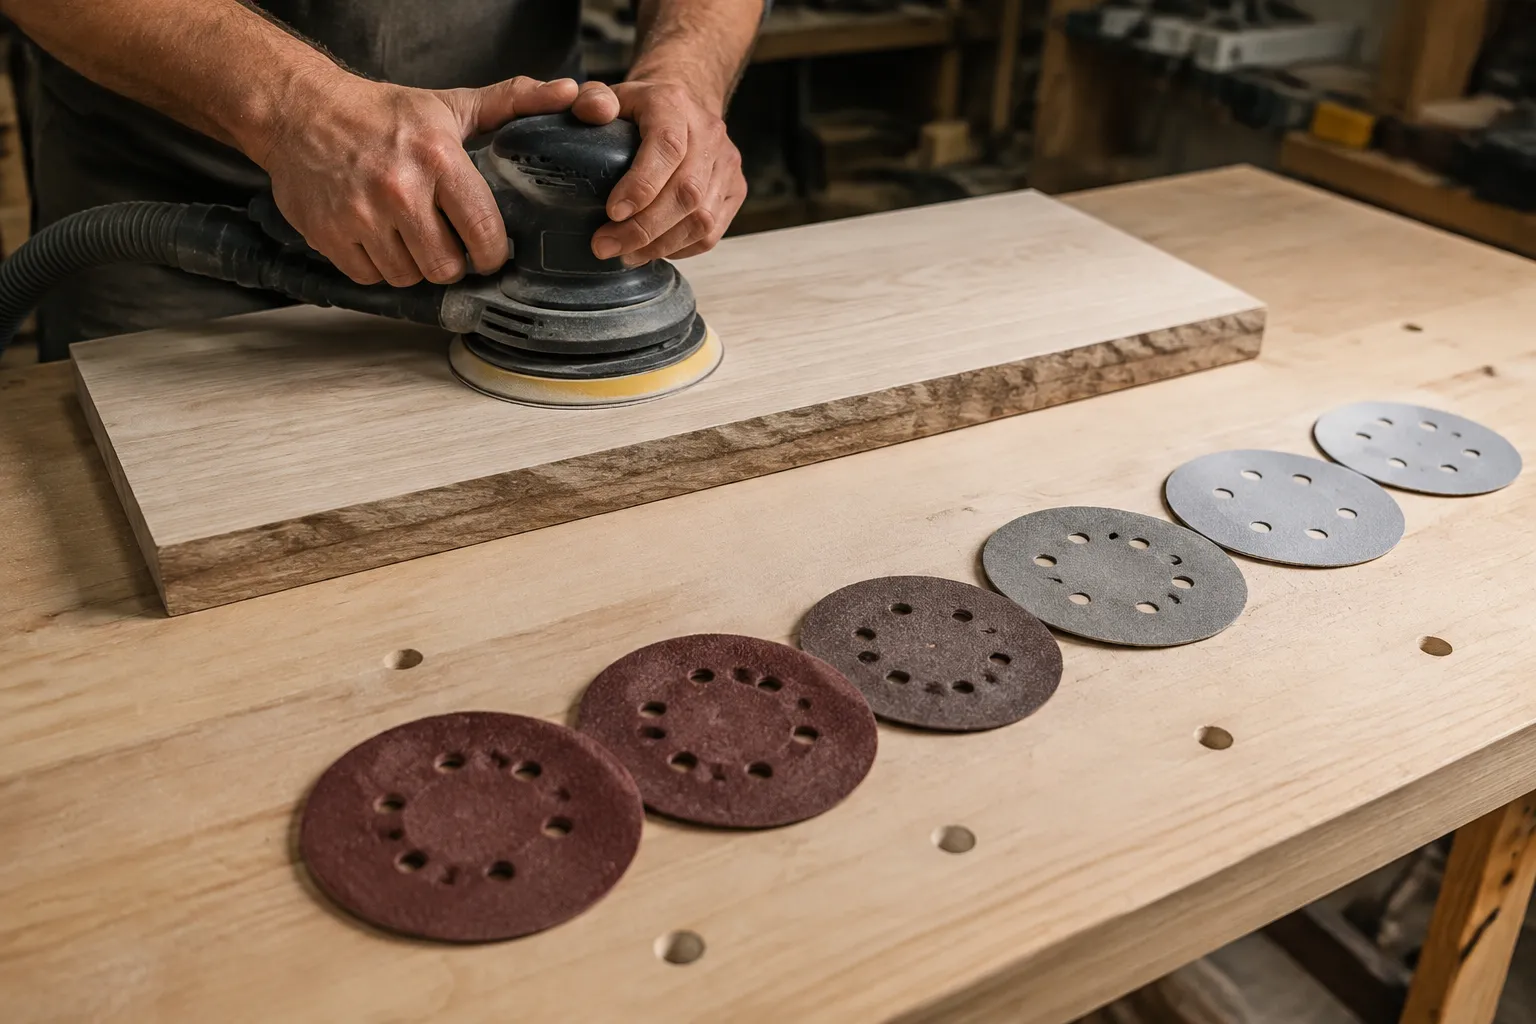
The flatness of a sanded surface is decided before the first disc touches the wood. Most people assume the sander does the flattening, that the tool's pad, spinning at 12,000 orbits per minute, will gradually erase the high spots if given enough time. That assumption is backwards. The sander only refines what the grit sequence establishes. Skip a step or rush through it, and no amount of final polishing will remove the damage. The grit sequence is not a suggestion or a ritual. It is the entire job.
Consider what an orbital sander actually does. It cuts with a random orbit, meaning the pad spins on its own axis while simultaneously moving in a small ellipse. The result is a scratch pattern with no directional lines, which is why the tool leaves a surface ready for finish. But the orbit also means the sander floats. The pad can rock slightly on its foam backing, tipping into valleys and skating over peaks. A coarse grit, say 60 or 80, cuts aggressively enough to knock down a high spot. Yet a fine grit, 220 or higher, barely touches the wood at all. It polishes whatever is already there.
So the sequence is a matter of subtraction. Each grit removes the scratches left by the previous one, and the depth of those scratches is determined by the size of the abrasive. A 60-grit scratch is a furrow. A 120-grit scratch is a groove. A 220-grit scratch is a hairline. The jump between them matters more than the starting point or the ending point. Go from 80 to 220 directly, and the 220 grit will spend its entire life trying to erase 80-grit furrows. It will fail. The surface will look smooth to a hand, but under a raking light, the valleys remain.
The standard sequence is 80, then 120, then 180, then 220. That is the beginner's path, and it works. But it is a blunt instrument. A person can do better by understanding where the wood starts and where it needs to end. If the surface is rough-sawn lumber, the sequence needs to begin at 60 or even 40 to strip the saw marks. If the surface is already milled flat with a jointer or planer, it can start at 100 or 120. The grit sequence is not a fixed law. It is a response to the material.
For a flat surface, the most important step is the one that gets the board flat in the first place. That is usually 80 grit on a random orbital sander, or 60 if the wood has real cup or twist. The coarse grit does the heavy lifting, and it does it fast. The temptation is to linger here, to keep sanding until the surface feels smooth under a palm. Resist that. The goal at 80 grit is not smoothness. It is flatness, a single plane with no visible high spots. Once the whole surface carries an even scratch pattern from coast to coast, the flatness is established. More time at 80 grit only deepens the scratches without improving the plane.
The 120-Grit Trap and the Hand Test
Moving to 120 grit is where most people make their first mistake. They sand, they feel the surface, they sand some more. The hand test feels smooth, so they move on. But the hand is a terrible instrument for detecting flatness. It detects roughness, which is a different thing entirely. A surface can feel glassy and still be riddled with low spots, waves, and subtle undulations. The palm registers texture, not geometry.
The better test is visual. Hold the board so a raking light, a bright light at a low angle, skims across the surface. The high spots catch the light as bright patches. The low spots sit in shadow. This is the only honest moment in the sanding process. At 120 grit, the surface should show an even, uniform sheen across its entire area. If there are bright patches, those are high spots that need more work. If there are dark patches, those are valleys that 80 grit did not reach. Go back down a grit and fix it. Do not try to fix a valley with 120 grit. That is like filling a pothole with a broom.
This is where a hard sanding block becomes valuable. A random orbital sander floats. A sanding block does not. For a genuinely flat surface, the coarse grit can be applied with the sander, but the intermediate grits benefit from a rigid block with the same paper. The block cannot follow a wave. It rides across the peaks and skips the valleys, which is exactly what a person wants when trying to establish a plane. The sander is for speed. The block is for truth.
Skipping Grits Saves Time, Then Costs More
Every skipped grit is a gamble. The rule of thumb is to never jump more than a factor of two in grit size. From 80 to 120 is fine. From 80 to 180 is a stretch. From 80 to 220 is a losing bet. The reason is simple arithmetic. A 220-grit particle is roughly one-third the size of an 80-grit particle. To erase an 80-grit scratch, the 220 grit must cut down to the bottom of that scratch. That means removing the entire top layer of wood between the scratches, which is far more material than the fine grit is designed to remove. The fine grit will do it eventually, but it will take ten times longer and load the paper with dust, and the heat from all that friction can scorch the finish or raise the grain.
Worse, a skipped grit often leaves a surface that looks uniform but is not. The fine grit cuts the peaks of the coarse scratches, rounding them off while leaving the valleys untouched. The result is a surface with a matte, even appearance under normal light, but a corduroy of microscopic ridges under a raking light or after a finish is applied. The finish, once it cures, shrinks slightly and reveals every valley that the sanding missed. This is the reason a tabletop can look perfect for a week, then show a ghost of waves after the finish has fully cured.
The time saved by skipping is measured in minutes. The time lost to re-sanding, stripping, and refinishing is measured in hours. A person who builds furniture for a living does not skip. A person who builds one piece a year might, and that is the person who ends up with a wavy top and a story about how the finish ruined it. The finish did not ruin it. The skipped grit did.
180 Grit and the Long, Boring Pass
The step from 120 to 180 is the most undervalued in the sequence. It does not feel like progress. The surface already looks smooth. The 180 grit seems to do nothing but make dust. But this is the step that actually prepares the wood for finish. It removes the last of the 120-grit scratches and leaves a scratch pattern fine enough that the finish will not telegraph through.
At this stage, the technique matters more than the grit. The sander should move slowly, overlapping each pass by half the pad's width. The speed should be deliberate, almost boring. A person who moves the sander quickly, like waxing a car, is only polishing the tops of the remaining scratches. The slow pass allows the abrasive to cut the full depth of the previous grit's pattern. This is the difference between a surface that passes the hand test and a surface that passes the finish test.
There is also the matter of dust. At 180 grit, the dust becomes fine enough to clog paper quickly. A clogged disc stops cutting and starts burnishing. The burnished spots become shiny patches that reject stain and finish. The fix is simple: change the disc more often than seems reasonable. A person should not try to get the last bit of life out of a 180-grit disc. The disc costs a dollar. The wood costs thirty. The time costs more than both.
220 Grit Is a Finish Decision, Not a Rule
Whether to end at 220, or go to 320, or stop at 180, is a question about the finish, not about the wood. A water-based polyurethane lays down a film that will magnify any remaining scratch pattern. That finish wants a surface sanded to 220 or higher. An oil finish, like tung oil or boiled linseed oil, penetrates the wood and does not magnify scratches the same way. That finish can stop at 180. A wax finish sits on the surface and offers no protection, so 320 is wasted effort.
The rule is simple: the more the finish magnifies, the finer the final grit should be. A person who sands to 400 and then wipes on a thin oil finish has done the work twice, because the oil will raise the grain and require a light sanding after the first coat anyway. A person who sands to 180 and then sprays a thick lacquer will see every scratch under the gloss. Match the final grit to the finish, not to some ideal of smoothness.
This is also where the orbital sander can be retired. The final pass, the one that determines the surface a finish will sit on, is better done by hand with a cork block and the same grit. The hand does not float. It presses evenly, and the block rides the plane that the earlier grits established. The sander's orbit, at this fine a grit, can leave a subtle swirl pattern that is invisible until a gloss finish is applied and viewed from an angle. A hand block leaves nothing but straight, even scratches that disappear into the wood.
The Reversed Sequence for Repairs
An existing surface that needs spot repair argues for a different approach. A scratch or a ding on a finished table cannot be fixed by starting at 80 grit on the entire top. That would sand through the finish and require a full refinish. The repair sequence goes the other way: start fine, then go finer, and confine the work to the damaged area.
A light scratch can often be buffed out starting at 320, then 400, then a rubbing compound. A deeper gouge needs the finish stripped in that spot, then the wood touched up, then a build of new finish, then a fine sanding of the new finish only. The grits still follow a sequence, but the sequence starts at the existing surface's level and moves down, not up. The principle is the same: each grit removes the previous one's scratches. The direction is just reversed.
The common error in repair work is to start too coarse. A person sees a visible scratch and reaches for 120 grit, then has to follow with 180, 220, 320, and 400 to erase the sanding marks, and still ends up with a dull patch where the surrounding finish is glossy. Starting at 320 or even 400, and accepting that the repair will take longer, preserves the surrounding material and leaves a patch that is invisible under normal light.
Paper Quality Changes the Math
All 120 grit is not the same. A cheap disc at a big-box store might use a softer abrasive that dulls in thirty seconds, effectively turning a 120-grit disc into a 180-grit disc halfway through the pass. That changes the sequence without the user knowing it. The solution is to buy paper from a brand that publishes its abrasive type, usually aluminum oxide or ceramic, and to replace discs the moment they stop cutting cleanly. A worn disc at 80 grit does not become a 120-grit disc. It becomes a burnisher, and a burnisher leaves a glazed surface that no subsequent grit can fix without starting over.
The cost difference between a cheap disc and a good disc is a few cents. The cost of a ruined surface is the entire project. There is no sequence, no matter how carefully chosen, that survives a disc that quit cutting halfway through.
A final note on technique, because the sequence is only half the story. The sander should be in motion before it touches the wood, and it should be lifted off the wood before it stops. This prevents the pad from leaving a divot or a swirl mark at the edges of the pass. The sander should never be pressed down. The weight of the tool is enough. Pressure beyond that only slows the orbit, heats the surface, and loads the paper. A person who lets the tool do the work, who changes discs at the first sign of dullness, and who trusts the sequence rather than the hand test, will end up with a surface that takes finish evenly and looks flat under any light. Everyone else ends up with a story about how the finish blushed or the stain went blotchy. The finish was fine. The sequence was wrong.