
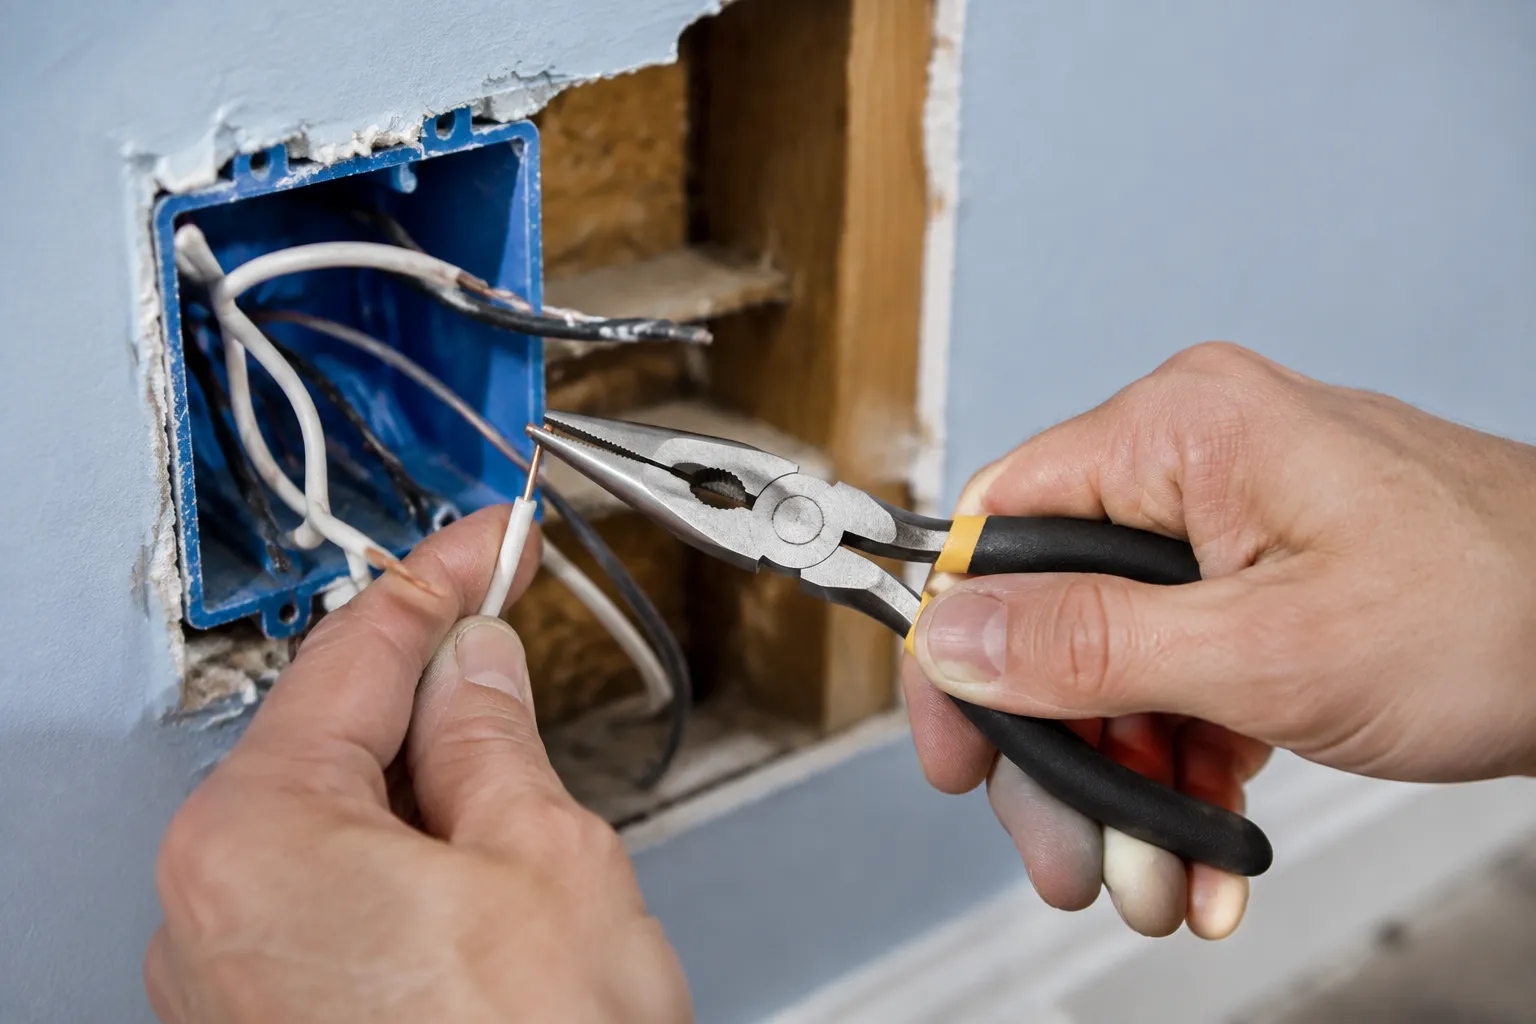
The needle nose plier is the most misunderstood tool in the home electrical box. People buy a cheap pair, use them to yank a staple out of a baseboard, and then wonder why the tips snap off when they try to bend a 12-gauge wire loop. The tool is not a pry bar, a hammer, or a mini bolt cutter. It is a precision instrument for gripping, bending, and shaping wire, and once that distinction lands, every wiring task in the house gets noticeably easier.
The problem starts with the hardware store display. There are a dozen pliers hanging on the pegboard, and they all look similar enough. A person grabs the cheapest one, often one with a vinyl grip that slides around in the hand, and brings it home. The first task is usually something like pulling a wire through a tight junction box. The pliers get used as a lever, the tips get twisted, and the tool is ruined within an afternoon. The home wiring tasks that actually need needle nose pliers are delicate, precise operations, not demolition work.
Choosing a Pair That Will Not Bend on the First Job
Before any technique matters, the tool itself has to be right. A good pair of 6-inch needle nose pliers for electrical work costs between fifteen and thirty dollars, and the difference between that pair and a five-dollar special is visible in the jaw. Look at the tip of the pliers. If the metal looks thin and flat, almost like a butter knife edge, the tool is going to flex under load. A quality pair has a thicker cross-section at the tip, even on the narrowest point, because the steel is forged and tapered properly.
The cutting edge matters too, even for pliers that are mostly used for bending. Most needle nose pliers have a side cutter built into the jaw, and a good one will shear through solid copper wire cleanly. The cheap ones crush the wire and leave a jagged edge that snags on the inside of a wire nut. A person should be able to close the pliers and hold them up to the light. If light passes through the cutting edges, the tool is not closing properly, and it will never cut cleanly.
The handle is the last consideration, and it is the one people get wrong. The hard plastic dip handles that come on most cheap pliers are slippery when a hand is sweaty or when the pliers are oily. The better option is a pair with cushioned grips that have some texture, or even bare steel handles for a person who wants maximum feel. The grip should not be so thick that a person loses the tactile feedback from the wire. Bending a loop is a feeling task, not a seeing task, and the handle transmits every little shift in the metal.
The Wire Loop: Shape It in Three Moves, Not One
The most common home wiring task is making a loop at the end of a wire so it can hook around a screw terminal on a switch or receptacle. Most people try to do this in a single motion, clamping the wire and twisting the pliers around like a crankshaft. The result is a loop that is egg-shaped, off-center, or worse, nicked where the pliers slipped. The better method takes three distinct moves and produces a loop that looks like it came from a factory.
First, strip about three-quarters of an inch of insulation from the wire. Then clamp the pliers on the bare copper at the very end, leaving about an eighth of an inch of wire poking past the jaws. The pliers should be perpendicular to the wire. Second, push the pliers forward, rolling the wire over the jaw in a quarter turn. The wire should now be bent at a right angle, with the short section pointing perpendicular to the long run. Third, release the pliers, reposition them on the short bend, and continue rolling the wire around the jaw until the loop closes.
The trick is that the loop is formed in two stages, not one. The first bend sets the radius, and the second bend completes the circle. A loop made this way sits flat against the screw terminal, and when the screw is tightened, the wire wraps around the shaft rather than pushing out sideways. The loop should be closed enough that the screw passes through it, but not so closed that the wire overlaps itself. About 80 percent closed is the sweet spot, and the screw does the rest.
One habit worth adopting is using the pliers to grab the wire near the insulation, not just the bare copper. This prevents the insulation from splitting back and leaves a clean, professional look inside the box. The pliers should grip the insulation gently, just enough to hold the wire steady while the other hand does the bending. A pair of pliers with a longer jaw makes this easier because there is more surface area to hold the wire without crushing it.
Tight Spaces: The Plier as an Extension of the Fingers
Junction boxes in older homes are cramped, and the wires inside are stiff. A person cannot always get two hands into the space, and sometimes even one hand barely fits. This is where needle nose pliers earn their name. The long, narrow jaws reach into a box and grab a wire that is tucked against the back wall, pulling it forward just enough to work with it.
Using the pliers this way requires a light touch. The jaws are strong when gripping along their full length, but weak when used at the very tip. A person who clamps down hard at the tip to pull a stubborn wire will eventually bend the jaws out of alignment. The better approach is to grip the wire as deep in the jaws as possible, close to the pivot, and pull straight back toward the body. This uses the strongest part of the tool and keeps the tips true.
Another tight-space task is feeding a wire through a knockout hole in the back of a metal box. The wire has a curve at the end from the coil it came off of, and that curve fights the person trying to push it through. The pliers can straighten the first two inches of wire, giving the end a slight, deliberate bend that acts as a guide. The wire then slides through the knockout with far less resistance, and the pliers can reach back through the opening to grab the wire from the other side if needed.
There is also the matter of removing a wire that is stuck in a terminal. Sometimes a screw was over-tightened and the wire is crushed, locking it in place. The needle nose pliers can grip the wire right at the terminal screw, wiggling it gently side to side while the screw is loosened. This takes the strain off the wire and prevents the copper from breaking off inside the terminal, which is a much larger problem to fix.
Bending a Hook for the Ground Screw
The ground wire on a receptacle or switch gets its own special treatment, and it is where many home wiring jobs fall apart. The ground wire is often bare copper, and it is stiffer than the insulated wires because it has no insulation to help it flex. Bending a loop in a 12-gauge bare copper wire with the wrong technique leaves a twisted, ugly mess that does not sit correctly under the green screw.
The technique is the same as the standard wire loop, but with more care taken on the first bend. Bare copper work-hardens quickly, so the wire resists bending after the first few attempts. A person who keeps repositioning the pliers and re-bending the wire will eventually create a weak spot that snaps. The loop needs to be formed in one continuous action, from the first bend to the closed circle, without stopping to check the angle.
A trick that helps with the ground wire is to grip the wire with the pliers and give it a slight twist before making the loop. This pre-stresses the copper evenly and makes the subsequent bends smoother. The twist should be subtle, just a quarter turn, not a full rotation. The result is a loop that has a slight spiral to it, kind of like the thread of a screw, which actually helps it seat better under the terminal screw.
Pulling Wire Through Conduit Without Tearing the Tips
Pulling wire through a short piece of conduit is a task that tempts people to use the pliers as a handle. The wire gets clamped at the end, a person wraps a finger around the pliers, and pulls hard. This is a fast way to ruin a pair of pliers, and it is also dangerous if the wire slips, because the pliers can snap back and hit the person in the face.
The right way to pull wire with needle nose pliers involves a fish tape or a pull string, and the pliers are used only to attach the wire to the pull medium. The wire is stripped back an inch, the pliers bend it into a hook, and that hook is looped through the eye of the fish tape. The pliers then close the hook tightly so the wire cannot slip out. The pulling action happens on the fish tape, not on the pliers. This keeps the tool out of the high-tension part of the job and preserves the jaw alignment.
For a short, straight conduit run, a person can get away without a fish tape. The pliers give the wire a long, straight section at the end, kind of like a spear, and push it through the conduit. The trick is that the wire should be pushed, not pulled. The pliers grip the wire, and the person pushes the pliers forward, feeding the wire into the conduit. This works because the pliers are held in compression, which is a much safer load for the tool than tension. The tips do not flex, and the pliers stay aligned.
Twisting Solid Wires Together Before the Wire Nut
There are two schools of thought on wire nuts. One school says to twist the wires together with pliers first, then screw on the nut. The other school says just put the nut on and let it do the twisting. For solid wire, the first school is correct, and the needle nose pliers are the right tool for the job.
Holding two or three 14-gauge solid wires side by side is awkward with the fingers, especially in a tight box. The pliers grip all the wires together near the end, holding them parallel so they line up. The wires are then twisted together, but not too tightly, just enough to make the bundle act as a single unit. The twist should be smooth and even, not kinked. The pliers make this possible because they hold the wires in a straight line while the twist develops.
The pliers are also useful for a final check after the wire nut is on. A person can grab the nut with the pliers and give it a firm tug to make sure it is seated. If the nut spins freely or slides off, the connection is bad and needs to be redone. This is a quick test that takes two seconds but prevents a common failure point in home wiring.
The Cutting Edge: When to Use It and When to Leave It Alone
The side cutter on a needle nose pliers is a useful feature, but it is not a replacement for a dedicated wire stripper or diagonal cutting pliers. The cutter is meant for trimming the end of a wire that is already stripped, nipping off a small piece of copper to get a clean end. It is not meant for cutting through a bundle of wires or cutting a nail.
When cutting solid copper wire with the side cutter, the pliers should be held perpendicular to the wire, and the cut should happen in one clean squeeze. A person who rocks the pliers back and forth while cutting will eventually chip the cutting edge. The cut end should be square and clean, not pointed or crushed. If the wire looks flattened after the cut, the cutting edge is dull, and the tool is due for replacement.
There is one cutting task where needle nose pliers are actually better than a dedicated cutter, and that is trimming a wire flush inside a crowded box. The long nose reaches into the box, positions the cutting edge right at the terminal, and snips off the excess wire without disturbing the neighboring connections. A diagonal cutter is bulkier and harder to angle in that situation. This is a legitimate use of the side cutter, and it solves a problem that no other tool handles well.
Straightening Kinked Wire Without Creating a Weak Spot
Wire that has been coiled for storage comes off the spool with a natural curve, and wire that has been roughly handled gets kinks. A kinked wire is weaker at the kink, and when it is bent again, it is more likely to break. The needle nose pliers can fix a kink, but the technique matters.
The pliers grip the wire on either side of the kink, and the person gently bends the wire back in the opposite direction of the kink. The key word is gently. A person who snaps the wire straight with force will stretch the copper and make the weak spot worse. The right approach is a series of small bends, each one restoring a little more of the original straightness. The pliers move along the wire, working out the kink over an inch or two of length.
This is not a task where the pliers should be used as a hammer or a lever. It is a shaping task, and the pliers are the shaping tool. The wire should end up straight and smooth, with no visible marks from the jaw edges. If a person sees jaw marks in the copper, the grip was too hard, and the wire has been weakened. A light touch is the whole game here.
Reading the Wear: When a Pair Is Done
A needle nose pliers wears out in three ways, and each one is easy to spot. The first is jaw misalignment, where the tips no longer meet evenly. This happens from using the pliers as a pry bar or from dropping them on a hard floor. The second is a rounded or chipped cutting edge, which makes every cut look crushed. The third is a loose pivot joint, where the pliers have side-to-side play when held closed.
Any of these conditions means the pliers need to be replaced. A misaligned jaw will not grip a wire securely, and it will slip at the worst moment. A dull cutter is dangerous because the user is tempted to press harder and rock the tool. A loose hinge makes precise bending impossible. The five-dollar pair may fail in a month, while the twenty-dollar pair may last a decade, but both eventually wear out.
The last thing worth noticing is the feel of a good pair in the hand. A well-made needle nose pliers has a pivot that moves with almost no resistance, a jaw that closes with a satisfying click, and tips that meet perfectly. When a person picks up a worn-out pair after using a good pair, the difference is unmistakable. That moment of comparison is the best argument for buying quality in the first place.