
The cheap multimeter in the drawer is the most underused tool in the modern home. Most people own one because a partner bought it, or because it came in a kit, and it sits there with the spare batteries and the screwdriver that never fits anything. That is a shame, because a $20 meter can diagnose more household problems than any other single tool, and it does it in seconds. The trick is knowing what to touch and what the numbers actually mean.
Forget the fancy features for a moment. The average DIYer does not need data logging or Bluetooth or a backlit screen with a bar graph. The essential functions are continuity, resistance, and AC voltage. Everything else is gravy. A person who masters those three settings can fix a lamp, find a dead outlet, check an appliance cord, and stop replacing light switches that were never broken in the first place.
The Continuity Test Is the First Thing to Learn
Continuity is the simplest and most powerful function on the meter. It checks whether electricity can travel from one probe to the other through whatever is in between. Most meters beep when the circuit is complete, and silence means a break. That beep is worth more than any other sound in home repair.
Start with the power cord on a lamp that stopped working. Unplug it first, always. Touch one probe to the metal prong at the plug and the other to the screw terminal inside the lamp socket. If the meter beeps, the wire is good. Move the probe from the prong to the other socket terminal and test again. A lamp that fails both tests has a broken wire or a bad socket. A lamp that passes both tests has a bad bulb or a faulty switch, and that is a much cheaper problem to solve.
The same test works on extension cords, appliance cords, and speaker wire. A cord that has been pinched behind a refrigerator or chewed by a pet will fail continuity somewhere along its length. Wiggling the cord while the probes are in place often finds the exact break, because the beep cuts in and out as the wire flexes. That is a diagnosis no visual inspection can match.
There is one caution worth remembering. A continuity test only works on unpowered circuits. Touching the probes to a live wire with the meter set to continuity will blow the fuse inside the meter, and possibly worse. The routine is always the same: unplug, test, confirm silence, then proceed.
Resistance Readings Tell a Fuller Story
Continuity gives a yes or no answer. Resistance gives a number, and the number matters. A heating element in a dryer or oven should show a specific resistance range, not just a closed circuit. A motor winding that reads near zero ohms is shorted. A winding that reads infinite resistance is open. Either way, the part is bad.
The most common home use for resistance is checking a heating element. An electric oven that does not heat but still has a working control panel likely has a burned-out bake element. The element is visible in the bottom of the oven, and the two terminals are right there on the back. With the oven off and the breaker off, a probe on each terminal should show somewhere between 20 and 60 ohms for a typical 240-volt element. An infinite reading means the element has broken internally, which is what happens when those little hot spots burn through.
Dryer elements work the same way, though they are tucked behind the drum and require a bit more disassembly. The resistance range is similar, and the diagnostic value is identical. A person who can read resistance on a dryer element has just saved a service call that would cost more than the meter, the new part, and a pizza combined.
Resistance also catches the intermittent failure that continuity misses. A wire that measures 5 ohms when it should measure 1 ohm is corroded or partially broken. It will pass current for a while, then overheat and fail. Heat guns, hair dryers, and vacuum cleaners with worn cords often show this on the resistance scale. The number tells the truth even when the beep says things are fine.
AC Voltage Checks Separate Dead from Dangerous
AC voltage is the setting that makes most beginners nervous, and rightly so. The stakes are higher. But the basic test is simple, and it answers a question that plagues every homeowner: is power reaching this point or not?
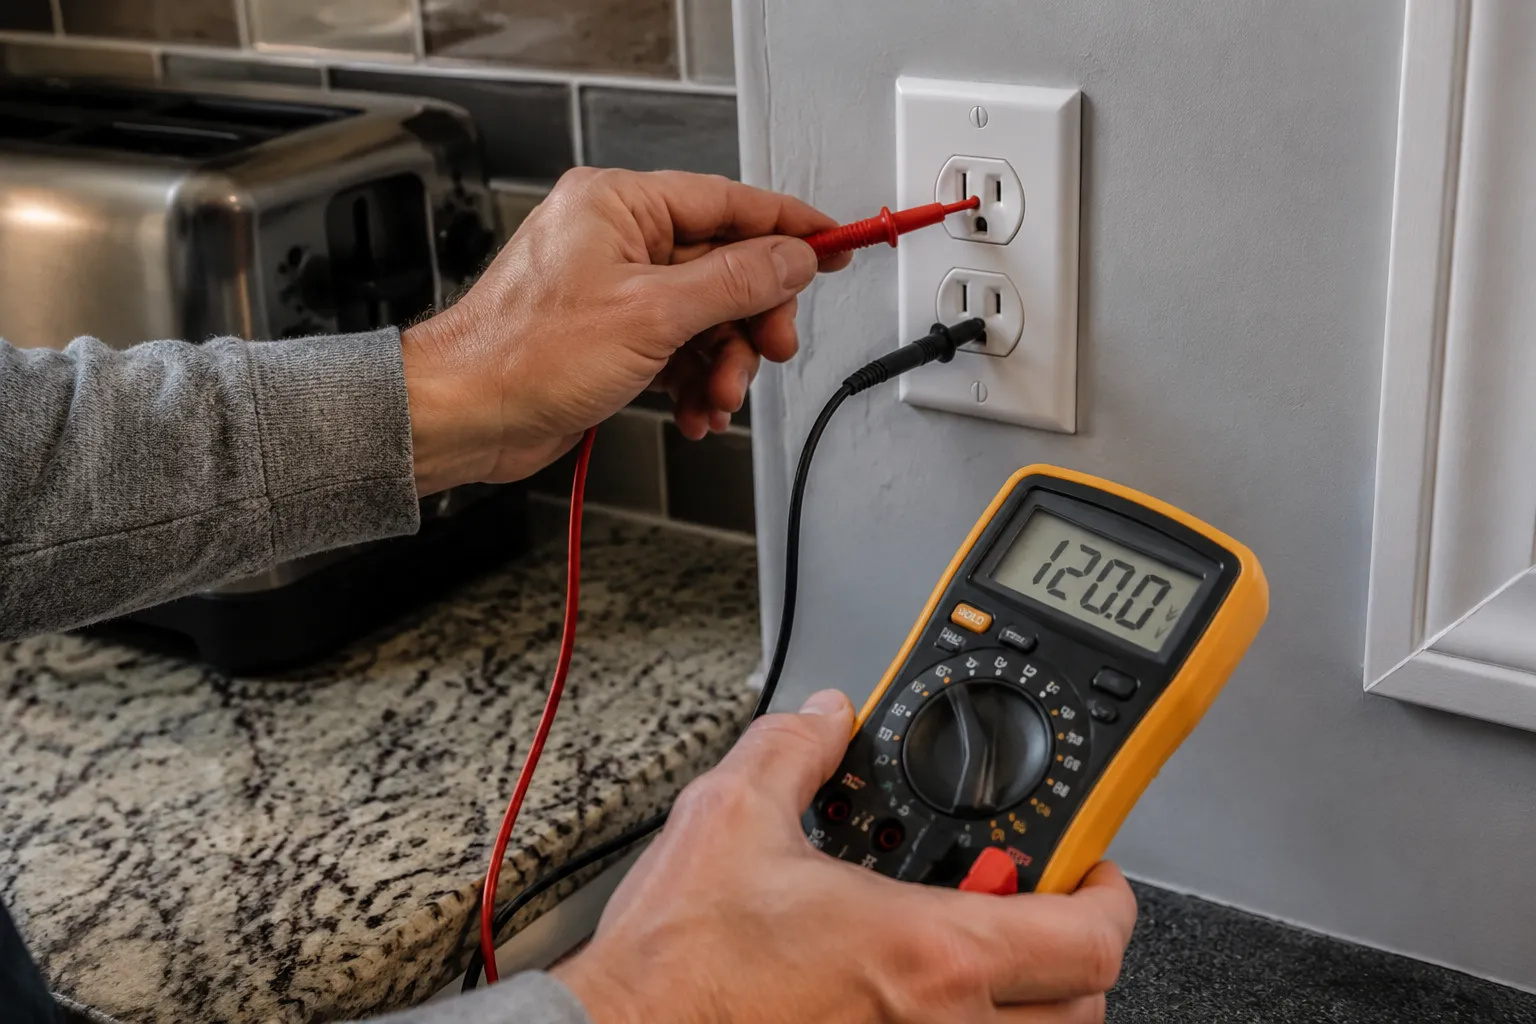
Set the dial to AC voltage (usually marked with a V and a wavy line) and choose a range above 120 volts. Insert the black probe into the common jack and the red probe into the voltage jack. Touch the probes to the two slots in a wall outlet, and the display should read somewhere between 110 and 125 volts. A reading of zero means the circuit is dead, or the outlet has a bad connection, or the breaker tripped. A reading of, say, 80 volts means something is loose, and that outlet needs attention now.
The same test works on light switches and ceiling fixtures. A switch that controls a dead light can be tested by touching the probes to the two screw terminals on the side of the switch. With the switch in the on position, the meter should read line voltage. If it reads nothing, the power is not reaching the switch at all, which points back to the breaker panel or a junction box somewhere in the wall.
One number that surprises people is the reading at a half-switched outlet. Some rooms have outlets where one socket is always on and the other is controlled by a wall switch. Testing both sockets is the fastest way to figure out which is which, and it saves the frustration of plugging a lamp into the wrong socket and blaming the wiring.
Voltage testing also finds the phantom problem of an overloaded neutral. If a circuit reads, say, 95 to 105 volts instead of 120, that often means the neutral wire has a poor connection somewhere. The appliances on that circuit still work, but they work poorly and can be damaged over time. Low voltage is not a number to ignore just because something runs.
A Non-Contact Tester Is the Companion Tool
Every multimeter owner should also own a non-contact voltage tester, the little pen-shaped tool that beeps when it gets near a live wire. These cost around $15 and are not a replacement for the multimeter. They are the first line of defense, the tool used to confirm a wire is dead before working on it.
The non-contact tester works by sensing the electric field around a live conductor. It does not need to touch bare metal. Hold it near a wire, a socket, or a switch plate, and it lights up or beeps if voltage is present. This is the tool to use when opening up a junction box or pulling a switch out of the wall, because it answers the question "is this safe to touch" in one hand, without fumbling for probes.
The multimeter then does the deeper work. A non-contact tester says a wire is live. The multimeter says exactly how live, and whether the reading is stable. It also says whether a wire that should be live has gone dead, which the non-contact tester sometimes misses on a weak circuit. The two tools work as a team, and neither one fully replaces the other.
One caution about non-contact testers: they can give false positives near two conductors carrying opposing currents, like the two legs of a 240-volt circuit, or near a wire that runs close to another live wire. They can also fail to detect a shared neutral with a small load. The multimeter is the authority. The pen is the screening tool.
Testing Batteries and Small Power Supplies
Battery testing is the gateway diagnostic. Every home is full of devices that refuse to work until the batteries are swapped, and the swap always costs a trip to the drawer for the last AA in the house. The multimeter settles it in seconds.
Set the meter to DC voltage (marked with a V and a straight line or dashed line) and choose a range above the battery voltage. A fresh AA battery reads about 1.5 volts. A battery that reads 1.2 volts is still usable. A battery that reads under 1.0 volt is dead, even if the meter shows something. The reading under load matters more than the resting voltage, but for a quick check, the unloaded reading is enough to sort the good from the bad.
The same method tests 9-volt batteries, which are notorious for reading fine on the meter but dying under the load of a smoke detector. A 9-volt that reads 8.5 volts unloaded may still work in a smoke detector, but a reading below 8 is a clear signal to replace it. Smoke detectors should have their batteries changed on a schedule anyway, not on a meter reading.
Wall adapters and phone chargers can be tested at the output end. A 5-volt USB charger should read close to 5 volts between the outer shell and the inner pin. A charger that reads 3 volts or less is failing and will charge a phone slowly or not at all. This test catches the difference between a worn cable and a dying charger, which saves the money spent on three new cables before finally replacing the brick.
Reading the Fuse Box Without Guessing
A tripped breaker is the easiest diagnosis in electrical work, but a breaker that trips repeatedly needs more than a reset. The multimeter can help find the cause.
The first check is to confirm the breaker is actually delivering power when it is reset. Remove the panel cover and touch the probes to the breaker terminal and the neutral bar. A healthy 120-volt breaker reads 120 volts. A breaker that reads zero is failed internally, which happens more often than people think, especially on older panels. A breaker that reads 120 volts at the terminal but trips again when a load is plugged in is a different problem, usually a short in the wiring or the appliance itself.
Chasing a short circuit with a multimeter requires patience. The process is to unplug everything on the circuit, reset the breaker, and see if it holds. If it holds, plug in devices one at a time until the breaker trips. That identifies the guilty device. If the breaker trips with nothing plugged in, the short is in the wiring, and that is a job for a licensed electrician.
The multimeter also checks for voltage at the panel even when the main breaker is off, which is a warning sign that should never be ignored. A panel that reads voltage with the main off has a serious problem, possibly a back-fed circuit or a failed main breaker. That is not a DIY repair.
The Meter Finds the Costly Water Heater Fault
Water heaters are a common multimeter success story. When the tank stops producing hot water, the usual suspects are the upper heating element, the lower heating element, or the thermostat. All three are testable with a resistance reading.
Turn off the breaker to the water heater first. Remove the access panel at the top and the bottom, and peel back the insulation to expose the elements. Most residential elements read between 10 and 20 ohms. An element that reads infinite resistance is burned out. An element that reads zero ohms is shorted. Either way, a $20 part and an hour of work replaces a $300 service call.
The thermostat is tested with continuity. With the power off, disconnect the wires and check across the thermostat terminals. A thermostat that should be closed, calling for heat, should read near zero ohms. A thermostat that reads infinity when it should be closed is stuck open. Replacing a thermostat is slightly fiddlier than replacing an element, but it is still within reach of a careful DIYer.
This one diagnostic path pays for the multimeter many times over. The parts are cheap, the test is definitive, and the alternative is a service technician who will charge a diagnostic fee just to open the same panels.
Making the Meter a Habit, Not a Specialty Tool
The multimeter earns its place in the drawer only when it gets used on the small problems. The lamp that flickers, the outlet that occasionally drops power, the extension cord that heats up, all of these are meter jobs that prevent larger failures. A flickering lamp that tests fine at the socket and fine at the plug points to the switch, and a bad switch is a $5 part. Without the meter, that same lamp gets thrown out, or worse, the wiring gets blamed and a professional gets called for a problem that was never in the wall.
The habit is simple. When something electrical misbehaves, the meter comes out before the screwdriver, not after. It takes thirty seconds to test continuity on a cord, a minute to check voltage at an outlet, and two minutes to probe a heating element. That is less time than it takes to drive to the hardware store, and it is the difference between a diagnosis and a guess.
The final piece of advice is to keep the meter where it is visible. A tool buried in a toolbox is a tool that never gets used. Hang it on a pegboard, keep it in the kitchen junk drawer, put it next to the light bulbs. The value of the multimeter is not in its specifications or its brand name. The value is in the number of trips it saves to the store, the number of parts it keeps a person from buying that were never broken, and the quiet confidence of knowing that a dead outlet is dead at the breaker, not dead somewhere in the wall. That confidence is worth the price of admission alone.