
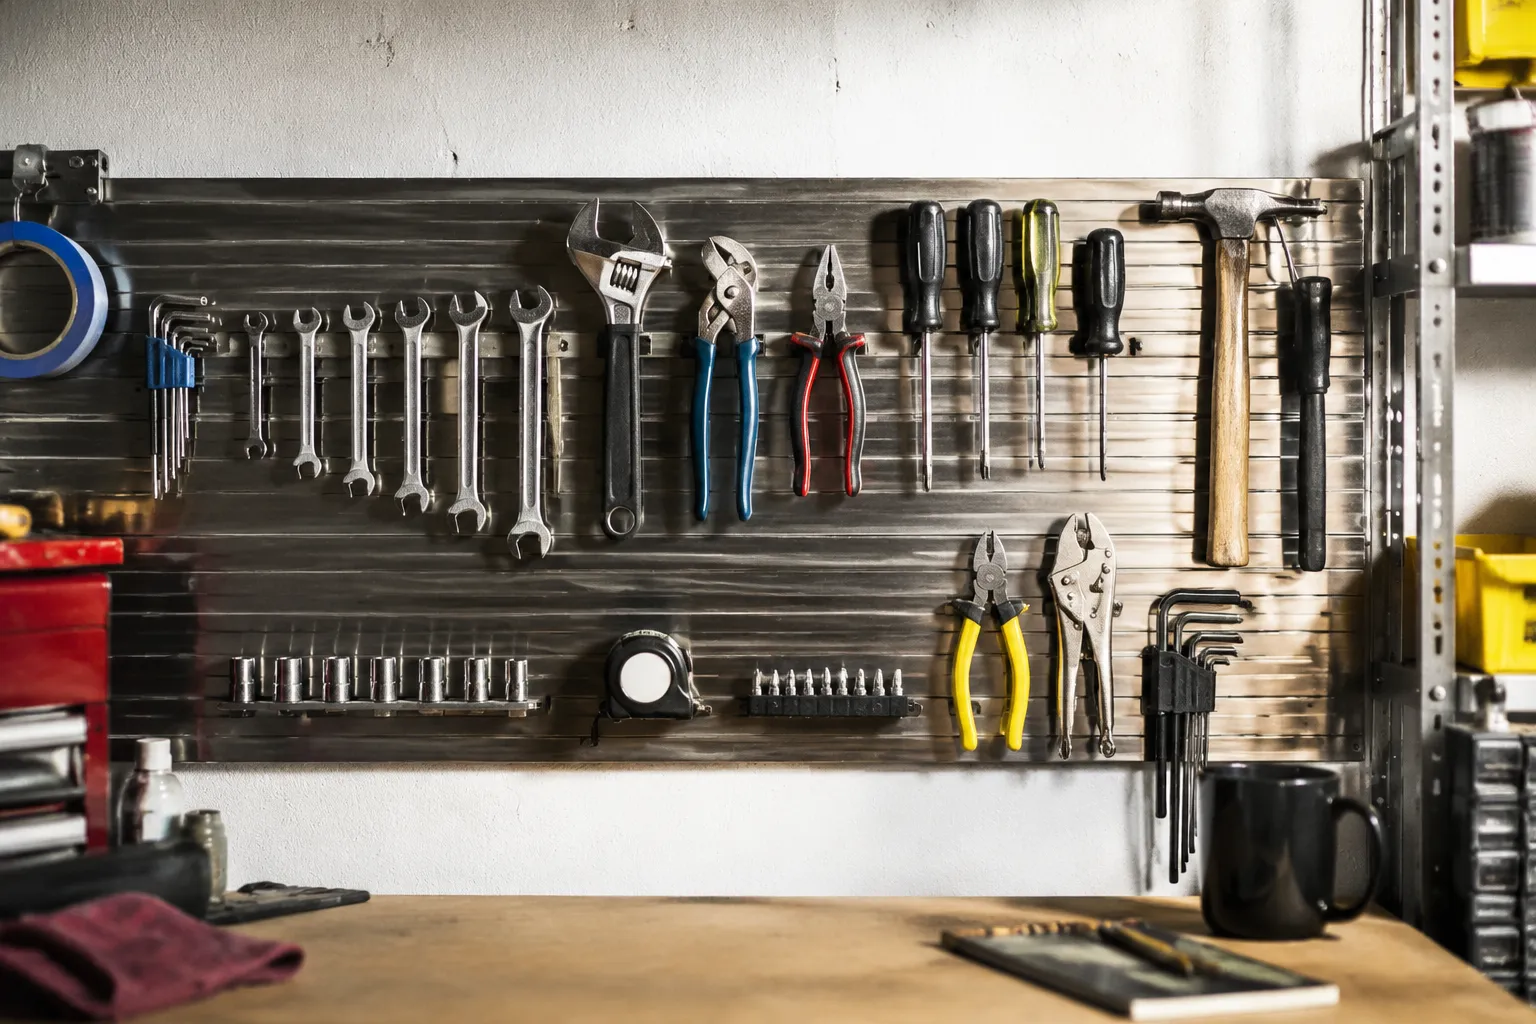
A magnetic tool strip is the rare organizing solution that actually works, provided a person stops treating it like a flat shelf and starts treating it like a layout problem. The strip itself is a piece of steel with a magnetic core, and it will happily hold a wrench or a pair of pliers anywhere along its length. That freedom is the trap. Without a deliberate arrangement, the strip becomes a jumble of overlapping handles, and the person who installed it to save time ends up squinting at tines and jaws, trying to identify which tool is which before grabbing the wrong one for the third time that morning.
The fix is not buying a bigger strip or a second strip. The fix is deciding what belongs on the wall in the first place, then arranging those tools in a pattern that the hand can learn faster than the eye can read.
The Strip Is for the Top Two Layers of the Drawer
Most workshop walls would be better served by a strip holding eight tools than a strip holding twenty. The magnetic strip earns its square footage only when it holds the items a person reaches for several times in a single session: the 10 mm socket, the adjustable wrench that gets used daily, the needle-nose pliers, the wire cutters, the utility knife. These are the tools that live in the top layer of the toolbox drawer, the ones that migrate to the workbench surface and never return home.
A strip loaded with rarely used specialty tools, a torque wrench, a pipe cutter, a level, is a strip that has become a display case. The tools gather dust, and the person still digs through drawers for the everyday stuff. The discipline is to walk past the wall with a critical eye and remove anything that has not been touched in a month. The strip should feel slightly underfilled. That emptiness is a feature, because it gives the eye a clear signal about what lives there.
Grouping by Task, Not by Tool Type
The natural instinct is to sort tools by category: all the wrenches together, all the pliers together, all the screwdrivers together. That arrangement looks tidy in a photo and fails in practice. A person does not reach for a wrench because it is Tuesday. A person reaches for a wrench because a specific job requires it, and that job usually requires two or three other tools at the same time.
The better layout groups by task. One section of the strip holds what a person needs for electrical work: wire strippers, needle-nose pliers, a small flathead for terminal screws, a voltage tester. Another section holds plumbing tools: adjustable wrench, basin wrench, pipe wrench, a roll of thread tape tucked into a nearby drawer. A third section serves general assembly: a ratchet with a couple of sockets, a hex key set, a medium Phillips, a utility knife.
This arrangement cuts down on cross-wall travel. The person working on a light fixture reaches to one spot and finds the whole kit. The person fixing a dripping valve reaches to another spot and finds the relevant tools without scanning the entire strip. The grouping makes the strip feel like a set of small dedicated stations rather than one long anonymous rail.
Gravity Decides the Order Left to Right
Left-to-right order matters more than most people expect. Right-handed users naturally scan from the left and gravitate toward tools on their right side as they work. The layout should place the most frequently used tools in the center of the strip, or slightly to the right of center for a right-handed person. That positioning puts the daily tools in the prime reach zone, the area directly in front of the body when standing at the bench.
Less frequently used items, like the rarely needed but indispensable pipe wrench, go to the far ends. This keeps the center of the strip from becoming a crowded cluster while still keeping the occasional tools visible and accessible. The far ends are also the spots where a tool can hang without interfering with the tools next to it, since the ends have open space beyond them.
For a left-handed user, the mirror image works better. The heavy-use tools shift slightly left of center. The principle is the same: put the tools that get grabbed every day in the spot where the hand naturally lands, not where the eye first looks.
The Vertical Position Sets the Handle Angle
A strip mounted at eye level forces a person to reach up and over, which is fine for a rarely used tool but awkward for daily items. The better strip height is lower, roughly at chest level or even shoulder height for a standing adult, so the hand can grab a tool without raising the elbow much. The exact height depends on the user's stature, but the principle holds: the tool should be reachable with the arm at a comfortable angle, not stretched overhead or bent down to the floor.
The vertical position also controls how the tool hangs. A strip mounted too high makes long tools like wrenches swing downward at an angle, their handles pointing at the floor. A strip mounted at the right height lets the tool rest flat against the wall, handle parallel to the strip. That flat position is easier to grab and easier to see, since the silhouette of the tool is not foreshortened.
There is a second consideration: the distance between the strip and the wall surface. Most strips come with a mounting bracket that holds the magnet away from the wall by a few millimeters. That gap is enough for most tools to hang flat. But a thick tool, like a pair of heavy pliers with a bulky grip, can tilt forward if the magnet is not strong enough or the tool is too heavy for the strip's rating. A person should check the weight rating of the strip before mounting it and choose a strip that can handle the heaviest item in the planned layout.
Spacing Prevents the Claw Grab
The most common failure of a magnetic strip layout is crowding. Tools placed too close together end up overlapping, and pulling one tool out often drags its neighbor halfway off the strip. The user then has to push the neighbor back while holding the first tool, which turns a one-second grab into a three-second fumble.
The spacing rule of thumb is simple: leave enough room between tools for two fingers to fit between them. That gap lets a person grip a single tool without touching its neighbors. For most hand tools, that means about 25 to 40 millimeters of clear space between items, depending on the width of the tool's head or handle. A strip that is 600 millimeters long can comfortably hold six to eight tools with proper spacing, not the twelve tools the marketing photos suggest.
Tools with wide handles, like lineman's pliers or a large adjustable wrench, need more room. Tools with slim profiles, like screwdrivers, can sit closer. The layout should be planned on a flat surface first, with the tools arranged and rearranged before the strip is mounted. This rehearsal costs nothing and prevents the frustration of mounting the strip, hanging the tools, and discovering the spacing is wrong.
Orientation: Handle Up or Head Up
The question of whether to hang a tool with its handle pointing up or down comes down to the tool's shape and how it is used. For a wrench, hanging it handle-down with the jaw up makes the tool easy to grab by the handle and pull straight off the strip. The jaw, which is the heavier end, rests against the magnetic surface, and the handle extends downward in a natural position for the hand.
For pliers, the opposite orientation works better. Hanging pliers handle-up means the jaws point downward, and the handles stick up above the strip. The user grabs the handles, which are already in the hand's natural grip position, and pulls the tool away. This orientation also keeps the jaws, which can be oily or dirty, from touching the wall surface.
Screwdrivers are the exception to both rules. They hang best handle-down, tip up, because the heavy handle stays low and the light shaft points up. This keeps the tip from scratching the wall and makes the tool look uniform across the strip. A row of screwdrivers hanging handle-down also makes the handle color immediately visible, which helps identify the driver at a glance.
The key is consistency within a tool family. If one wrench hangs handle-down and the next hangs handle-up, the eye has to work harder to parse the strip. A uniform orientation within each group makes the layout readable in a split second.
The Strip Needs a Backup Zone
No matter how well planned the layout, a tool will occasionally end up mislaid. A neighbor borrows the 10 mm socket and returns it to a drawer. A family member uses the utility knife and sets it on the counter. The strip then has a gap, and the gap breaks the visual rhythm of the layout.
The solution is not to obsess over keeping the strip perfect but to build slack into the system. A small cup or tray mounted at the end of the strip, or on a nearby shelf, catches the strays and the items that do not have a permanent spot. This backup zone holds the temporary overflow without forcing the user to rearrange the entire layout every time a tool goes missing.
The backup zone also holds tools that are too heavy for the strip, like a large pipe wrench or a hammer with a heavy head. A strip rated for 10 kilograms can hold a surprising amount of weight, but a 1.5-kilogram hammer hanging by its head is a risk. The backup tray gives those tools a home without compromising the strip's safety.
The Layout Drifts, So Audit It Monthly
A magnetic strip layout is a living arrangement. It will drift over time as the user discovers that a different tool gets used more often than expected, or that a tool on the strip has not been touched since installation. The drift is natural, and fighting it is a waste of energy.
The monthly audit takes two minutes. Stand in front of the strip and look at each tool. Ask whether it has been used in the past month. If not, move it to the backup zone or back to the drawer. Then look at the tools that are not on the strip and ask whether any of them have been used more than the items currently displayed. If a tool has been reached for repeatedly from the drawer, it belongs on the strip.
This audit keeps the strip honest. A strip that holds the right tools in the right order becomes a reflex. The hand reaches, the hand finds, the hand returns. A strip that holds the wrong tools, or the right tools in a jumbled order, becomes just another place where tools go to hide. The difference is not the strip itself. The difference is the layout, and the layout is a decision that gets made once and then maintained.
The best test of a magnetic strip layout is a quiet one. A person walks into the shop, reaches for a tool without looking, and finds it in the same spot it was last week and the week before. That consistency is the entire point. The strip is not a display. It is a memory, written in steel and magnets, that saves a person from thinking about where the tools are so the thinking can go into the work.