
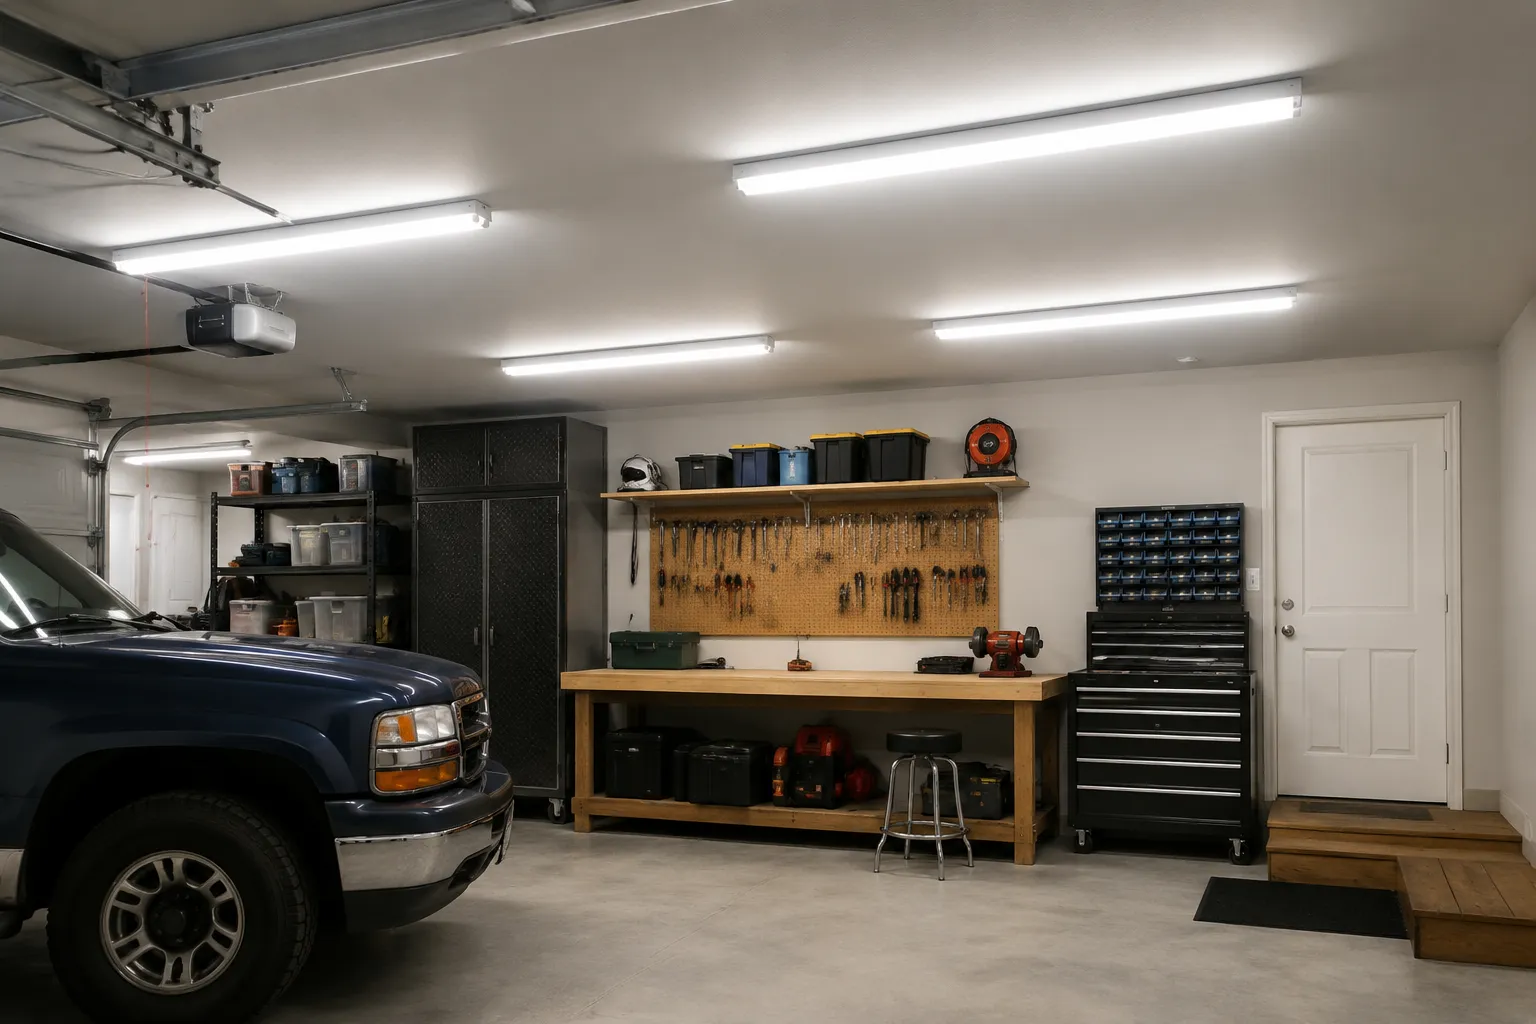
The first LED shop light installed in a home garage usually ends up being a disappointment, and it has nothing to do with color temperature or brand loyalty. The fixture gets mounted, the switch flips, and the space fills with a harsh, uneven glare that makes a clean workbench look like an interrogation room. The owner then spends the next several evenings convinced the light is defective, or that they bought the wrong thing, when the real problem is simpler: they bought a light without thinking about what the garage actually requires. Most people shop by wattage and price. Neither number tells them anything useful about how the light will behave on a concrete floor under a car hood.
The brightness conversation in garages gets muddled because the marketing wants it that way. Fixture boxes scream lumen counts in bold type, and the assumption takes hold that more lumens always means better vision. That logic collapses the moment the fixture is switched on. A 20,000-lumen bar bolted to a ceiling joist eight feet up will produce a different working environment than the same fixture mounted at ten feet, or aimed at a white wall instead of a dark floor. The lumens are a starting point, not a verdict.
Lumens Are the Only Honest Number on the Box
Wattage has become nearly meaningless for comparing LED fixtures, and the sooner a garage owner stops using it as a reference point, the sooner they can make an informed purchase. An older fluorescent shop light might have drawn 96 watts and produced somewhere around 6,000 lumens. A current LED bar drawing 60 watts can produce 10,000 lumens or more. The wattage drop is a triumph of efficiency, but it is a terrible yardstick for brightness. The lumen rating, which measures the actual light output, is the figure that matters. A person should treat the lumen number on the box the way they treat the ounce weight on a bag of coffee: it is the only objective measure of what they are getting.
For a standard two-car garage, the practical target sits between 10,000 and 15,000 total lumens for general work. That figure assumes a white or light-colored ceiling and walls, which reflect light back into the space. A garage with dark painted walls or a floor covered in oil-stained concrete will swallow light, pushing that same room closer to the dim end of the range. A person finishing a detailed project, like assembling a small engine or soldering circuit boards, will want another 2,000 to 4,000 lumens directed right at the task. The general fixture layout handles the ambient light; a portable work light handles the close work.
There is also the question of how many fixtures, not just how many lumens. A single 20,000-lumen bar centered in the garage will create a bright pool directly beneath it and dark corners everywhere else. Two 8,000-lumen fixtures spaced apart will light the same square footage more evenly, because the light comes from multiple angles and fills in shadows. The instinct to buy one enormous fixture is usually wrong. Spreading the light source out is almost always the better move.
The Color Temperature Trap
Brightness and color temperature are often conflated, and the confusion leads to a garage that feels bright but is actually harder to see in. Color temperature is measured in Kelvin, and the scale runs from warm yellows around 3000K to cold blues past 6000K. A 5000K fixture looks "brighter" to the eye than a 4000K fixture because the blue-white light stimulates the retina more aggressively. That sensation of brightness does not always translate to better visibility. The high-blue light scatters more in the air, and on a dusty garage it can create a haze that reduces contrast on dark surfaces.
The sweet spot for garage work is 4000K to 5000K. The lower end of that range renders colors more naturally and produces less glare on shiny metal. The higher end approaches daylight and helps with tasks that require distinguishing subtle shades, like electrical work where wire insulation colors matter. A person should avoid the 6500K "daylight" fixtures sold at big-box stores. They have a clinical cast that exhausts the eyes over a long session and make the garage feel like a surgical suite rather than a workspace.
One practical way to test the difference is to hold a piece of red wire or a cardboard box with printed text under the fixture before committing. Under a 5000K light, the red looks vivid and the text snaps into focus. Under a 6500K light, the same objects take on a washed-out, bluish tint that makes the text harder to read even though the space feels subjectively brighter. The eye can be fooled by color temperature. The work cannot.
Ceiling Height Changes the Equation
Most home garages have ceilings between eight and ten feet, and the fixture manufacturers design their products around that assumption. A standard LED linkable bar throws a wide beam that works well at that height. But a garage with a higher ceiling, or a person who mounts the fixtures flat against the ceiling rather than hanging them on chains, will need to adjust expectations. Light falls off with the square of the distance, which means a fixture at ten feet delivers only a quarter of the intensity of the same fixture at five feet.
For a high ceiling, the solution is usually more fixtures rather than brighter ones. A 12,000-lumen bar hanging six feet above a workbench will do more good than a 20,000-lumen bar mounted at twelve feet, because the closer light packs its punch into a smaller area. The inverse square law is unforgiving, and no lumen count on the box overrides it. A person with a tall garage should plan on mounting fixtures lower, on chains or brackets, or face the reality that they will need twice the fixtures to get the same working light.
The mounting angle matters too. A fixture aimed straight down creates a cone of light that is narrow and intense. Tilting the fixture slightly toward the workbench or the car hood spreads the beam and reduces the hot spot. Some fixtures come with adjustable mounting brackets that allow a gentle tilt. It is worth using them. A few degrees of angle can turn a harsh ceiling glare into a useful pool of light on the work surface.
Shadows Are the Real Enemy
Lumen counts and color temperatures become abstract the moment a person leans over an engine bay and their own body blocks the light. The shadow problem is the one complaint that shows up in every garage lighting discussion, and it is the one the marketing never addresses. A single overhead fixture creates a shadow directly beneath anything solid. A person working under a raised hood will find the entire engine block in darkness no matter how bright the ceiling fixture is.
The fix is not more ceiling light. The fix is light from multiple directions. A fixture mounted on the wall behind the workbench, aimed forward, fills in the shadow cast by the worker's body. A portable LED work light on a stand, positioned to the side of the car, eliminates the shadow under the hood. The combination of an overhead fixture and a wall-mounted or portable unit creates overlapping light that cancels out the dark spots. A person who plans their lighting this way, with sources at different heights and angles, will have a more usable garage than someone who simply doubled the ceiling fixtures.
The cheap version of this solution is a basic LED drop light on a cord, hung from the hood latch. The better version is a dedicated work light on a tripod or a magnetic fixture that clamps to a fender. Either approach acknowledges the fundamental truth: the person doing the work is part of the lighting problem, and the lighting layout has to account for a body in the way.
The Reflectance of the Room Itself
A garage is rarely a neutral space. The walls are often bare drywall or painted concrete block, the floor is stained gray, and the ceiling may be unfinished joists with wiring hanging down. Every surface absorbs or reflects light differently, and those differences show up quickly in how the room feels. A white ceiling reflects about 80 percent of the light that hits it. A bare concrete floor reflects maybe 20 percent. The disparity means the top half of the room is bright while the bottom half, where the work happens, stays dimmer than the lumen count suggests.
The cheapest improvement in garage lighting has nothing to do with fixtures. Painting the ceiling and upper walls white, or at least a light gray, can effectively add several thousand lumens of usable light without adding a single bulb. The reflected light bounces down into the work area rather than being absorbed by dark drywall. A person who has not considered the room's reflectance is losing light they already paid for. The fixture is emitting it; the walls are just eating it.
The floor matters less, but it still plays a role. A light-colored epoxy floor coating reflects a surprising amount of light upward, and it has the added benefit of making dropped screws and bolts easier to spot. The combination of a white ceiling and a light floor can cut the number of fixtures needed by a third. The math is not complicated: if the room bounces more light around, the fixtures do not have to work as hard.
Linkable Bars Versus Single Fixtures
The most common LED shop light sold today is the linkable bar, a long thin fixture with a cord on one end and a socket on the other, designed so multiple units plug together in a row. The concept is sound: a person can start with two bars and add a third later without rewiring. The execution depends entirely on how the bars are laid out. Linking four bars end to end across the full length of a garage creates a single continuous strip of light down the middle. That layout works well for lighting a car but poorly for lighting the workbenches along the side walls.
A better arrangement is two separate runs, each with two bars linked together, mounted parallel to each other and offset toward opposite walls. This creates broad, overlapping light that reaches the corners. The linking feature is a convenience, not a mandate to make one long train of fixtures. Each run should be positioned to serve a specific zone of the garage.
The fixtures themselves have gotten remarkably cheap, and the price difference between a reputable brand and a no-name import has narrowed. The reliability difference has not entirely disappeared. A cheap bar may flicker, hum, or fail within a year, and the warranty is often void by the time the box is recycled. Spending a few more dollars per fixture on a model with a recognized brand name and a five-year warranty is one of the few places in garage lighting where the premium is worth it. The fixture is screwed to the ceiling. Replacing it is a chore nobody wants to do twice.
A Workbench Needs Its Own Light
No amount of ceiling light will properly illuminate the back of a workbench, especially if the bench has an upper cabinet or a shelf casting a shadow over the work surface. A dedicated under-cabinet LED strip or a small clamp-on task light mounted to the bench edge is the difference between squinting at a screw hole and seeing it clearly. The task light should be positioned so it shines from the front and slightly above, not directly overhead where the worker's head blocks it.
The color temperature of the task light should match the ceiling fixtures, otherwise the mixed light creates a strange two-tone effect on the work surface. If the ceiling bars run at 5000K, the task light should run at 5000K too. The eye adapts to mixed light poorly, and the mismatch adds fatigue over a long evening of tinkering. The task light does not need to be large, just consistent.
This is also the place where a person can be honest about what they actually do in the garage. A person who only changes oil and parks a car needs less light than one who rebuilds carburetors or restores furniture. The lighting plan should follow the work. A garage used for storage and parking can get by with 8,000 lumens of ambient light. A working garage needs the full layout: ambient ceiling light, task light at the bench, and a portable unit for the car. The distinction is not about luxury. It is about whether the light serves a purpose or just fills a room.
Most people walk out of the store with a single 20,000-lumen bar, hang it over their head, and call it done. The garage ends up bright in one spot and dark everywhere else, and the disappointment sets in. The better path is to measure the space, plan the layout around the actual work zones, and accept that a few smaller fixtures positioned thoughtfully will beat one giant fixture every time. The light should make the work easier, not just make the ceiling glow.