
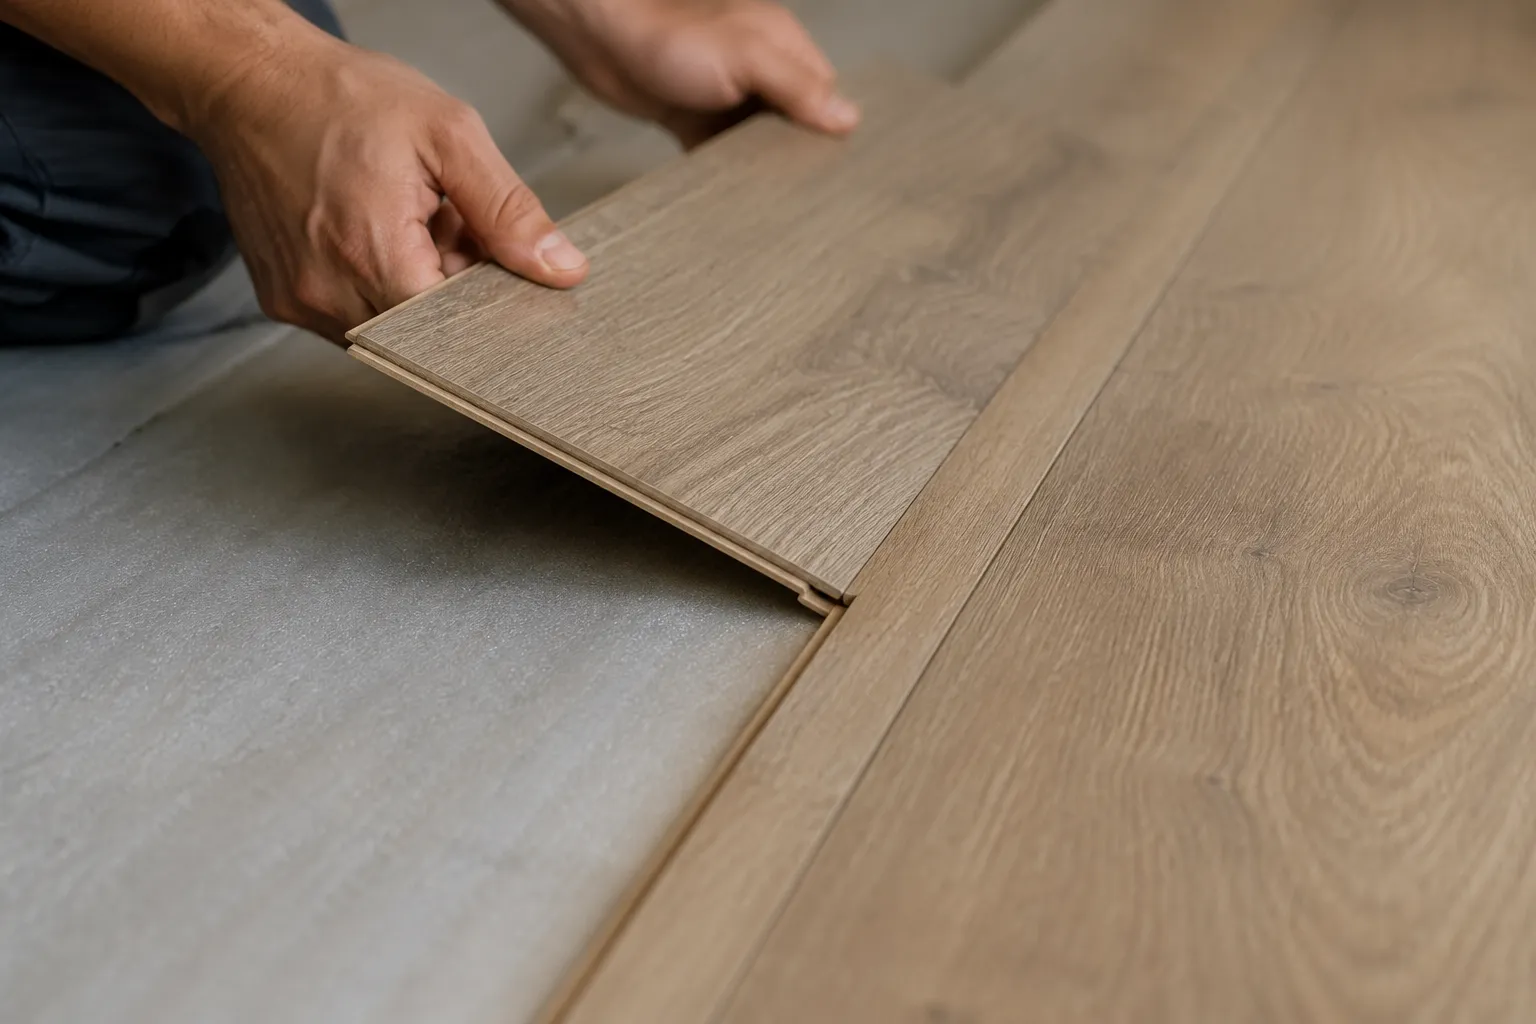
The click-lock joint is a small triumph of engineering, and a persistent nuisance in practice. The tongue clicks into the groove, the planks lock flat, and then, a year later, a hairline shadow appears along that same seam. Dust collects in it. The edge starts to feel sharp under bare feet. The culprit is rarely the flooring itself. It is almost always the installation, specifically the tiny decisions made in the seconds before the plank is pressed down.
Most installation guides treat the click-lock mechanism as a binary event: it clicks, or it does not. The reality is that the joint has a narrow window of correct engagement, and a wide range of failure modes that still produce a click. A plank can seat tightly at the surface while leaving a microscopic gap at the base of the tongue. That gap is invisible on day one. It shows up later as a dark line, a creak, or a slight vertical movement when a person walks across it.
The flatness of the subfloor decides everything
No amount of tapping, pulling, or angle adjustment fixes a floor that refuses to lie flat. The click-lock system demands that two long edges meet along their entire length at the same time. If the subfloor dips by even a few millimeters in the middle of a board, the joint binds at the ends and leaves the center slightly raised. The click sounds fine. The seam looks acceptable. Then the edge wears down over the first season of foot traffic.
A person should check the subfloor with a straightedge at least 2 meters long, not a 300 mm level. The shorter tool misses the gentle undulations that cause the trouble. The tolerance for most laminate systems is 3 mm over a 2 meter span, but staying under 2 mm is a safer target. High spots are worse than low spots. A low spot leaves a hollow under the plank. A high spot forces the joint to bend upward, which puts constant pressure on the click-lock profile and eventually cracks the tongue.
Self-leveling compound fixes the low spots. A belt sander or a grinder handles the high ones. Neither job takes more than an afternoon, and both are far faster than pulling up a failed floor later. The people who skip this step usually skip it not out of laziness but out of optimism, and the floor punishes that optimism within the first year.
The angle of attack matters more than the force
Click-lock systems all work on the same principle: insert the tongue at an angle, push forward, then rotate down flat. The angle matters enormously. Too shallow, and the tongue scrapes along the top of the groove without seating. Too steep, and the locking lip catches on the underside of the groove, which forces the installer to hammer the joint down, which damages the profile.
The correct angle varies by manufacturer, but a common range sits between 20 and 30 degrees from the floor. A person can feel when the tongue seats properly. There is a distinct slide, then a stop, then the rotation down meets almost no resistance. If the rotation requires force, the tongue is not seated. Pull the plank back up, adjust the angle, try again. Forcing it down is how tongues crack.
Many installers develop a habit of rocking the plank side to side as they press down. That motion works for some locking systems and harms others. The rocking action can shear the locking lip on profiles that rely on a straight vertical engagement. When in doubt, press down evenly along the entire length of the joint, working from one end to the other, rather than slamming the whole plank at once.
Tapping blocks are for the face, never the tongue
The tapping block exists to close the horizontal seam between the short ends of two planks. It does not exist to persuade a stuck long-side joint. A person who hammers the block along the long edge is driving the tongue deeper into the groove, which is not the direction the lock needs. The joint needs vertical pressure, not lateral force.
When the short-end seam refuses to close, the problem is usually debris in the groove. A tiny wood splinter, a grain of sand, a dried drop of glue from a previous installation. The tapping block cannot overcome a physical obstruction. The correct move is to lift the plank, inspect the groove with a bright light, and clear the debris with a utility knife or a stiff brush. This takes ninety seconds. Hammering takes five minutes and often produces a damaged tongue.
Another common mistake involves tapping the block at an angle, so that the force drives the plank downward instead of horizontally. The block should sit flush against the plank edge, and the hammer should strike the block squarely. A glancing blow transfers energy into the surface of the plank, which can dent the top layer or, worse, chip the locking mechanism underneath.
The pull bar is the most misunderstood tool in the kit
The pull bar exists for one situation: closing a seam that is out of reach of a tapping block, usually against a wall or under a door jamb. The bar hooks over the far edge of the plank, and a hammer strikes the near end of the bar, which pulls the plank toward the installer. This tool gets blamed for damage that is actually caused by improper placement.
The pull bar must hook under the plank edge, not over it. Many people lay the bar flat against the top surface and hammer it, which transmits all the force into the decorative layer and leaves a crescent-shaped dent. The bar should engage the underside of the plank, so the force pulls horizontally along the plane of the floor. A person can check the placement by looking at the gap between the bar and the plank surface. If there is no gap, the bar is too high.
Some pull bars come with a rubberized pad on the striking surface. Those are worth seeking out. The bare metal versions work, but they require a careful hammer swing. A glancing blow off the metal edge can send the hammer into the finished floor, and that scratch is permanent.
Moisture and temperature change the joint geometry
Laminate planks are mostly wood fiber, and wood moves with humidity. The click-lock profile is cut to fit at a specific moisture content. Install the floor in a dry winter room, and the planks will shrink slightly, opening up the seams. Install in a humid summer, and the planks will expand, which can cause the joints to cup or even buckle.
The standard advice is to acclimate the flooring in the room for 48 hours before installation. That advice is incomplete. The flooring should acclimate in the unopened boxes, stacked off the floor, with the room at the temperature and humidity levels where it will live. A person who acclimates in a garage and installs in a climate-controlled living room is wasting the time.
The expansion gap around the perimeter also matters more than most people realize. The gap is not a suggestion. It is the release valve for the entire floor. A floor installed with no gap at the walls has nowhere to go when the planks expand, so the pressure pushes upward at the seams. The click-lock joints bear the brunt, and the result is a row of slightly raised edges that never quite lie flat again.
The last row is where floors go to die
The final row against the wall requires ripping the planks lengthwise, which means cutting off the tongue. A plank with no tongue cannot click-lock. It can only be glued or held in place by the baseboard and the friction of the adjacent row. This is a known weak point, and it deserves more respect than it gets.
The cleanest workaround is to plan the layout so that the last row is wider than a third of a full plank. A narrow strip of flooring at the wall is structurally fragile and visually unappealing. Measuring the room width and dividing by the plank width before starting the first row reveals the final row size. If it comes out too narrow, the first row should be ripped to a narrower width to balance the floor.
For the ripped row, the exposed cut edge needs a coat of moisture sealant, especially in kitchens or basements. The cut exposes the raw fiber core, which wicks moisture far faster than the factory-sealed edges. A thin layer of clear wood sealer or even candle wax rubbed along the cut edge provides a moisture barrier that keeps the plank from swelling at the seam.
Clean seams are a cleanliness problem first
Before the first plank goes down, the subfloor should be vacuumed, not swept. A broom moves the big debris but leaves a fine dust film that acts like ball bearings under the planks. The dust does not prevent the click-lock from engaging initially, but it settles into the joint over time and creates a gritty feel when the floor flexes slightly under load.
The same logic applies to the locking profiles themselves. They arrive clean from the factory, but the act of moving planks around a job site introduces dust, sawdust from nearby cuts, and the occasional wood shaving that lands right in the groove. Wiping the profiles with a dry microfiber cloth before each joint is tedious. It is also the difference between a seam that clicks shut and one that clicks with a tiny gap that never closes.
Some installers keep a small brush in their pocket and sweep the groove before every single joint. That habit adds maybe fifteen seconds per row. For a room with twenty rows, that is five minutes of extra work. The alternative is a floor with intermittent hairline seams that collect dirt and look worse every year.
A dead-blow hammer is the right tool for the job
Rubber mallets work, but they bounce. The rebound means the installer has to swing harder to get the same energy into the joint, and a harder swing is less accurate. A dead-blow hammer contains shot or sand inside the head, which absorbs the rebound and transfers nearly all the energy into the target. This makes the tool easier to control and less likely to bounce into a finished surface.
The weight matters too. A 450 gram hammer is enough for most laminate work. A 900 gram hammer delivers more force but also more risk of overdriving a joint. The goal is to close the seam, not to compress the locking mechanism. Overdriving can damage the profile even when the click sounds clean.
For the tapping block, a person should look for one with a curved face that matches the contour of the plank edge. The flat-faced blocks work on square-edged planks but leave marks on the beveled edges that are common on laminate. A properly matched block distributes the force across the full thickness of the plank rather than concentrating it on the top edge.
The visible seam is the last thing to check
After the floor is down, a person can run a fingernail across each seam. A clean seam feels flush, with no catch and no step. A seam with a tiny lip catches the nail. That lip is often the result of the plank not being fully rotated down, which leaves the groove slightly higher than the tongue. A few taps with the block and hammer, applied to the high side, usually sets it flat.
But the fingernail test only catches vertical displacement. A horizontal gap at the seam is harder to spot and easier to miss. A bright light held at a low angle, almost parallel to the floor, reveals these gaps as dark lines. A person who sees this line should not assume the floor will settle. It will not. The plank needs to be pulled and reseated, and the sooner this happens, the easier it is. Waiting until the surrounding rows are installed turns a ten-second fix into a half-hour project.
The last check involves walking the floor barefoot. A clean seam should feel like nothing at all. If a person feels a faint ridge or a slight give, that seam will only get worse. Mark it with a piece of painter's tape and address it before the baseboards go on. Once the trim is up, every repair becomes a demolition project.
The click of a properly seated joint has a particular quality, a solid thunk with no rattle. That sound is worth learning to recognize. It takes a few rows to develop the ear, but once a person knows it, the difference between a good joint and a mediocre one is audible before it is visible. A floor full of those solid clicks will keep its seams clean for decades. A floor full of hollow clicks will reveal its compromises one hairline shadow at a time.