
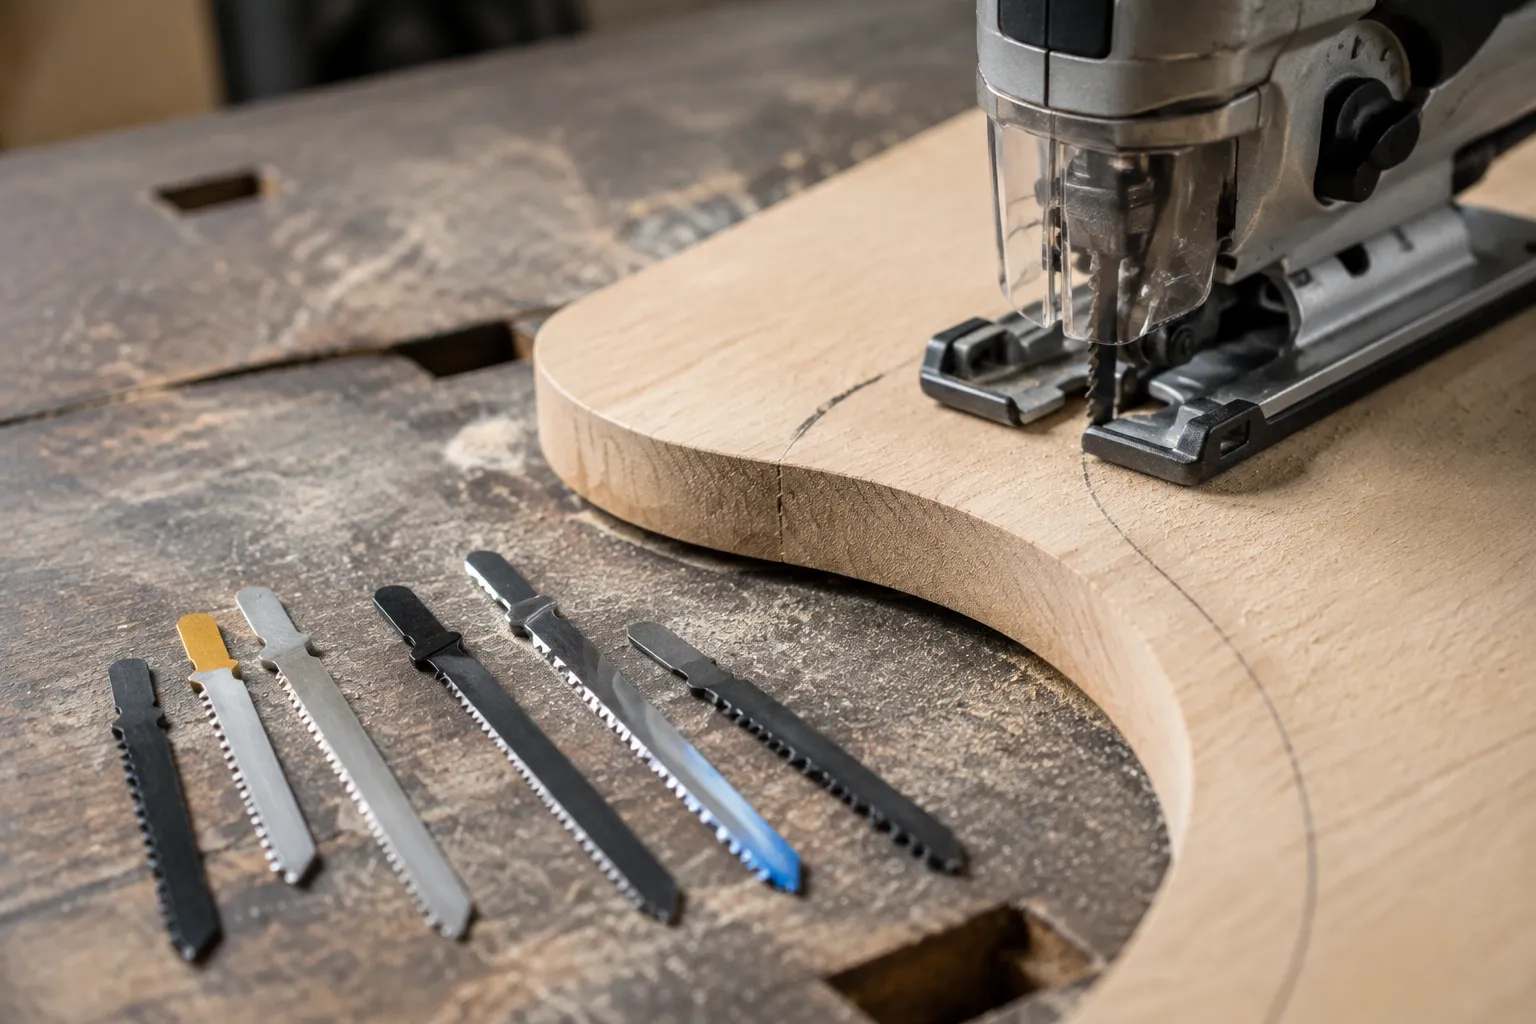
There is a moment in every curved cut where the blade decides whether the line stays honest. The saw is moving at a steady clip, the workpiece is turning through the cut, and then the steel flexes a half-millimeter sideways. That deflection is the whole difference between a fair curve and a wavy one, and it has almost nothing to do with how steady a person's hand is. It has everything to do with which blade is clamped in the chuck.
The jigsaw is the most forgiving saw in most workshops, which is precisely why so many people never learn to pick blades properly. A circular saw punishes a bad choice immediately with burning or kickback. A bandsaw hides a bad blade until the cut wanders off the line. The jigsaw just keeps cutting, poorly, and the user blames their own technique. Shop the blade section of any hardware store and the confusion is understandable. Racks of steel strips with different tangs, tooth counts, and shank widths sit next to each other with packaging that mostly screams about "clean cuts" and "fast cuts" without explaining which promise applies to which material.
Start with the tang, because that is the part that actually locks the blade into the saw, and it is the most common source of user error. U-shank blades fit the older jigsaws with a single screw clamp. T-shank blades fit virtually everything made in the last twenty years, including every major brand from Bosch to Makita to DeWalt. A person who inherits an older saw and grabs a modern T-shank blade will stand there wondering why the clamp keeps slipping. The reverse happens too: someone buys a new saw and tries to force an old U-shank blade into a T-shank receiver. It does not work. Check the chuck before buying anything else, because every other blade characteristic is meaningless if the steel cannot lock in place.
Tooth Count Is Not a Quality Score
Blade packaging loves to show a number like "10 TPI" or "24 TPI" in big type, as if more teeth were always better. That is a misunderstanding of how saw teeth actually work. Teeth per inch, or TPI, controls the size of the gullet between teeth, which controls how much material each tooth removes and how fast it clears that material. A coarse blade with 6 to 8 TPI rips through 2x4s because each tooth takes a large bite and the gullet clears the sawdust. The same blade in 3/4-inch plywood will tear the top veneer because the bite is too aggressive for the thin material.
For smooth curves, the target is a blade with 10 to 12 TPI for wood up to about an inch thick. That range handles the compromise between cutting speed and edge quality reasonably well. Go to 14 TPI or higher for plywood and veneered panels, where the finer teeth produce a cleaner edge across the face grain. The mistake people make is buying the highest TPI they can find and assuming it will deliver the smoothest cut in everything. It will not. A 20 TPI blade in thick hardwood will clog, overheat, and burn the wood because the gullets are too small to evacuate the sawdust. The blade gets hot, the steel flexes, and the curve goes crooked.
Tooth geometry matters more than the count alone. Blades labeled "ground" or "precision ground" have teeth that are sharpened after the steel is cut and set, which produces a more consistent tooth height and a cleaner cut. Cheaper blades are stamped, and the teeth can vary in height by a few thousandths of an inch. That variation means a few teeth carry most of the cutting load while the others barely touch the work. The result is a rougher cut and a blade that dulls unevenly. For any project where the edge will be visible, ground blades are worth the extra dollar or two each.
The Set of the Teeth Sets the Finish
Look at the side of a blade and the teeth appear to lean alternately left and right. That is the "set," and it determines how wide the kerf is relative to the blade body. A wide set pushes the teeth outward and cuts a slot wider than the steel plate, which prevents the blade from binding in the cut. A narrow set, or no set at all, cuts a slot nearly the same width as the blade, which produces a much cleaner edge but increases friction and heat.
Most blades that advertise "clean cuts" use a wavy set, where the teeth follow a gentle alternating pattern rather than a hard left-right stagger. This design keeps the kerf wide enough to avoid binding while leaving a smoother edge than a standard alternate set. For curves in solid wood, wavy set blades are the practical sweet spot. They do not cut as fast as aggressively set blades, but they do not leave the fuzzy, torn edge that makes a curve look like it was cut with a dull hatchet.
There is also the matter of the blade's body taper. Some blades taper from the tang toward the tip, and this taper reduces the amount of steel rubbing against the cut wall. A taper-ground blade is generally the mark of a higher-quality product. It cuts more freely and stays cooler, and it is the standard geometry on most premium blades. The packaging rarely mentions the taper, but the difference is noticeable when cutting a long curve through an inch of maple. The non-tapered blade starts to bind and smoke; the tapered one keeps pulling through.
Reverse Teeth for the Top Surface
One specific blade type deserves special attention for anyone cutting curves in plywood or any material with a finished face. Reverse-tooth blades, sometimes called reverse-cut or down-cut blades, have a few teeth at the top of the blade that point downward. Those teeth cut on the downstroke instead of the upstroke, which is the stroke that normally splinters the top surface of the workpiece. The down-cutting teeth shear the top fibers cleanly instead of lifting them.
The trade-off is a slightly slower cut and a little more vibration, because the blade is fighting the upward stroke of the saw. But for a curve cut in cabinet-grade plywood, where the top veneer is the whole point of the material, a reverse-tooth blade is the difference between a clean line and a chipped mess. The cut edge still needs sanding, but it does not need repairing. Anyone who has spent an afternoon filling tear-out with wood filler and sawdust knows what that saves.
Double-scroll blades are the other specialty worth knowing. These are narrow blades, often only 1/8 inch wide or less, with a high tooth count and a very fine set. They are designed for tight-radius work, where the blade must turn sharply without binding. A standard blade with a wide body cannot make a tight turn because the back edge of the blade hits the uncut material and stops the rotation. A scroll blade is narrow enough to pivot in place. These blades cut slowly and are fragile, but they are the only option for cutting a 1/4-inch radius in 3/4-inch hardwood without drilling a relief hole and switching to a coping saw.
Material-Specific Blades Actually Matter
Blade manufacturers now offer specialized lines for specific materials, and this is one marketing push that deserves to be taken seriously. A blade designed for metal has a much finer tooth pitch and a higher hardness rating, and it cuts steel and aluminum with a scraping action rather than a tearing one. Using a wood blade on metal will dull the teeth in seconds and produce a rough, dangerous cut. Using a metal blade on wood is merely frustrating; the cut is slow and the teeth clog with resin.
The more useful specialization is for acrylic and other plastics. Standard wood blades melt acrylic as they cut, because the friction heats the material past its softening point and the saw leaves behind a molten bead that fuses back into the cut edge. Plastic-cutting blades have a different tooth geometry with a more pronounced rake and a wider set, which clears the chips efficiently and keeps the workpiece cooler. For anyone cutting plexiglass or polycarbonate curves, the dedicated blade is not a luxury. It is the only blade that produces a clear, polished edge instead of a white, frosted mess.
Carbide-grit blades are a separate category that sits on the edge of the conversation. These are not toothed blades at all; they are steel strips coated with tungsten carbide grit, and they cut by abrasion rather than by shearing. They are meant for tile, ceramic, and occasionally fiberglass. They work in a jigsaw, and they cut curves in tile that no toothed blade would survive. But they are slow and produce a dusty, chipped edge. They belong in the toolbox for occasional tile work, not in the regular rotation for wood curves.
The Orbit Setting Is Half the Equation
A new blade in a saw set to the wrong orbit will still cut badly. Most modern jigsaws have an orbital-action lever with settings from zero to three. Zero is a straight up-and-down stroke. Higher settings add a forward-and-back motion that pushes the blade into the workpiece on the upstroke, which removes material faster but leaves a rougher edge. For smooth curves, the orbit should be set to zero or one. The straight stroke keeps the blade cutting in a single plane and leaves the cleanest finish.
The mistake is leaving the saw on a high orbit setting from a previous fast-cutting job and then blaming the new fine-tooth blade for a rough curve. The blade cannot compensate for the aggressive orbital action. The two variables work together: a fast-cutting blade with high orbit cuts quickly and roughly, a finish blade with zero orbit cuts slowly and smoothly, and any mismatch in between produces mediocre results. Matching the blade to the orbit is the step most people skip.
Reading the Cut as You Go
No blade stays sharp forever, and a dull blade will ruin a curve long before it stops cutting entirely. The signs are subtle. The cut starts to require more forward pressure, the motor pitch changes, and the edge of the cut develops a slightly burned or charred appearance. A blade that used to track a pencil line smoothly now wanders, because the uneven tooth wear pulls the saw in one direction. All of these are cues to stop and change the blade, not to push harder.
A person cutting a single curve in a piece of pine might not notice the difference. Someone cutting a batch of identical curved components, say a dozen chair rails or a set of decorative brackets, will notice that the third or fourth piece comes out worse than the first. That is the blade telling them it is done. Jigsaw blades are cheap consumables. Replacing one mid-project costs a dollar or two and takes thirty seconds. Fighting through a dull blade costs the whole workpiece and an hour of sanding to fix what cannot really be fixed.
The habit of buying a single multi-pack of whatever blades are on the rack and using them for everything is the root of most curved-cut frustration. A mixed pack with a couple of coarse wood blades, a couple of finish blades, and a reverse-tooth blade covers most situations, and each blade will last longer because it is used for the job it was designed to do. The extra minutes spent changing blades are nothing compared to the time saved by not sanding out wobbles and tear-out. The curve is already cut before the sandpaper ever comes out, and that is where the blade earns its keep.