
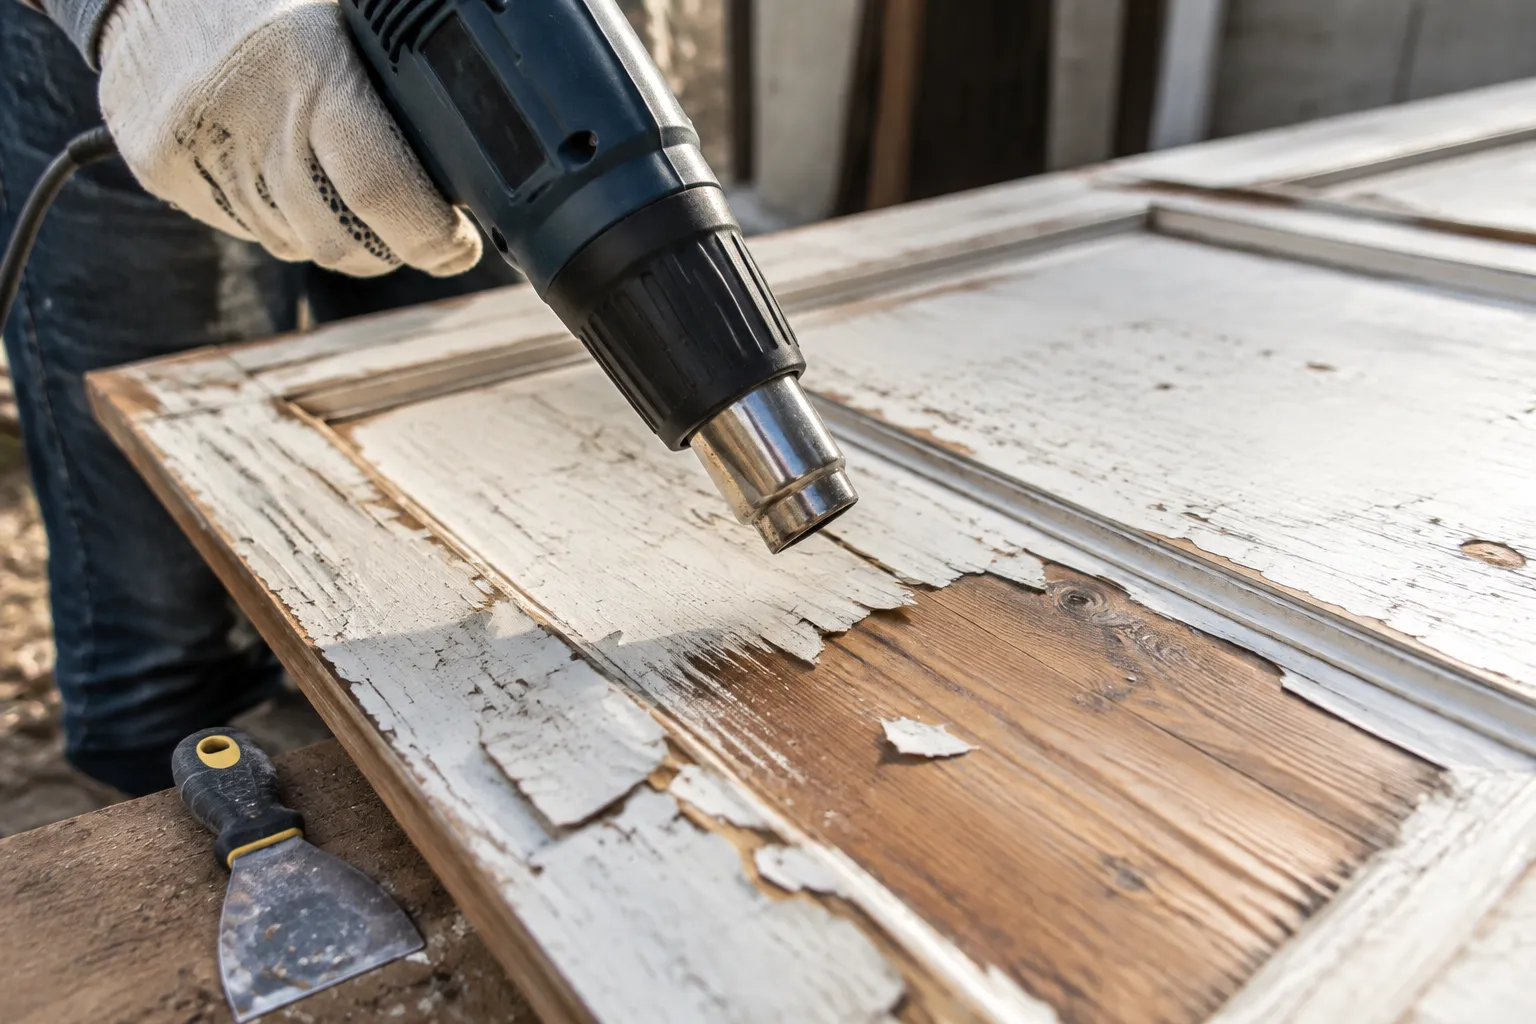
Heat guns get blamed for scorched wood, and the blame is usually deserved. A person cranks the temperature to max, hovers the nozzle an inch from a door panel, and waits for the paint to bubble. Then the wood underneath starts to darken, then smoke, then char. The paint comes off, sure, but so does the dignity of the project. The scorching is not a failure of the tool itself. It is a failure of method, and the method is fixable with a few deliberate adjustments.
The physics here are straightforward. Heat guns do not melt paint instantly. They deliver a stream of hot air that softens the bond between paint and substrate. The paint bubbles, lifts, and turns rubbery. At that point a scraper can push it off in long ribbons. The problem is that most people treat the gun like a flamethrower. They hold it still, crank the dial, and wait. The surface temperature climbs past the paint's softening point and keeps climbing until the wood itself starts breaking down.
Wood chars somewhere around 300 degrees Celsius, depending on species and moisture content. Paint softens and lifts well below that, often in the 150 to 200 degree range. That gap is the entire game. The goal is to keep the wood surface below the char point while getting the paint hot enough to release. The gap is wide enough to work with comfortably, provided the gun is moving and the distance is respected.
Start With the Right Gun and the Right Setting
Not every heat gun is suited to paint stripping. The cheap single-speed models often run at one temperature, usually too hot, and offer no control. A decent two-speed gun with adjustable temperature is worth the extra money. The low setting on most guns lands around 250 degrees Celsius, which is still hotter than needed but workable with technique. The high setting is for shrinking tubing and bending plastic, not for paint. Leave it off.
Variable temperature guns allow finer control. A setting around 200 degrees is a sensible starting point for most latex and oil paints. Test on an inconspicuous corner first. If the paint softens but does not bubble aggressively, that temperature is right. If it bubbles and blisters within a few seconds, back the temperature down.
The nozzle matters too. A wide flat nozzle spreads heat across a larger area and lowers the peak temperature at any single point. The narrow round nozzle concentrates heat and increases scorch risk. For stripping a flat panel, the wide nozzle is the better tool. For detail work on moldings, a smaller nozzle gives more precision, but it demands even more attention to movement.
Distance and Motion Are the Real Controls
The distance between the nozzle and the paint is the first line of defense. Holding the gun too close is the most common mistake. At 2 centimeters, the air is still near its maximum temperature. At 10 centimeters, the heat has dissipated substantially. The paint still softens, but the wood stays cooler. A working distance of 8 to 12 centimeters is a good range for most stripping work.
The direction of the air stream matters as much as the distance. Angling the gun so the hot air pushes the softened paint away from the working edge, rather than straight down onto it, keeps the area you are about to scrape at a lower temperature. The paint lifts and rolls off the surface instead of sitting in a puddle and soaking heat deeper into the wood.
Constant motion is non-negotiable. The gun should be sweeping back and forth across the surface, never pausing. A sweep of a few seconds heats the paint without overheating the wood underneath. When the paint starts to bubble, that is the signal to move the gun along and bring the scraper in. The heat lingers in the paint after the gun moves away, so the scraping window is longer than most people expect.
Read the Paint, Not the Timer
Paint responds to heat differently depending on its age, chemistry, and the number of coats. A modern latex coating on a single layer bubbles quickly and lifts in large sheets. An old oil-based paint with five layers underneath takes longer and behaves differently. The outermost layer may bubble while the deeper layers stay hard. Reading the paint is about watching the surface and adjusting in real time.
When the paint begins to bubble and blister, that is the moment to scrape. The bubbles mean the coating has released from the wood. Scraping while the paint is still flat and smooth is the second most common mistake. The scraper catches, digs in, and gouges the wood. The gun should be working a small area ahead of the scraper, roughly the width of the scraper blade, so the paint is always at the right stage.
Smoke is the warning sign. A faint wisp of smoke from the paint itself is normal, especially with oil-based coatings. Smoke that smells like burning wood, not burning paint, means the temperature is too high or the gun has stayed in one place too long. The wood is starting to scorch. Back the gun off, increase the distance, and let the area cool briefly before continuing.
Scrape With the Grain, Not Against It
The scraper is half the equation, and the wrong technique ruins wood just as fast as the wrong temperature. A sharp scraper, held at a shallow angle, slides under the softened paint and lifts it cleanly. A dull scraper requires more pressure, which digs into the wood and leaves furrows. The blade should be sharpened frequently, especially on long jobs.
Scraping direction should follow the wood grain. Moving the scraper across the grain, or in random directions, gouges the softer earlywood and leaves a rough, fuzzy surface. Working with the grain produces a cleaner result and reduces the amount of sanding needed afterward. On a door panel, that means scraping vertically on the stiles and horizontally on the rails, matching the direction of the wood fibers.
The pressure should come from the handle, not the wrist. A long, smooth stroke that follows the softened paint ribbon is more effective than a short, jabbing motion. The paint should peel away in strips, not chip off in flakes. Chipping means the paint is not soft enough, and the heat needs to stay on the area a moment longer or the gun needs to move closer.
The Softwood Problem Needs Extra Caution
Softwoods, pine and fir especially, scorch faster and at lower temperatures than hardwoods. The resin content makes them more flammable. A pine door frame can show darkening within seconds at temperatures that leave oak untouched. Anyone stripping softwood should run the gun on a lower setting and keep the distance at the longer end of the range.
The earlywood in softwoods is soft and porous. It absorbs heat quickly and scorches before the harder latewood shows any change. This is why a pine surface can look fine from a distance and show dark streaks up close. The streaks are the earlywood bands that got too hot. Slower passes with the gun, and more patience between heat and scrape, prevent this.
Hardwoods have their own quirks. Oak, ash, and other open-pored woods hold paint in the grain valleys, and the paint in those recesses resists scraping. The temptation is to hold the gun closer to force the paint out of the pores. Instead, let the area cool, then use a stiff brush or a second pass with a smaller scraper to lift the residue from the valleys. Holding the gun closer risks scorching the raised grain while the paint in the pores remains stubborn.
Corners, Moldings, and Other Slow Spots
Flat surfaces are forgiving. Corners and profiled moldings are where scorching happens. The heat builds up in the recesses and behind edges, and the wood there is often thinner or more exposed. A cove molding or a bead profile concentrates heat in the concave sections, and the paint in those grooves softens later than the paint on the flat faces.
Working a molding requires slowing down and using a narrower nozzle or a smaller scraper. The gun should be kept in motion, but the sweeps should be shorter and more deliberate. A person cannot expect to strip a decorative profile in one pass. The paint in the grooves may need a second application of heat after the first pass removes the top layer.
Inside corners, where two surfaces meet, are the worst offenders. Heat reflects off both surfaces and concentrates in the corner. The wood there can scorch while the surrounding paint is barely warm. The fix is to angle the gun so the air stream hits one face at a time, and to keep the nozzle further from the corner than intuition suggests.
When the Wood Already Scorched
Scorching happens even to careful workers. The question is what to do when the damage is done. Light scorching, a light brown or tan discoloration, can often be sanded out. The charred layer is thin, and removing it with medium grit sandpaper restores the natural wood color. Deeper scorching, where the wood has turned dark brown or black, requires more aggressive action.
A dark scorch mark that does not sand out at 120 grit has penetrated the wood fibers. Removing it means cutting down below the charred layer, which changes the profile of the piece. On a flat surface, a plane or a belt sander can remove the damaged wood. On a molding, the char may be irreparable without replacing the section. In that case, the honest move is to acknowledge the limit and either refinish the piece with the mark as a design feature or replace the damaged component.
Chemical strippers remain a viable alternative for intricate pieces or for anyone who cannot get the heat gun technique dialed in. They take longer, make a mess, and require careful handling of solvents, but they do not scorch wood. The choice between heat and chemicals is not about one being universally better. It is about matching the tool to the workpiece and the skill of the person holding it.
A Clean Surface Needs a Clean Start
The best heat gun technique in the world cannot fix a dirty surface. Paint that has been coated with grease, wax, or decades of grime behaves unpredictably under heat. The contaminants vaporize and smoke, and the paint underneath may not soften evenly. Wiping the surface down with a degreaser and letting it dry before starting saves time and reduces scorch risk.
Loose or failing paint should be scraped off by hand before the heat gun comes out. Paint that is already peeling does not need to be softened, and running a heat gun over it just bakes the remaining edges harder. A quick pass with a paint scraper or a wire brush removes the loose material and leaves a surface that responds to heat uniformly.
A heat gun bought new needs a break-in period. The first use often produces a smell of burning oil from the manufacturing process. Running the gun at high heat outdoors for a few minutes before the first real job burns off the residue and prevents the smell from transferring to the work. This is not a safety issue, just a hygiene issue.
The Rhythm of Stripping
Stripping a door with a heat gun settles into a rhythm after a few minutes. The gun sweeps, the paint bubbles, the scraper lifts a ribbon, the gun moves on. The rhythm is the point. A person who holds the gun and scrapes in a synchronized flow covers ground efficiently without scorching. A person who treats each step as a separate operation, heat up a section, then scrape it, then heat the next, loses the timing and risks overheating the wood while waiting for the scraper to catch up.
The steady hand wins. A heat gun is not a precision instrument, but it rewards a steady sweep and a patient read of the surface. The wood tells a person what it needs, usually through the behavior of the paint. Watching the paint, not the clock or the temperature gauge, is the skill that separates a clean strip from a scorched mess.
The last coat of paint reveals the quality of the work. If the wood underneath is pale and clean, with no dark streaks and no gouges, the technique was right. If the surface shows scorch marks or scraper furrows, those will show through the new finish no matter how many coats go on top. Sanding can fix shallow problems, but deep scorch marks remain, a permanent record of the moment the gun stayed too long.