
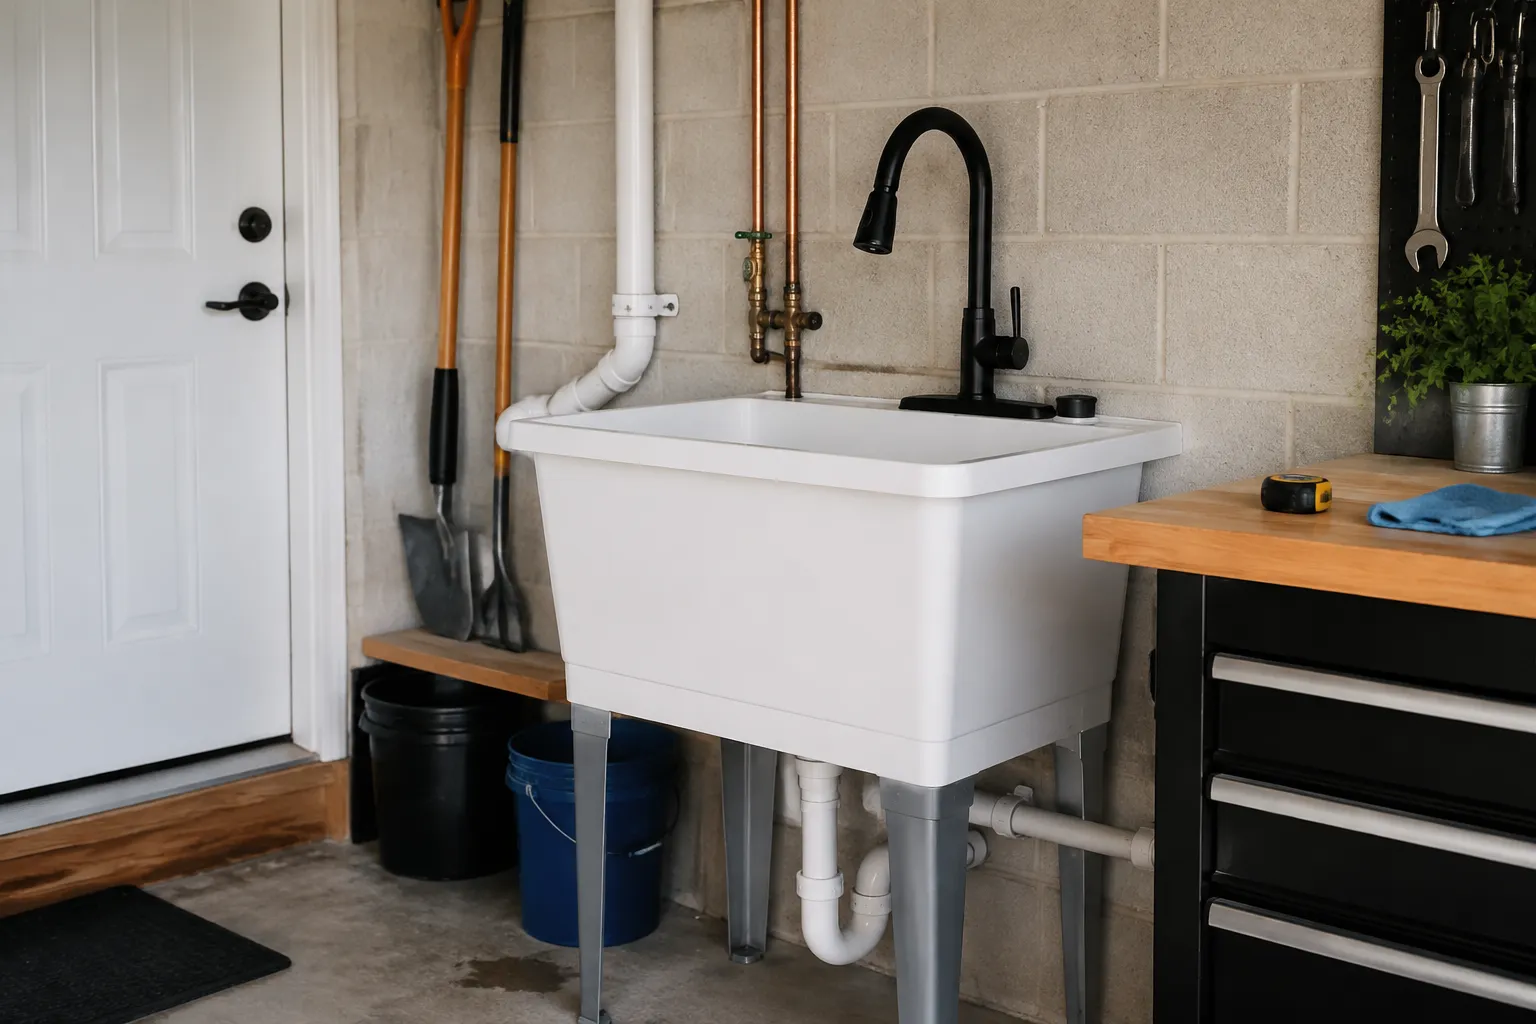
The garage sink is the most lied-about fixture in the American home. Homeowners will tell you it is purely utilitarian, a place to rinse paintbrushes and wash the dog, and that its appearance does not matter. This is a polite fiction. The garage sink is the first thing a person sees when the door from the house swings open, and it sets the tone for the entire space. A flimsy, shallow plastic basin that flexes under a full bucket reads as neglect. A deep, rigid commercial-style unit reads as intention. The difference between the two is not budget. It is planning.
Most garage sink installations fail before any pipe is glued. The failure happens in the quiet moments, usually when someone measures the wall studs and mentally adds a few inches for the spout, or when they decide to use a kitchen faucet because it was on sale. The checklist below exists to prevent that specific kind of failure. It is organized around decisions, not parts, because the parts are easy. The decisions are where the project lives or dies.
The Depth Question Comes First
Before buying anything, a person must decide what the sink will actually contain. This is the single most important question, and almost everyone gets it wrong by defaulting to the shallowest option. A 6-inch-deep utility sink handles hand-washing and small parts. It fails at the three jobs that justify a garage sink in the first place: washing a large bucket, soaking a grill grate, or rinsing a muddy pair of boots. Those tasks demand at least 10 inches of depth, and 12 is better. The extra depth costs almost nothing in materials. It costs a few inches of the user's lower back, which is a fair trade.
The depth decision drives everything else. A deeper basin means the faucet will need a taller spout to clear the rim. It means the drain will sit lower, which affects the waste line routing under the slab. It means the mounting frame, if the sink is a drop-in style, will need to bear more weight when the basin is full. Water weighs about 8 pounds per gallon. A 12-inch-deep basin at 20 inches wide and 24 inches long holds roughly 25 gallons when full. That is 200 pounds of water, plus the bucket, plus the person leaning on the edge. The framing has to be ready for that.
A wall-mounted sink is a trap for exactly this reason. They look clean and industrial, and they free up floor space. But a wall-mounted unit transfers all of that load into the wall studs, which were never designed to hold a 250-pound point load several feet from the floor. The result is a wobbly fixture and cracked tile in the house on the other side of the wall. A floor-standing unit, or a drop-in set into a built cabinet frame, distributes the load to the floor. That is where heavy things belong.
Matching the Sink to the Wall Structure
Garage walls are rarely kind. They are often studs on 24-inch centers, or they are covered in a layer of OSB that was never intended to be finished. The sink needs a mounting surface, and that surface needs to exist before the sink arrives. This means framing out the area with extra blocking, typically a pair of 2x6 horizontals between the studs at the height where the sink rim will land. The blocking has to be flush with the face of the studs, not recessed, or the sink will sit proud and look like a mistake.
For a drop-in sink set into a countertop or a custom cabinet, the same principle applies, but the structure moves to the cabinet frame. A utility-grade cabinet built from 2x4s and plywood is more honest than a recycled kitchen vanity. Kitchen vanities are built for light loads and dry conditions. A garage sink will get splashed, dripped on, and occasionally hit with a wrench. The cabinet has to tolerate that abuse. A pressure-treated plywood base with a marine-grade finish, or a powder-coated steel frame, will outlast every homeowner's patience.
One detail that gets skipped constantly is the backer board behind the faucet mount. If the sink is against a bare stud wall, the faucet deck needs a solid surface to clamp against. A sheet of 3/4-inch plywood, painted and sealed, mounted between the studs at the faucet height, solves this. Without it, the faucet mounting nuts have nothing to bite into, and the whole unit wiggles every time the handle is turned.
Faucet Choices That Survive the Garage
Kitchen faucets do not belong in a garage. They look right, which is the trap. But a kitchen faucet is engineered for a controlled indoor environment with low sediment in the water. Garage water lines are often old galvanized pipe or a branch off the irrigation system. That water carries grit that will destroy a cheap cartridge in a season. The faucet for a garage sink needs to be a commercial or utility model with a ceramic disk cartridge and a metal body. These models cost twice as much as a mid-range kitchen unit and last ten times as long.
The spout height is a separate decision. A gooseneck spout with 8 to 10 inches of clearance lets a person fill a 5-gallon bucket without tilting it. A short spout makes the same task a balancing act. The trade-off is that a tall spout splashes more, so the back wall behind the sink needs to be waterproof. A sheet of 4x8 fiberglass panel or a roll of commercial waterproof membrane will protect the drywall and the studs. This is not cosmetic. It is the difference between a garage that smells like mildew in July and one that does not.
Consider a faucet with a side-mounted sprayer or a pull-out wand. The wand is not a luxury. It is the tool that actually rinses the corners of the basin and washes off a muddy shovel head without splashing the operator's chest. A fixed spout only points straight down. The wand points where the work is. If the budget allows for only one upgrade, this is the one.
Drain and Supply Line Routing
The plumbing behind the wall is where the project either disappears into the wall or becomes a recurring problem. The supply lines should be run in PEX with a shut-off valve right at the sink. A local valve is non-negotiable. Without it, a leaking faucet means shutting off water to the whole house, which is the kind of annoyance that turns into a deferred repair. The valve costs twelve dollars and takes ten minutes to install.
The waste line is the harder part. A garage sink drain often has to travel a long horizontal distance to reach a stack, and that travel is uphill in the plumbing sense. The drain needs a consistent slope of 1/4 inch per foot. Any less, and the drain will clog slowly. Any more, and the water runs too fast, leaving solids behind. The line also needs a vent. A garage sink tied into a branch drain without a vent will gurgle and drain slowly, and the trap seal will get sucked dry, letting sewer gas into the garage.
If the sink is in a slab-on-grade garage, an AAV (air admittance valve) under the sink is the standard solution. The AAV lets air into the drain when water flows, then closes to keep gas out. It works, but it has to be accessible. Burying it behind a finished wall panel is a mistake that will require surgery later. The AAV also needs to be the highest point in the drain run, or it will fill with water and fail.
Hot Water, Decided Honestly
Most garage sinks get cold water only, and that is the right call for most people. The cold line is usually right there, a simple tee off the nearest branch. Adding hot water means a long run from the water heater, which means waiting forever for the water to warm up and then watching the heat bleed out of the pipe before it reaches the tap. A tankless recirculation loop or an undersink point-of-use heater solves this, but both add cost and complexity.
The honest question is whether the garage sink will see tasks that need hot water. Washing grease off engine parts, cleaning paintbrushes after oil-based work, or soaking tools in warm soapy water all benefit from heat. If the answer is yes even once a month, the point-of-use heater is worth it. A 2.5-gallon unit under the sink provides enough hot water for a bucket and a wipe-down without the waste of a long supply run. If the answer is no, skip it. Cold water and a good degreaser handle ninety percent of garage work.
Lighting and the Work Surface
The sink itself is only half the station. The area around it determines whether the sink is actually useful. A single overhead garage light puts the user's own shadow over the basin. A dedicated task light, either a surface-mount LED bar above the sink or a swing-arm lamp mounted to the wall, eliminates that shadow. This is a small detail that changes the feel of the whole space.
The work surface beside the sink needs to be continuous and waterproof. A 24-inch run of butcher block next to a garage sink will delaminate within a year. A stainless steel table, or a plywood counter painted with a two-part epoxy, will survive. The surface also needs a raised lip on the back edge to catch splash and keep water from running down the wall. This lip is an afterthought in most installations, and it shows.
Drainage on the counter matters too. A slight slope toward the sink, even a degree or two, keeps puddles from forming. This is easy to build into a plywood top and impossible to fix later. The slope is invisible to the eye but obvious in the way the counter dries quickly and stays clean.
The Trap and the Cleanout
Garage sink drains collect debris that household drains never see: sand, sawdust, metal shavings, and the occasional lost screw. A standard P-trap with a cleanout plug at the bottom is the minimum requirement. Without the cleanout, clearing a clog means disassembling the trap, which spills the contents onto the floor. The cleanout plug costs two dollars and saves a mess.
Beyond the trap, a wye fitting with a capped cleanout on the horizontal drain run is worth the extra pipe and fittings. This gives a plumber's snake a way in when the clog is past the trap, in the line to the stack. The capped cleanout should point up and out, accessible from inside the garage. It will look odd, a small capped pipe sticking out of the wall or the cabinet base. The odd look is a small price for not having to cut the drain line open with a sawzall at 9 p.m. on a Sunday.
One more drain detail: the trap should be a deep-seal style, not the shallow one that comes with most cheap sink kits. The deep seal holds more water, which keeps sewer gas out during long stretches of no use. A garage sink can sit idle for two weeks in the winter. A shallow trap dries out and lets the gas through. The deep seal buys time.
Anchoring Against the Concrete Floor
Floor-standing sink legs look sturdy, but they usually sit on three small feet that rock on any uneven concrete. The solution is to remove the rubber feet, if they exist, and set the legs in a bed of construction adhesive on the floor, then bolt them down with a masonry anchor. This sounds permanent, and it is. A garage sink that wobbles is worse than no sink at all, because it invites a person to lean on it, which makes the wobble worse, which leads to a broken drain connection. The extra ten minutes on the drill and the two dollars for a masonry bit are the best value in the entire installation.
The floor underneath the sink also needs a waterproof mat or a small containment tray. The mat catches the inevitable drips from the faucet and the splashes from the basin. This is not about protecting the concrete, which does not care. It is about the user's feet. A wet concrete floor in a garage is a slipping hazard, and the garage floor is usually the same surface the person walks on to get from the car to the house. A ribbed rubber mat, cut to fit the footprint of the sink and the area in front of it, changes the whole experience.
The Final Walkthrough, Out of Order
Before the first bucket of water goes down the drain, a person should stand at the sink and reach for the faucet handle, the spray wand, and the soap dispenser, if there is one. The reach should be easy from a natural standing position. If any of those reaches require leaning in or stretching, the layout is wrong. Fixing the layout at this stage means moving a faucet or a dispenser, which is a minor job. Fixing it later means drilling new holes in the counter and patching old ones.
The same walkthrough should include a full bucket. Filling a 5-gallon bucket to the brim and lifting it out of the sink is the stress test for everything. The bucket should clear the spout. The basin should not flex. The drain should take the full volume without backing up. If the bucket does not clear the spout, the sink is too shallow or the spout is too low, and no amount of clever plumbing will fix a geometry problem. The bucket test is the truth teller. It takes two minutes, and it is the reason a garage sink either becomes the most used tool in the house or the subject of a recurring complaint that nobody ever fixes.