
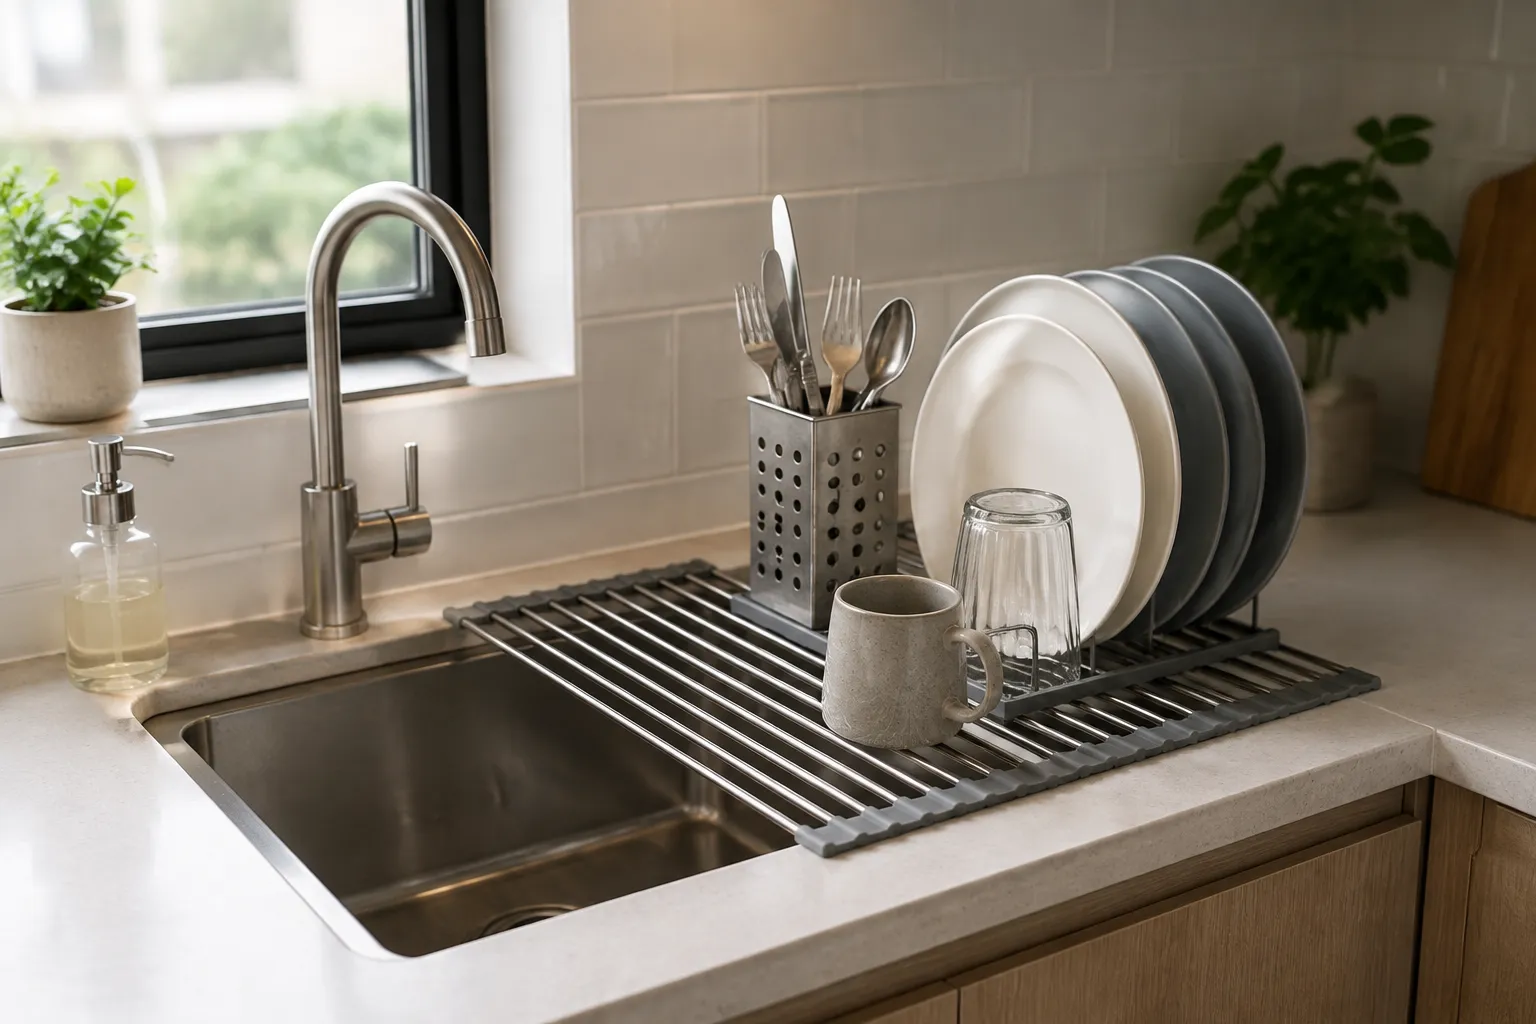
The standard dish rack is a conspiracy against small kitchens, and it has been for decades. Manufacturers keep producing the same wire grid with the same cup spindles and the same utensil basket, scaled down slightly, and calling it a solution. The real problem is not the size of the rack. The problem is that the rack, the sink, and the counter have never been considered as one system. A person with a small sink area does not need a smaller version of a suburban rack. That person needs a different arrangement entirely.
Before getting to the actual options, it helps to understand why the obvious products fail. Most racks are designed for a hypothetical 60-inch counter next to a 33-inch double sink. The rack sits on the right, the drying zone is the left basin, and nobody ever has to think about water runoff or knife storage or where the colander goes. Shrink that same layout by 20 percent, and the whole thing collapses. The rack hangs over the sink edge, the counter gets wet anyway, and the utensil basket eats the only usable square foot of space.
The first honest fix is to stop buying a rack that sits entirely on the counter. A rack that bridges the sink, with half its footprint over the basin, changes the math completely. This is not a new idea, but the execution matters. The cheap versions use a flimsy folding frame that wobbles under a stack of plates. The good ones use a sturdy base that extends about eight inches over the sink and locks into place with rubber feet on the counter edge. The plates drain into the sink, not onto the counter, and the counter keeps three or four inches of dry workspace that the old rack would have claimed.
The over-sink rack has one genuine weakness, and it is worth acknowledging. Loading it from the side, where the sink is, means reaching across the basin to place a plate. For a person of average height, this is a minor lean. For someone with a bad back or short arms, it is a daily frustration. The solution is not to abandon the bridged rack but to pair it with a cutting board that sits flush over the second half of the sink. That gives the area a flat surface on one side and a draining surface on the other, and both are at the same height, which keeps the whole zone workable.
For the smallest spaces, the roll-up rack deserves more respect than it gets. These are the silicone-coated wire racks that roll into a cylinder and store in a drawer. Most serious cooks dismiss them as flimsy, and that dismissal is half right. The cheap ones, with thin wire and soft silicone, sag under a dinner plate and hold maybe four items before looking like a pup tent. But the premium versions use thicker stainless wire and a stiffer silicone that actually grips the plate edges. They hold six plates, a bowl, and a mug without collapsing, and they roll up to the size of a French press.
The roll-up rack is not the primary drying surface. It is the backup, the overflow, the drying space that appears only when the main rack is full. In a small sink area, that role is essential. The main rack handles the daily dishes. The roll-up rack comes out for the pasta pot, the salad spinner, and the time a person cooks an actual meal for guests. Storing it in the drawer keeps the counter clear when it is not needed, which is half the battle in a small kitchen.
Mounting the rack to the wall
The counter and the sink are not the only real estate in a small kitchen, and this is where most people stop thinking too early. The wall above the sink, the strip of wall between the counter and the upper cabinets, is dead space that can hold a surprising amount of drying capacity. A wall-mounted dish rack, installed directly over the sink, puts the dishes exactly where the water should go and keeps the counter completely clear.
These racks are common in commercial kitchens and almost unknown in homes, which is a shame. The design is simple: two horizontal stainless bars mount to the wall about 12 inches apart, and plates slide between them, leaning back slightly. Water runs down the plates, hits the bars, and drips into the sink below. The plates dry by airflow on both sides, which is faster than the one-sided drying of a flat rack. And the whole thing takes up zero counter space.
The catch is installation and capacity. The rack needs to mount into studs or use heavy toggle bolts, because a row of ceramic plates weighs more than most people guess. A full load of eight plates can exceed 15 pounds, and the leverage from plates leaning back puts stress on the top bar. The capacity is also limited to flat items. Bowls, mugs, and utensils still need a counter surface. This is a complement to a small counter rack, not a replacement for it.
For renters, the wall-mounted option is usually dead on arrival, and that is fine. The calculation is different for someone who owns the space and can put a few screws in the wall. That person gets a permanent drying station that never needs to be moved, dried, or stored. The dishes air dry in a position that looks intentional and even handsome. The water drains straight into the sink basin, so there is no tray to empty and no counter to wipe. It is the closest thing to a zero-footprint solution that exists.
The utility of a small two-tier rack
A two-tier rack usually looks like a gimmick until a person has to dry a set of espresso cups, a few bowls, and the daily plates in a space the size of a cutting board. The top tier, which sits about six inches above the bottom, doubles the usable surface without doubling the footprint. The trick is finding one where the top tier is actually removable and where the bottom tier is not so deep that reaching the back row requires a stretch.
The better two-tier designs use a top shelf that tilts slightly, so cups and small bowls sit at an angle and drain forward. Flat shelves hold water in the bottom of a cup, which is how a person ends up drying dishes that have already been "dried." The tilt matters, and so does the drainage slot placement. A top tier with small holes lets water drip onto the plates below, which defeats the purpose. The good ones route the water to the edges, where it falls straight into the bottom tray or the sink.
The honest limitation of the two-tier rack is that it handles small things well and large things poorly. A dinner plate does not fit on most top tiers, and stacking it on the bottom tier blocks the entire lower level. The rack shines as a daily driver for a household of one or two people, where the dishes are mostly cups, small plates, and bowls. For a family of four, it becomes a bottleneck. The right buyer for this rack is the person who washes dishes throughout the day, not the person who faces a mountain after dinner.
Using the side of the sink cabinet
The inside of the cabinet door under the sink is another piece of ignored real estate. A simple over-door rack, the kind designed for cleaning supplies, can hold a drying rack's worth of cutting boards, trays, and baking sheets. These flat items are the hardest to dry in a small area because they take up horizontal space out of proportion to their actual use. Storing them on the cabinet door, vertically, frees the counter entirely and gives them a place to finish drying where they will also live permanently.
This is not a drying rack in the traditional sense, but it solves the same problem. The bottleneck in a small sink area is rarely the plates. It is the awkward flat stuff, the cutting board, the sheet pan, the cooling rack, that has nowhere to go. A vertical storage rack on the cabinet door holds six to eight flat items, lets them air dry, and keeps them accessible. The water drips down into the cabinet base, so a small tray or towel at the bottom of the door catches the occasional drip.
The door rack requires a cabinet with adequate clearance. A sink cabinet with a garbage disposal and pipes running through it can be too cramped for anything but the most shallow rack. A person should measure the interior depth before buying, and should also check that the rack does not interfere with the plumbing when the door swings. When it fits, the payoff is substantial: every cutting board removed from the counter opens up space for the actual dishes.
The folding rack over the faucet
Faucets are the most overlooked support structure in a small kitchen. A rack that mounts directly over the faucet base, with arms extending to the sides, turns the sink's vertical plumbing into a load-bearing drying surface. These racks are sold as faucet-mounted drying accessories, and they work best with gooseneck or high-arc faucets. The rack sits above the sink basin entirely, so it takes up zero counter space and drains directly into the sink.
The capacity is modest, usually a few cups and small plates, but the convenience is unmatched for quick rinses. A person rinses a mug, flips down the rack arm, and sets the mug on it without turning around. The same rack holds a sponge, a scrub brush, and a small bottle of soap, which removes three items from the counter. The drying surface is right over the sink, so water cannot run anywhere except down the drain.
The downside is that the rack is always in the way of the faucet handle. Reaching around it to turn the water on and off becomes a minor annoyance, and the rack's weight on the faucet can loosen the base over time with a cheap faucet. The solution is to use it selectively. The rack folds down or lifts off when not needed, and it stays on only during the drying phase of the day. This is not a permanent installation; it is a tool that appears when washing is happening.
What a drying mat does that a rack cannot
The silicone drying mat deserves a place in every small sink area, even if it sounds like a downgrade from a rack. A mat does not hold dishes vertically, and it does not have spindles for cups. But it folds up, stores flat, and can be rolled into a cylinder that fits in any drawer. It also handles the one thing racks do poorly: fragile items. A wine glass, a thin-walled ceramic bowl, or a piece of enameled cast iron should not be wedged into a wire rack. The mat gives it a flat, padded surface where it can rest without pressure points.
The best mats have a raised ribbed pattern that lifts the dishes slightly off the surface, allowing air to circulate underneath. The water pools in the low channels and evaporates, or the mat sits at a slight angle so the water runs off into the sink. The material matters. A cheap mat is floppy and develops permanent creases. A good one is thick enough to hold its shape, with a non-slip underside that stays put on wet counters.
The mat is the right tool for the end of a wash session, when the main rack is full and a few awkward items remain. It is also the right tool for a person who does not want to look at a drying rack at all. The mat goes down, the dishes dry, the mat rolls up and disappears. For a small sink area, the ability to return the counter to a clear state is worth more than the extra capacity of a permanent rack.
Choosing a rack based on the sink itself
The shape of the sink determines which drying solution will actually work, and most people buy the rack before they think about the sink geometry. A deep single-bowl sink, the kind that is 10 inches deep, can take an over-sink rack that sits low, inside the basin. The rack rests on the bottom of the sink or on the edges, and the dishes are below the counter line. This keeps the view clean and the counter fully clear, and it uses the sink as a drying chamber.
A shallow sink, the kind that is 6 inches deep or less, cannot hold an interior rack without the dishes sticking up awkwardly and blocking the faucet. For that sink, the bridged rack or the wall-mounted option works better. A divided sink, with two small basins, presents its own problem: neither basin is large enough for a full rack, but the divider itself can support a custom rack that spans both sides.
The sink material also matters. A thick farmhouse apron-front sink has a wide rim that supports a rack well. A thin stainless drop-in sink has a narrow rim, and a bridged rack can slide around or scratch the surface. Any rack that touches the sink should have rubber or silicone contact points, and a person should check those pads before buying, not after the first scratch appears. The rack is a tool, but the sink is a fixture, and the fixture is the harder thing to replace.
The best layout is a combination
No single rack solves a small sink area, and the people who insist one product will do the job end up with a counter full of compromises. The workable layout combines a bridged rack over the sink for the daily plates, a wall-mounted bar or a folding rack for cups and mugs, and a silicone mat for the overflow and fragile items. The combination takes up no counter space when the activities are done, and it handles the full range of what a person actually washes.
The order of acquisition matters too. Buying the bridged rack first, then assessing what is still hard to dry, is the right sequence. Many people buy a utensil basket first, because it is cheap and obvious, and then discover it eats the entire corner of the counter. The utensil basket is the last thing to buy, and only if the other racks have not solved the problem. Utensils dry fine lying flat on a mat or standing in a mug on the bridged rack.
The end goal is a sink area where the water goes only into the basin, the counter stays dry, and everything dries within a few hours. That is achievable in any space, but only by combining tools that each handle a specific job. The person who treats the small sink area as a system, rather than as a place to park a rack, gets a kitchen that works.