
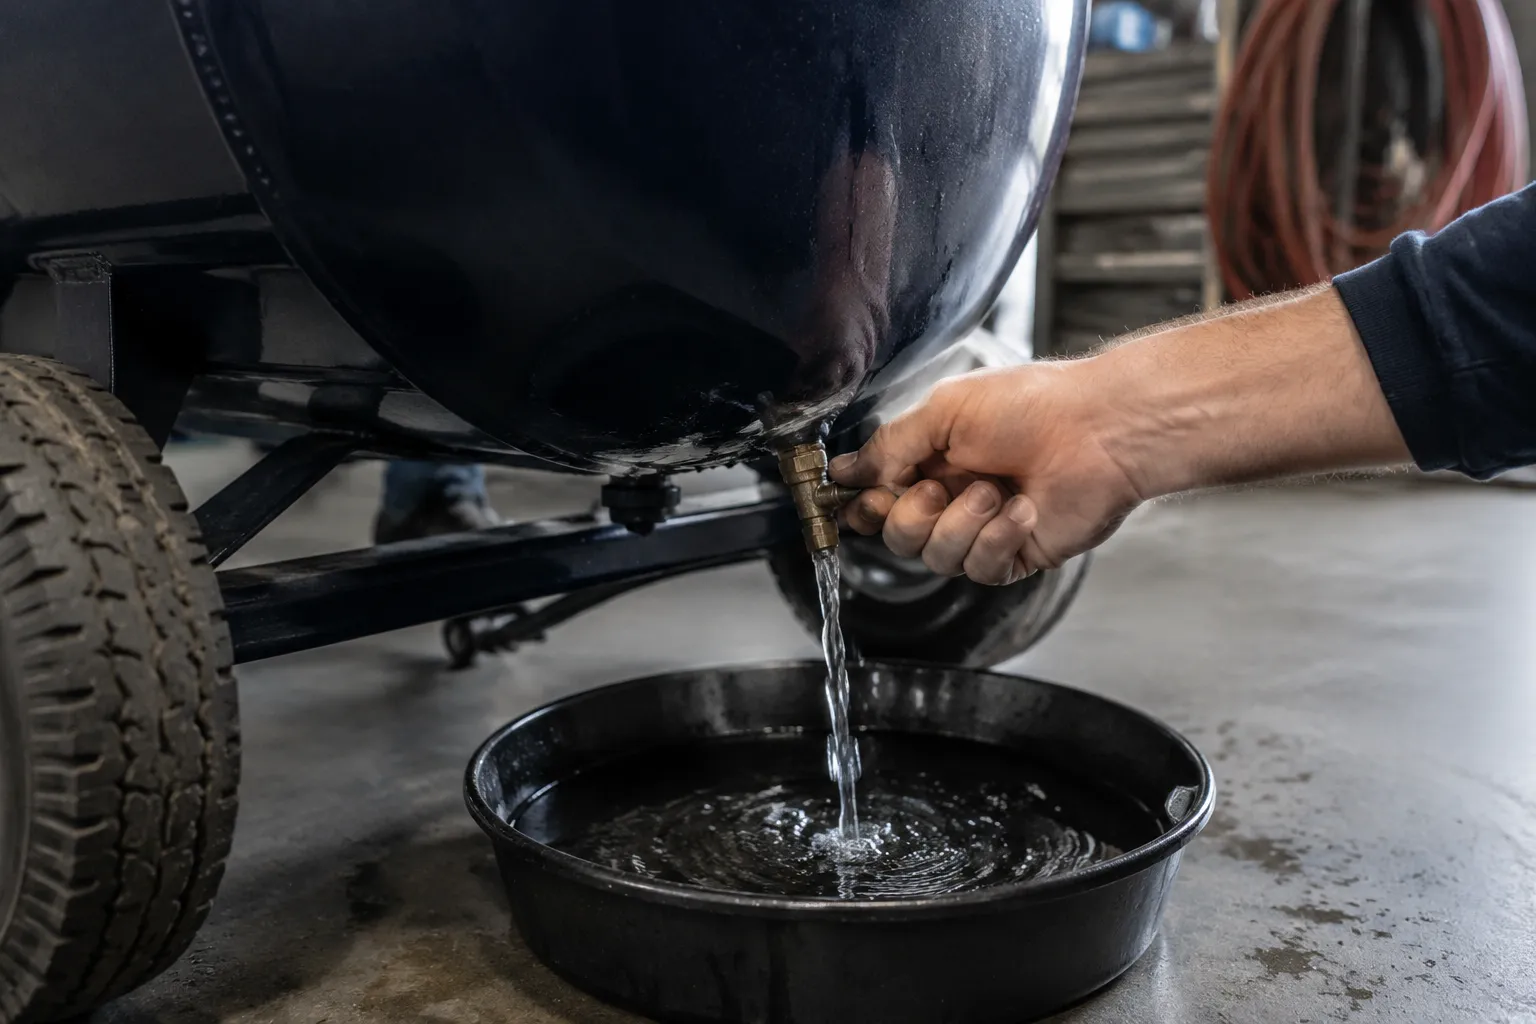
Condensation inside an air compressor tank is not a maintenance inconvenience. It is a chemical process that, left alone, turns a steel vessel into a rusted sieve. Every cubic foot of air pulled in by the pump carries atmospheric moisture, and when that air cools in the tank, water falls out of suspension. Over a single humid summer week, a typical 60-gallon tank can accumulate several pints of liquid water sitting against the bottom seam. The only defense is a drain routine that matches how the tank actually behaves, not one that follows a calendar someone printed on a sticker.
The common advice is to open the petcock at the bottom of the tank once a week and let the air blow out the moisture. That advice is incomplete to the point of being dangerous for anyone who runs a compressor in a damp shop, a coastal garage, or any space that experiences wide temperature swings. A weekly drain clears the water that has pooled by Friday, but it does nothing about the thin film of condensation that forms on the tank walls every single night as the tank cools and the internal air reaches its dew point. That film runs down the sides and sits in a thin layer across the entire bottom interior surface. Rust does not need a puddle to start. It needs a damp surface and oxygen, which a half-drained tank provides in abundance.
The Math of Moisture Intake
A compressor draws in whatever air exists in the room. At 70 degrees Fahrenheit and 65 percent relative humidity, a cubic foot of air holds roughly 0.008 pounds of water vapor. A five-horsepower compressor with a 60-gallon tank can pull around 15 cubic feet of air per minute at the intake, which means every minute of run time drags about two tablespoons of water vapor into the system. Much of that vapor gets compressed and cooled, and a significant portion condenses inside the tank. Run the compressor for an hour of actual work, sanding or nailing or running a die grinder, and the tank interior receives a substantial amount of liquid water that did not exist before. This is not a trickle. This is a measurable flow.
The math changes with the seasons. Cold winter air holds less moisture, so the tank stays relatively dry. A shop heated to 68 degrees with humid summer air outside can push the intake air's moisture content far higher. A compressor in an uninsulated garage in the Gulf South operates in a different world than one in a heated basement in Minnesota. The drain schedule has to respect that. A fixed weekly interval ignores the variable that actually matters: how much water entered the tank since the last drain.
Why the Petcock Fails the Job
The standard drain valve is a small brass petcock threaded into the bottom of the tank. Opening it while the tank holds pressure produces a blast of air that sounds impressive and blows out the pooled water near the valve opening. The problem is the geometry. The petcock sits at the lowest point, but the water that drains through it comes only from the immediate vicinity. The rest of the tank bottom, which may be 20 or 30 inches across, holds water that has to travel across a flat steel surface to reach the drain hole. Some of it gets pushed along by the air blast. A lot of it stays put, held in place by surface tension and the simple fact that a flat plate does not channel water toward a single point.
There is a simple test to prove this. Open the drain on a warm day after the compressor has run hard, and time how long the air blows clear. Then close the valve, wait ten minutes, and open it again. A second burst of water will come out. That second burst is the film that crept toward the valve after the initial pressure drop equalized. Repeat the process a third time and a few more drops will appear. Tilt the tank if it is a portable unit, and more water emerges from a spot that was supposedly drained. The petcock is not a drain. It is a relief valve for the wettest few ounces.
For stationary tanks bolted to a floor, tilting is not an option. The water simply sits there, in a thin layer, across the entire bottom head of the tank. That layer is the start of the rust line that eventually eats through from the inside out. A person cannot see it from the outside. The tank looks fine until the day a pin-hole leak sprays a fine mist of rusty water across the shop floor.
Draining Hot vs. Draining Cold
The temperature of the tank at drain time changes what comes out. A hot tank, right after heavy use, holds air that is still carrying moisture in vapor form. Opening the drain releases pressure and drops the temperature, which causes more condensation to form inside the tank as the air expands and cools. That new water lands on surfaces that were just hot enough to keep moisture in suspension. Draining a hot tank removes the liquid that already pooled, but it leaves behind a freshly wetted interior.
A cold tank, one that has sat overnight, tells a different story. The air inside has already cooled to the ambient temperature, and the moisture it could no longer hold has already condensed onto the walls and run to the bottom. Draining in the morning, before the compressor runs again, removes the maximum amount of settled water. The tank is at its driest state at that moment. This is the strongest argument for a startup routine: drain first, run second. It clears yesterday's accumulated moisture before new moisture gets added.
The Case for an Automatic Drain Valve
Human memory is the weakest component in any drain routine. Weekly intervals get skipped, busy weeks stretch into busy months, and a compressor in a corner of a shop can go unnoticed for a long stretch. An automatic drain valve removes the dependence on memory. Two common types exist. The first is a simple timer-based solenoid valve that opens for a few seconds at set intervals, typically every 15 to 30 minutes of elapsed time, regardless of whether the compressor ran. The second is a condensate drain that uses a float mechanism, opening a pilot valve when the water level rises past a set point.
The timer type has a flaw worth understanding. It vents air every cycle, even when the tank is dry, which wastes a small amount of compressed air if the system is pressurized at that moment. More importantly, a fixed timer does not know how much water actually accumulated. It fires on schedule, not on demand. The float type is smarter, because it only opens when water is present, but float drains are sensitive to the oil and particulates that blow through the tank. They require periodic cleaning or they stick closed, which returns the system to its original failure mode.
An automatic valve is a legitimate upgrade, and it costs less than a single tank replacement. A compressor tank is not a quoted and billed part on most repair invoices because most compressors are sold as complete units. Replacing the tank means replacing the whole machine, which can run several hundred dollars for a decent stationary unit and over a thousand for a quality model. A solenoid valve, by contrast, runs under a hundred dollars and installs in about fifteen minutes with a pipe wrench and thread sealant. It is the highest-return modification a compressor owner can make.
A Routine That Matches the Real World
The practical routine, for a person who does not want to bolt on electronics and just wants the tank to survive, starts with frequency. Drain the tank at the end of every work session, not at the start of the next one. Ending the day with an open drain, letting the tank fully depressurize and sit open overnight, allows the interior to equalize with the surrounding air and lets residual moisture evaporate out through the open valve. A tank left pressurized and sealed is a closed system. A tank left open is a ventilated one. Ventilation is the enemy of rust because it lets the interior dry completely.
Leaving the drain open overnight is not feasible for a system that runs on a pressure switch and stays pressurized for immediate use. For those setups, the end-of-session drain still matters, but it needs to be thorough. Open the valve fully, let the tank drop to zero pressure, and leave the valve open for a full minute after the hissing stops. The pressure equalizes quickly, but the water migration does not. Giving the water time to crawl toward the drain opening makes the difference between a token purge and an actual dry-out.
For tanks that must remain pressurized, a weekly deep drain is the minimum bar, but it has to be done correctly. Depressurize fully, open the drain, and walk away for five minutes. Come back, close it, repressurize, and then do a second drain cycle. The second drain catches the water that migrated during the first five minutes. This two-pass approach is the difference between a tank that lasts a decade and one that starts weeping rust-colored water through the paint seams in year four.
What Rust Actually Does to the Tank
Rust in a compressor tank is not a cosmetic issue. It reduces the wall thickness and creates pitting that concentrates stress. A tank is a pressure vessel, and a pressure vessel with compromised walls is a candidate for catastrophic failure. The common failure mode in consumer compressors is not a violent explosion; it is a pinhole leak that grows slowly. But the risk profile changes when the tank has been rusting from the inside for years. The bottom head takes the brunt because that is where the water sits, and the bottom head is also where the tank has the least external protection from road debris and shop abuse.
The interior of a new tank has a thin oil coating from the manufacturing process that offers some early protection. That coating degrades within the first year of regular use, especially if the compressor runs intermittently and allows condensation to form and evaporate repeatedly. Once the oil film breaks down, bare steel is exposed to water and air. The rust that forms is not a passive layer like the green patina on copper. It is a flaky, porous scale that holds moisture against the metal and accelerates further corrosion. A rusted tank does not heal. It only gets worse at a rate proportional to how often water sits against the compromised areas.
There is a point of no return. When rust scale starts flaking off the interior and getting carried into the air lines, it appears as a fine red dust at the hose outlet. That dust is abrasive. It wears out tool seals, contaminates spray finishes, and settles into regulators and lubricators. When a person sees red dust coming out of a blow gun, the tank interior is already a mess and the only real fix is tank replacement. No amount of draining from that point forward reverses the damage already done.
The Moisture Trap Nobody Checks
The tank is the largest condensation surface, but it is not the only one. The discharge line running from the pump head to the tank check valve gets hot during operation and cools rapidly when the compressor shuts off. That temperature swing produces condensation inside the pipe, which then drains back into the tank when the compressor is off. The check valve is supposed to prevent backflow, but a worn check valve with a slight leak lets that water drip back into the pump head itself. Water sitting in a pump cylinder is a corrosion source and a lubrication killer. A person chasing a rust problem should inspect the check valve at the same time they install an automatic drain. A leaky check valve undoes the work of every drain in the system.
A simple test for check valve leakage involves removing the air filter and spinning the pump over by hand or with a brief bump of the starter. If air hisses back through the intake, the check valve is passing air in the wrong direction, and it is passing water too. Replacing the check valve is a modest expense, often under thirty dollars, and it addresses a corrosion channel that most owners never consider.
A Drained Tank Still Needs a Dry Air Path
Even a perfectly drained tank delivers moist air to the tools. The tank removes some moisture by letting it condense and settle, but the air leaving the tank is still saturated at the tank's pressure and temperature. As that air expands through a hose and cools further, more condensation forms downstream. Tools that run on untreated air accumulate water internally. A spray gun spits water droplets into a finish. A die grinder passes moisture through its bearings. The tank drain routine protects the tank, but it does nothing for the tools on the other end of the hose.
The fix is a water separator or a refrigerated dryer installed between the tank outlet and the hose. A simple cyclone separator costs little and removes a large portion of the remaining moisture. A refrigerated dryer removes almost all of it, but it adds cost and requires a power connection and periodic maintenance. For a shop that runs air tools for more than a few minutes a day, the separator is not an accessory. It is the second half of the same moisture problem. The tank drain handles the bulk water; the separator handles the vapor that the tank never captured.
Nothing about this is glamorous. Draining a compressor tank is the kind of task that gets put off precisely because it is quick, dirty, and easy to ignore. But the cost of ignoring it is a machine that fails not through dramatic breakage but through slow, invisible thinning of its weakest surface. The tank sits in the corner, holds pressure, and does its job until the day it does not. A five-minute habit at the end of a work session, or a sixty-dollar valve that does the remembering for a person, is the price of keeping that corner of the shop quiet and dry.