
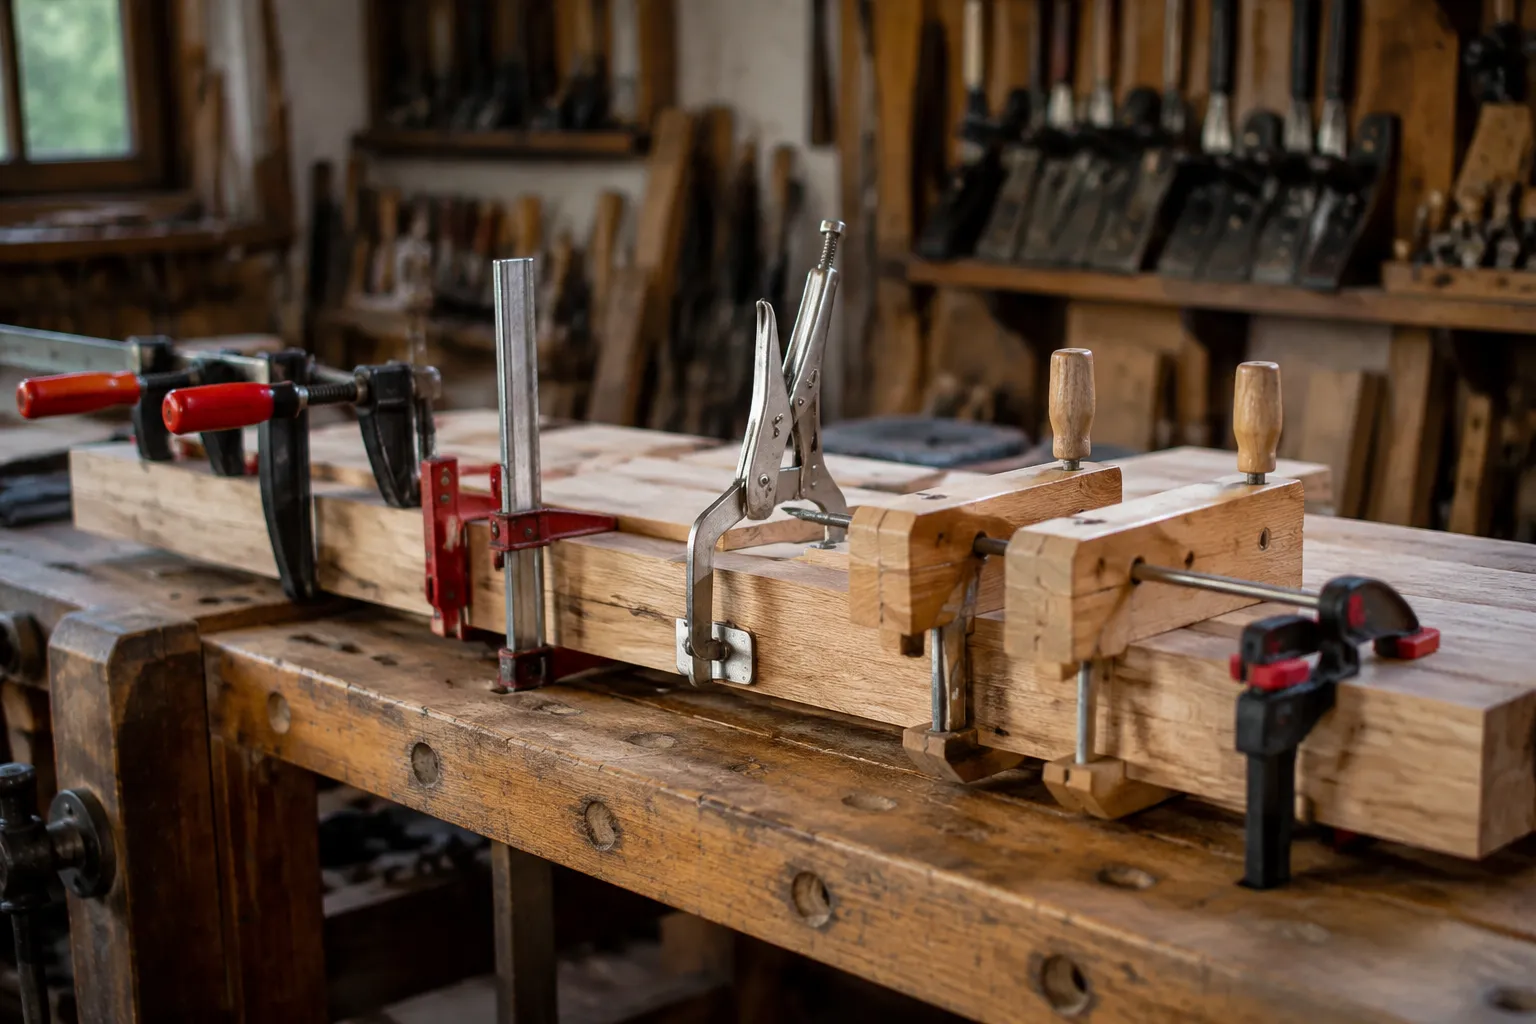
Woodworking has a dirty secret that most beginners discover the hard way: the clamp is the real tool. A table saw cuts the wood, a router shapes it, but a clamp decides whether the pieces stay where they were put. All the careful joinery in the world collapses into a crooked mess the moment the glue starts to set and the workpiece slides. The clamp is not an accessory. It is the difference between a project that fits and a project that fights.
The problem is the sheer variety. Hardware stores stock walls of them, and they all look like they should work. They do not. Each clamp type solves a specific problem, and using the wrong one creates a new problem that usually involves swearing and a chisel. Understanding which clamp does what, and where each one fails, turns a frustrating afternoon into something close to peaceful.
F-Clamps and the Pressure Question
The F-clamp, sometimes called a bar clamp, is the default for most shops. A long steel bar, a fixed jaw on one end, a sliding jaw that locks with a trigger, and a screw on the other end to apply pressure. They are cheap, they come in lengths from six inches to six feet, and they work. A shop without a set of F-clamps is a shop that does not glue much.
Their strength is also their weakness. The screw puts real force behind the jaw, which is exactly what edge-to-edge panel gluing needs. But that force concentrates on a small pad, and it can crush soft wood if the pad is tiny or the user is enthusiastic. The fix is simple, and every experienced woodworker does it: glue a scrap of leather or a thin piece of cork to the pad. It spreads the load and saves the workpiece.
The other limitation is reach. An F-clamp can only reach so far across a panel before the bar gets in the way. Clamping the middle of a wide board becomes a puzzle of flipping clamps and working around the bar. For that, a different shape is needed.
Parallel Clamps for Flat and True Panels
Parallel clamps look like F-clamps at first glance, but the jaws tell the real story. Instead of small pads, the jaws are wide, flat bars that stay parallel to each other as the screw tightens. That wide jaw spreads pressure across the whole surface, so a panel clamped edge-to-edge comes out flat, not dimpled.
They cost more, sometimes three or four times more than an equivalent F-clamp, and for good reason. A parallel clamp can bear down hard without leaving marks, and it holds a panel flat across its entire width. For a tabletop or a cabinet door, that is the difference between a surface that needs planing and a surface that is ready for sanding. The tradeoff is bulk and weight. A four-foot parallel clamp is a heavy thing, and handling a full set of them for a single glue-up gets tiring.
The honest advice is to buy parallel clamps in pairs, and to buy the longest ones first. A pair of 24-inch clamps handles most cabinet work, and a pair of 50-inch clamps covers tabletops. They are an investment, but one that pays off every time the glue dries straight.
Spring Clamps and the Speed Trap
Spring clamps are the gateway tool. Cheap, colorful, and endlessly handy, they live in a drawer near the bench and get used for holding things that are not even woodworking. A person uses them to hold a phone charger in place, or to clip a bag of chips shut. They are the most versatile clamp in the house.
For actual woodworking, they are a trap. The pressure is limited by the spring, which means they cannot pull two thick boards together with enough force to close a gap. The jaws are also angled, so they apply pressure at a slight pitch, which can rock a piece out of square. They are perfect for holding a small piece while the glue sets, or for clamping a temporary guide, but they are not a substitute for a real clamp.
The distinction matters because every beginner tries to use them for a real glue-up at some point. The result is a joint that looks tight but fails under load, and the failure is always blamed on the woodworking when the real culprit was the clamp. A spring clamp is a convenience, not a workhorse.
Pipe Clamps When the Job Gets Long
Pipe clamps take a half-inch or three-quarter-inch pipe and turn it into a clamp body. The head slides along the pipe and locks with a set screw, and the screw applies pressure. They are the old-school solution for long glue-ups, and they still work.
The beauty of pipe clamps is modularity. A set of heads and a few lengths of pipe cover everything from a chair rail to a long table edge. The pipe is cheap, and the heads are not expensive. A shop can own a dozen clamp heads and just buy more pipe when a longer clamp is needed.
The downside is the pipe itself. It flexes slightly under heavy pressure, and a long pipe can bow, which means the clamp does not pull straight. The pipe also leaves marks on the wood unless a block is used, and the threads on the pipe can rust and bind. Most serious shops have a set of pipe clamps in the corner, covered in dust, used only when nothing else reaches.
They are not glamorous, but they are reliable in a way that matters. When a project is too long for parallel clamps and too heavy for anything else, pipe clamps are the answer.
Strap Clamps for Odd Shapes
Some glue-ups do not have flat faces to clamp against. A picture frame, a round table edge, a chair leg, any shape that curves or corners presents a problem for a straight clamp. This is where the strap clamp earns its place.
A strap clamp is a long nylon webbing strap with a tightening mechanism. The strap wraps around the entire piece, and the mechanism pulls it tight, applying even pressure all the way around. For a mitered frame, it pulls all four corners together at once, which is nearly impossible to do with individual corner clamps.
The bandsaw box crowd uses them constantly, wrapping the strap around curved boxes to pull the lid and base into place. The pressure is even, so there are no gaps on the outside of a curve. The limitation is that the strap cannot apply the raw force of a screw clamp. It is for holding pieces together while the glue sets, not for closing a gap that should not be there in the first place.
A person who does a lot of frame work should own at least two strap clamps, because a single one cannot handle a large frame without twisting under the load. Two straps, crossed at the corners, hold a frame flat and true.
The Miter Clamp for Corner Work
Mitered corners are the fussiest joint in woodworking. The two faces meet at 45 degrees, which means the clamping force has to push both ways at once, and a standard clamp just slides the joint out of alignment. The miter clamp exists specifically for this problem.
There are a few designs. The simplest is a pair of angled jaws that sit on either side of the corner and pull it together. More elaborate versions use a band or a hinged frame. The point is that the clamp pushes the two pieces into each other, not past each other, which is what keeps the miter tight.
For a single frame, four miter clamps do the job, and they are worth the money if frames are a regular part of the work. The alternative is a strap clamp, which works but does not hold the corners quite as precisely. Miter clamps are the difference between a frame that looks sharp and one that needs filler.
Hand Screws for Gentle, Adjustable Pressure
The wooden hand screw is the oldest clamp in the shop, and it is still the best choice for certain jobs. Two wooden jaws, two threaded rods, and a lot of adjustability. The jaws stay parallel no matter how the screws are turned, so they apply even pressure across a wide surface.
The wood jaws are the real advantage. They do not dent or mark, they conform slightly to an uneven surface, and they are gentle on finished pieces. A hand screw can grip a curved piece, a tapered piece, or a piece with a profile, because the jaws can be angled to match. No other clamp offers that flexibility.
They are slow to adjust. Turning two screws to open and close the jaws takes time, and a person cannot flip them around one-handed. But for a delicate glue-up or a piece that must not be damaged, the hand screw is the right tool. Every shop should have at least one, and two is better.
Edge Clamps for Edges That Need Attention
Gluing a piece to the edge of a board, like a face frame to a cabinet box, needs a clamp that does not reach across the whole assembly. An edge clamp does exactly that. It has two jaws that pinch the workpiece against the edge, and it applies pressure perpendicular to the face.
The practical use is simple: a person clamps the edge piece in place, and the clamp holds it flat while the glue dries. Without an edge clamp, the workaround is to clamp a block to the face and then clamp the edge piece to the block, which is fiddly and never quite works. The edge clamp is a clean solution to a common problem.
The limitation is depth. Most edge clamps only reach a few inches down the face, so they are not for thick assemblies. For thin stock and face frames, they are indispensable.
The Clamp Storage Problem
Every shop accumulates clamps, and every shop eventually faces the storage question. Clamps are awkward, they tangle, and they take up wall space that could hold something nicer. A person can spend as much time organizing clamps as using them.
The common solution is a wall rack made of scrap wood with a series of slots and pegs. F-clamps hang by their bars, parallel clamps stand upright in a holder, and spring clamps live in a bin or a drawer. The key is to keep them visible. Clamps that are hidden in a drawer are clamps that never get used, and a person ends up buying duplicates.
A rolling cart works well for a bigger shop, because the whole set can move to the assembly table. For a small shop, a wall rack above the bench keeps the clamps within arm's reach. Either way, the storage must be dedicated. Clamps do not belong in a bucket under the bench, because every time a glue-up starts, the search begins, and the glue starts to set.
Buying Clamps in a Plan
The mistake is buying one of everything, all at once. A beginner ends up with a drawer of spring clamps, a single F-clamp that is too short, and no way to clamp a panel. The smarter approach is to build a set around the projects that actually happen.
Start with four F-clamps in medium lengths, 12 to 24 inches. That covers most cabinet work and small glue-ups. Add a pair of parallel clamps in a longer length for panels, then a strap clamp for frames. Add more as the work demands. A person who buys clamps one at a time, matching the need, ends up with a set that all get used.
The other consideration is quality. Cheap clamps flex, the threads bind, and the pads fall off. A mid-range clamp, from a brand like Bessey or Pony, performs well and lasts. The premium brands are nicer, but the mid-range is where the value sits. A cheap clamp is not a bargain if it fails in the middle of a glue-up.
The final word on clamps is simple: they are not interchangeable. Each type has a job, and the job dictates the tool. A shop that owns the right clamp for the work is a shop that produces clean, square, solid joints. A shop that owns a random collection of clamps is a shop that fights the wood.