
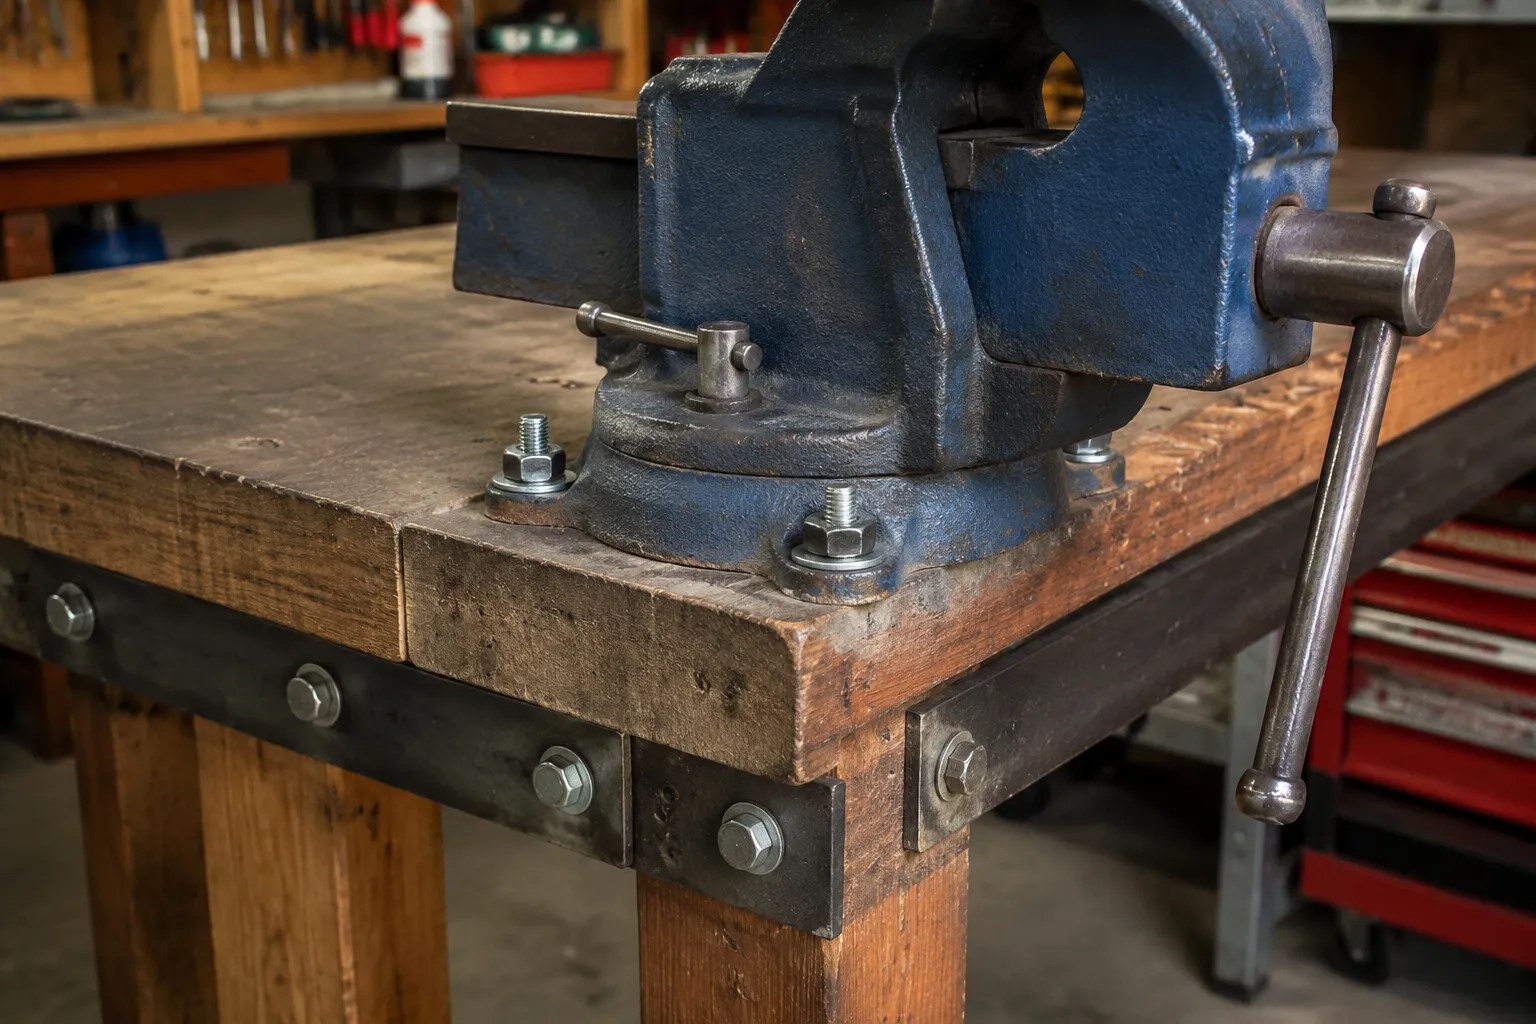
The standard workbench vise, the kind bolted to the front edge of a bench or through the top, gets sold as a complete tool. It is not. The casting, the screw, the jaws, those are finished products. The mounting hardware is an afterthought, usually a pair of zinc-plated carriage bolts and hex nuts rattling around in a bag, and the instructions assume the buyer owns a benchtop made of solid 3-inch hardwood. Most people do not own that bench. Most people own a 2x4-framed top with a plywood skin, or a hollow-core door on saw horses, or a manufactured bench with a thin steel top that flexes when leaned on. The vise gets bolted to whatever is there, the bolts get tightened until something gives, and the vise spends the rest of its life wobbling, or the bench top splits, or the whole assembly racks sideways under load. The fix is not a stronger vise. The fix is understanding what those four bolts actually do and what the material they bite into can and cannot handle.
Bolting a vise to a bench is a joint design problem, not a hardware store errand. The bolts transfer every pound of force the vise applies into the bench structure. A person cranks a 6-inch vise down on a seized nut and leans a 3-foot breaker bar on the handle; that can put several hundred pounds of force into the jaws. The bolts see that force as shear and tension, constantly, at odd angles. The bench top sees it as localized crushing and bending. The weakest link in that chain is rarely the vise. It is the wood immediately around the bolt holes, or the thin metal of a manufactured top, or the washers too small to spread the load.
The first question is always the same: what is the bench top made of, and how thick is it? A solid hardwood top, 2 inches or better, can take carriage bolts torqued down hard with big washers and never complain. A 3/4-inch plywood top needs large steel washers top and bottom, and even then the plywood will compress over time. A hollow-core door needs a steel backing plate inside, and a thin steel top needs a serious load-spreading plate on the underside. There is no universal right bolt. There is only the right bolt for the thickness and composition of the material it passes through.
Bolt Size, Grade, and Why 3/8 Inch Usually Wins
The vise manufacturer drills the mounting holes to a specific diameter, and that sets the maximum bolt size. Most common vises, the 4 to 6 inch homeowner and shop class, use holes sized for 3/8-inch or sometimes 1/2-inch bolts. A person should never drill the vise base out to accept a bigger bolt. That removes metal from the casting where it takes the most stress, and a cracked base is terminal. The right move is to use the largest bolt that fits the existing holes, which in practice means 3/8 inch for the vast majority of vises.
Grade matters less than people think. A grade 2 bolt, the cheapest kind, has a tensile strength around 60,000 psi. A grade 5 runs about 120,000 psi. For a bench vise, the grade 2 is almost always sufficient because the limiting factor is the wood crushing, not the bolt shearing. The bolt will bend before it breaks, and a bent bolt is obvious. That said, grade 5 is cheap insurance and costs pennies more. The real reason to choose grade 5 is the threading. Grade 5 bolts have a rolled thread that is cleaner and stronger, and they are less likely to gall or strip when a person is cranking a wrench in a tight spot under the bench.
Bolt length gets miscalculated constantly. The bolt needs to pass through the vise base, the bench top, the washers, and then leave enough thread to fully engage the nut plus a few threads showing. A 3/8-inch bolt through a 1-1/2-inch top needs to be about 2-1/2 inches long with a nut and washer. The common mistake is using a bolt too short, so the nut only catches a few threads, or too long, so it bottomed out against the threads and never tightens properly. The thread should always extend at least two full turns past the nut.
Carriage Bolts Versus Hex Bolts and the Square-Hole Problem
Most vises ship with carriage bolts, and for good reason. The rounded head with the square shoulder underneath seats into a square hole in the vise base, preventing the bolt from spinning while the nut is tightened. That design lets one person hold the wrench on the nut without also needing to hold the bolt head from turning. The catch is that the square shoulder only works if the hole in the vise base is actually square, or at least has a matching recess. Some vises, particularly cheaper ones, have plain round holes, and the carriage bolt spins freely. The workaround is to file the square shoulder into a hex shape to jam it, or just use hex bolts and hold the head with a wrench on top while working underneath.
Hex bolts are the better choice for most retrofits because they are easier to source in grade 5, and a person can hold the head with a socket wrench on top while tightening from below. The downside is needing two wrenches and a second hand. A trick that works well: run a hex bolt up through the bench top from underneath, then set the vise over it. The bolt head and washer on the underside act as a stud, and a nut and washer on top of the vise base does the clamping. That arrangement gets the wrench work up on top where it is visible, and it lets a person feel the load building without contorting under the bench.
Whatever the bolt type, the washers are not optional trim. A 3/8-inch bolt through a vise base hole that is 7/16 inch needs at least a 1-inch outside diameter washer under the nut. Through a soft wood top, the washer should be bigger, 1-1/2 inches or even a fabricated steel plate. The point of the washer is to spread the clamping pressure over enough area that the wood does not crush or the thin metal does not dimple. A standard narrow washer under a torqued vise bolt will sink into a pine top in a year, and the vise will get loose no matter how hard the nut was initially tightened.
Reinforcing the Bench Top Before the Bolts Go In
The bench top is the actual structure holding the vise, and most tops need help before they can do that job reliably. The weakest common setup is a hollow-core interior door used as a work surface, which is essentially a cardboard honeycomb between two thin skins of veneer. Bolting a vise to that is pure fantasy; the bolts will pull right through the top under the first heavy job. The same goes for a thin steel top on a manufactured cabinet, where the metal flexes and the bolts eventually elongate the holes.
The reinforcement method depends on access. If the underside of the bench is open, the best approach is a steel plate, 1/4 inch thick, roughly 4 by 6 inches or larger, drilled to match the vise bolt pattern. The plate goes under the top, and the bolts pass through the vise base, the bench top, and the plate. That plate spreads the clamping force over a wide area and, more importantly, gives the bolts a solid steel surface to bear against. The wood between the vise and the plate is then in pure compression, which even weak plywood can handle for years.
For a hollow-core door or a thin panel, the plate approach still works if a person can reach the inside to place it, but often the interior is sealed. In that case, the better move is to cut an access hole in the underside of the door, insert the plate, and bolt through. That is a bigger job, but it is the difference between a vise that works and a vise that tears the top apart. Some people instead use toggle bolts designed for hollow doors, which are quick and work for light clamping, but they do not have the bearing area or stiffness to hold a 6-inch vise under heavy work. It is a temporary solution at best.
For a solid wood top that is simply too thin, like a 3/4-inch pine board, the plate on the underside is still the right call, but the top surface needs attention too. The vise base itself will crush the wood fibers directly under it over time, especially if the wood is soft. A thin steel or aluminum plate, sized to the vise base footprint, placed between the vise and the bench top, distributes the pressure and prevents the base from digging in. The bolts then pass through the plate, the top, and the lower plate. This is the configuration for a serious workbench: a vise bolted through a sandwich of metal, wood, and metal.
The Fastener of Last Resort: Threaded Inserts in the Top
Some benches do not have open access underneath, like a torsion box top or a finished cabinet with a closed base. In those cases, the bolts cannot reach the underside, and a person needs a different anchoring method. The common answer is a threaded insert, a steel barrel with external threads on the outside and internal threads on the inside, set flush into the top surface. The vise bolts pass through the base and thread into the inserts. This method works well, but the inserts are only as strong as the wood they bite into, and installing them properly is exacting.
The insert needs a pilot hole drilled to the manufacturer's spec, and the hole must be perfectly perpendicular. The insert is then driven in with a driver bit or a bolt, and its external threads cut into the wood. In soft wood, the insert will strip out with repeated load cycles; in hardwood, it holds very well. The critical detail is that these inserts cannot be installed and removed repeatedly. Once they are in, they stay in, or the wood around them is damaged on removal. That makes them a poor choice for someone who wants to swap vises between benches.
Threaded inserts also concentrate the load at discrete points rather than spreading it, which means the bench top under the vise still needs to be substantially rigid. An insert in a 3/4-inch plywood top will pull out sideways under a heavy twisting load on the vise jaws. The insert is best used in a solid wood top at least 1-1/2 inches thick, or in a top that has been reinforced with a plywood or hardwood doubler underneath. When done right, inserts make a clean installation with no nuts visible under the bench, but done wrong, they fail catastrophically and leave stripped holes that are hard to repair.
The Sequence That Keeps Everything Aligned and Tight
Installation order seems trivial until a person has to undo three bolts to reposition the fourth. The right sequence starts with the vise positioned on the bench, perfectly square and at the desired setback. Most vises go at the front edge with the rear jaw flush with the front of the bench, so the workpiece hangs over the edge for filing and chiseling. Mark the bolt holes through the vise base with a sharp awl or a center punch. Do not trust a pencil line; the drill bit will wander.
Drill the holes through the top. For a through-bolt installation, the hole should be a 1/16-inch larger than the bolt diameter to allow for slight misalignment between the vise base holes and the bench holes. A tight hole that requires hammering the bolt through is a problem, because it means the bolt is not bearing evenly and will bind when the nut is tightened. For threaded inserts, the hole must be the exact size the insert manufacturer specifies, no slop at all.
With all holes drilled and any backing plate in place, set the vise back on the bench, drop the bolts in, and thread the nuts on just enough to hold. Then tighten in a crossing pattern, a little at a time, the same way a person tightens a cylinder head. The goal is even clamping pressure across all four corners. Torque the bolts firmly, but do not reef on them with a breaker bar. The point is to compress the wood and washers into a stable state, not to crush the top or strip the threads. After a few weeks of use, recheck the bolts and snug them again, because wood compresses and the joint settles.
One detail that separates a good installation from a frustrating one: put a thin coat of paste wax or anti-seize on the bolt threads before assembly. It prevents the nut from galling on the threads, makes future disassembly possible, and allows a more accurate final torque because the friction is consistent. A dry bolt feels tight when it is only halfway home, and a person will either leave it loose or break it trying to get it tighter.
The Bench Itself Has to Stop Bending
A vise bolted to a bench that racks or twists under load will never feel solid, no matter how good the bolts and plates are. The bench frame is part of the mounting system. A common failure is a bench with a heavy top and four skinny legs joined with screws into end grain. The first time a person leans on a long piece of stock clamped in the vise, the whole bench twists, and the vise appears to be loose when it is actually the bench swaying.
The fix is cross-bracing, usually a pair of diagonal braces on the back and sides, or a solid shelf panel nailed and glued into the lower frame. The bench needs to be rigid in the same plane as the vise jaws, because that is the direction the forces pull. A person can test this by clamping a scrap board in the vise and pushing hard on the end of the board. If the bench walks or the top flexes, the frame, not the vise, needs the attention.
Another overlooked point is the floor. A bench on carpet or on uneven concrete will rock, and the rocking feels exactly like a loose vise. Shimming the legs or bolting the bench to the wall is often the difference between a frustrating setup and a solid one. The vise is the tool, but the bench is the foundation, and the bolts are only as good as the structure they connect to.
The best mounting job in the world is still just four bolts holding a vise to a bench. But those four bolts, with the right size, the right washers, and a reinforced top, are the difference between a tool that works and a tool that threatens to tear itself loose on every job. Getting it right takes an hour of planning and an extra trip to the hardware store for a steel plate. Getting it wrong takes years of annoyance, a wobbling vise, and a bench top full of elongated holes that will never hold anything tight again. The vise was bought to hold work firmly. The mounting is what actually makes that happen.