
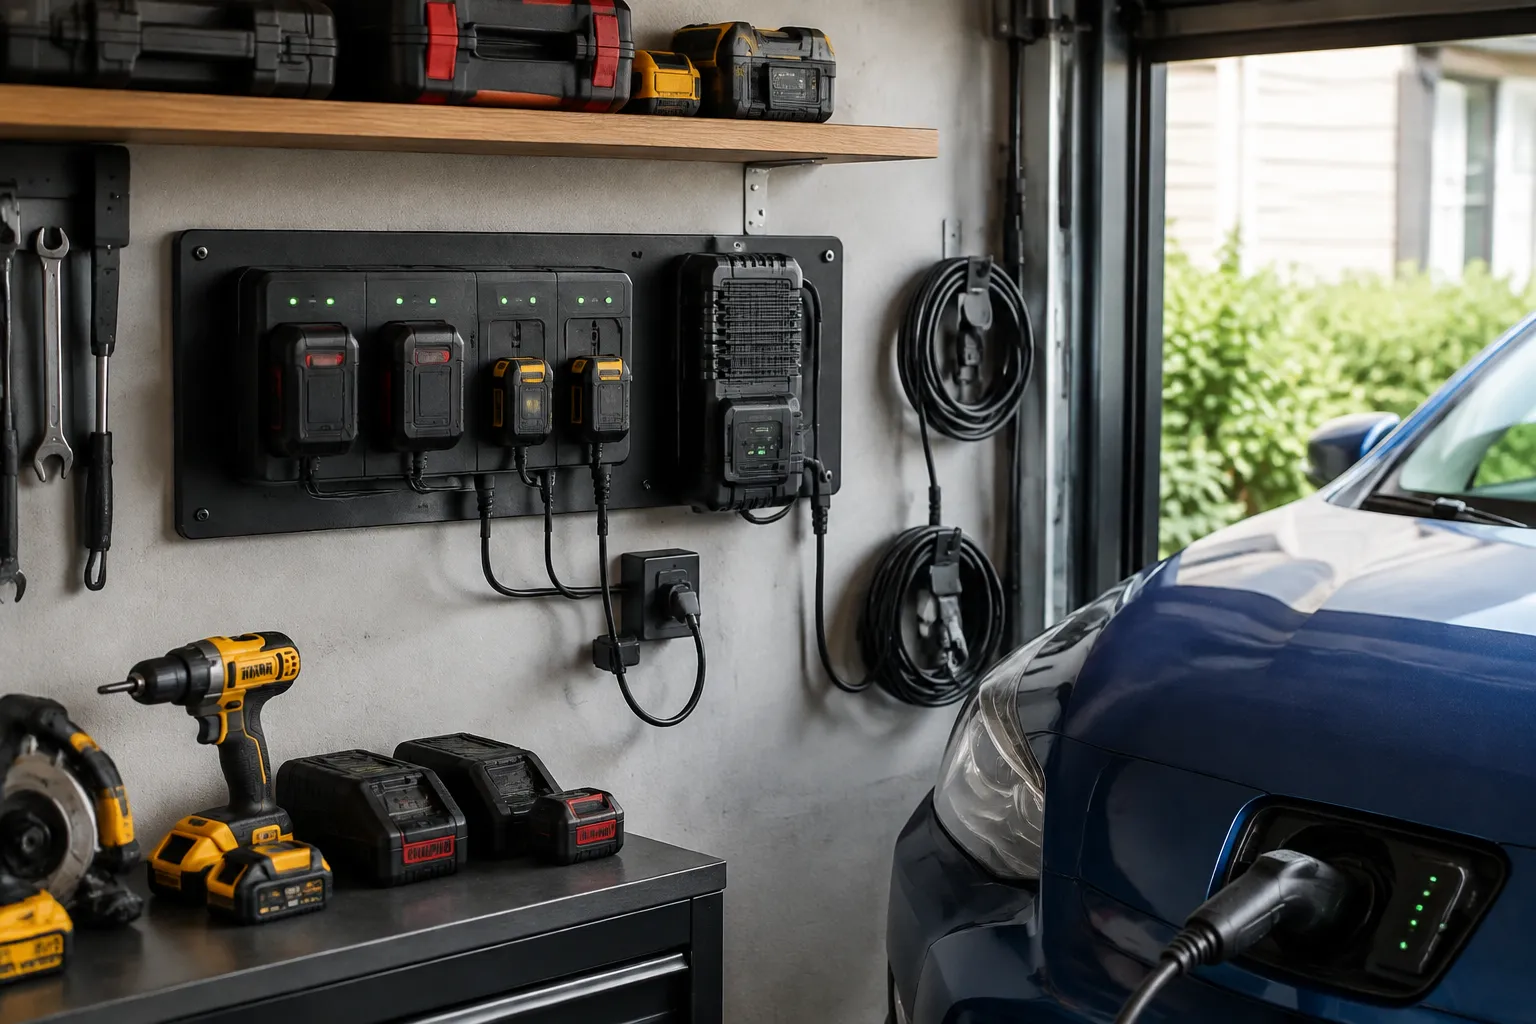
The garage corner where chargers and batteries pile up is usually the least organized square footage in the house. Cables tangle into a single braid, the 12-volt charger sits under a box of winter gloves, and the drill battery charger shares a surge protector with a space heater that draws more than the circuit wants. A proper charging station solves a real problem, but the solution has less to do with buying a fancy cabinet and more to do with understanding what each charger actually needs.
Most people who set out to build a charging station start with the wrong question. They ask what it should look like. The right question is what it has to survive. A car battery charger and a cordless tool charger live completely different lives, and forcing them into the same physical space without accounting for that difference creates a station that looks tidy for a week and then falls apart.
Splitting the Two Charging Worlds
Tool battery chargers are bench equipment. They sit indoors, usually in a garage or workshop, and they work with small lithium-ion packs that charge in under an hour. The environment is relatively clean, temperature stays somewhere between freezing and hot, and the main hazards are dust, accidental knocks, and the occasional splash of solvent.
Car battery chargers are different animals. A modern smart charger for a 12-volt lead-acid battery can run for hours, sometimes overnight, especially if it is doing a desulfation cycle or recovering a deeply discharged battery. The battery itself is often still in the vehicle, which means the charger sits on a concrete floor near a car that may be leaking oil or dripping water from the wheel wells. The air is colder, dirtier, and sometimes damp.
These two jobs need different mounting strategies and different power delivery planning. A station that ignores this split will either cook a tool charger with poor ventilation or put a car charger somewhere inaccessible.
Power Capacity and the Hidden Amp Draw
The first concrete step is counting the actual load. A typical cordless tool charger draws between 40 and 90 watts depending on the brand and how many batteries it can hold. A dual-bay rapid charger for a 20-volt max system can pull close to 150 watts at full tilt. A car battery charger in bulk mode draws anywhere from 2 to 10 amps from the wall, which translates to 250 to 1,200 watts for the big 10-amp units.
Add a work light, a radio, and a bench grinder on the same circuit and the math gets tight fast. A standard garage circuit is 15 amps at 120 volts, or 1,800 watts total. Two car chargers on high output plus a couple of tool chargers can approach that limit before anything else turns on.
The practical solution is dedicated circuits for the heavy chargers. A 20-amp circuit for the car battery chargers alone is worth the cost of running new wire. The tool chargers can share a general-purpose circuit as long as nothing huge cycles on at the same time. This is not a theoretical concern. A tripped breaker in the middle of an overnight recovery charge resets the charger's algorithm, and some units just sit there blinking until someone presses a button again.
Ventilation, the Part Everyone Skips
Heat is the silent killer of charging electronics. Tool chargers have small cooling fans or passive heat sinks, and they need air space around them. Tucking three chargers into a plywood cubby with one inch of clearance on each side turns a 45-minute charge into a 90-minute charge as the electronics throttle back to protect themselves.
The rule for tool chargers is six inches of open air on every side, including the top. Wall mounting them vertically with a gap behind the unit works well. A piece of 1x2 lumber as a standoff spacer creates that gap and keeps the charger off the wall surface.
Car battery chargers generate even more heat, especially the transformer-based units that have not been replaced by switch-mode designs. These older units can run hot enough to discolor a wooden shelf over years of use. They belong on a metal surface or a concrete floor, never in a sealed box. The small 1.5-amp trickle chargers run cool, but the 10-amp multi-stage units need real airflow. A shelf made of expanded metal mesh is the right call, it lets air move below and around the unit.
Cable Management That Survives Real Use
Cable management fails when it is too rigid. A station that requires each cable to be coiled perfectly after every use will be abandoned by the third week. The system has to tolerate sloppy behavior and still function.
For tool chargers, the weak point is the AC cord. Most tool charger cords are short, often just two feet, which forces the charger to sit near an outlet. A power strip mounted to the back of the station works better than individual extension cords. The charger sits on the shelf, its cord drapes behind, and the plug goes into the strip. There is no visible cable to manage because the strip is hidden.
Car chargers need longer leads, usually six to ten feet, to reach the battery in the vehicle. The output cables are the thickest part of the setup. A cord reel mounted near the station works, but a simpler approach is a couple of heavy-duty hooks on the station's side where the clamps hang. The cable coils loosely around the hook, and the clamps clip onto each other so they do not dangle and touch.
The battery clamps themselves deserve attention. Leaving them shorted together is harmless, but leaving them where they can touch a metal shelf or a grounded surface is a small shock hazard. A small piece of rubber mat glued to the station's frame gives the clamps a safe resting spot.
The 12-Volt and Battery-Maintainer Question
Seasonal vehicles complicate the station. A car, motorcycle, or lawn tractor that sits for months needs a battery maintainer, not a full charger. Maintainers put out 0.75 to 1.5 amps and cycle on and off to hold a battery at full charge. They are meant to run continuously for weeks.
The station should include a dedicated outlet for maintainers that is always energized, not switched by a light or a bench tool. If the garage has a switched outlet, the maintainer will stop working when someone flips the wrong switch, and the battery will be dead by spring. A small label above the outlet saves a lot of frustration.
Multiple maintainers can share one power strip as long as the strip is rated for continuous duty. The cheap plastic strips with a built-in surge protector work fine indoors. The maintainer's own electronics handle the switching, so the strip just passes power.
Mounting the Chargers So the Station Stays Put
Tool chargers have different mounting options. Some come with keyhole slots on the back for hanging. Others are meant to sit flat. For those without slots, a small shelf with a lip on the front edge keeps the charger from sliding off when a battery is yanked out. The yank matters more than people think. Pulling a battery pack out of a charger exerts a surprising amount of force, and a charger sitting on a flat shelf will migrate an inch every time.
A strip of hook-and-loop tape under the charger solves the migration problem without permanent adhesive damage. The soft side sticks to the charger's rubber feet, the hook side sticks to the shelf. It holds well enough to resist the battery removal force but still lets the charger be lifted off for service.
Car chargers should sit at waist height or lower. Reaching over a car fender with a charger held at head height is awkward and dangerous if the clamps slip. A low shelf or a rolling cart works best. The cart has an advantage: it moves to the vehicle instead of the vehicle moving to the station. For a garage where cars park nose-first against a wall, a rolling cart with the charger, the clamps, and a few extension cords mounted on it saves ten minutes of shuffling every time.
What the Floor and Wall Construction Dictate
A charging station attached to a stud wall needs different hardware than one mounted on a concrete block or metal stud wall. The heavy car chargers, the ones that weigh eight to twelve pounds, need a real anchor. A plastic drywall anchor rated for 20 pounds will hold a charger at rest but can pull out when someone catches a cable and yanks it. A toggle bolt or a lag screw into a wooden stud is the right call for anything over five pounds.
If the station mounts to a workbench, the bench's stability matters. A light folding table will shake and eventually collapse under the repeated force of pushing battery packs into chargers. A solid 2x4 frame bench or a butcher-block top on steel legs is the baseline. The station is a permanent fixture, not a temporary arrangement.
Concrete floors in a garage pull moisture out of the air and can stay cold and damp. A car charger sitting directly on concrete will have condensation on its casing in the morning. A piece of 3/4-inch plywood or a rubber horse stall mat under the charger lifts it off the cold surface and adds a little vibration isolation.
The Question of Expansion
Tool systems grow. A station built for two chargers will need three within a year, especially if the user owns multiple battery platforms or has a second brand for a specific tool. The station needs spare capacity in power delivery and shelf space.
On the power side, a 12-outlet power strip on a dedicated 20-amp circuit leaves room for two or three additional tool chargers. On the shelf side, vertical space is cheaper than floor space. Adding a second tier of shelving later is much harder than building it tall from the start. A station that goes to the ceiling with adjustable shelves handles growth without a rebuild.
The same logic applies to the car charger side. A station with one 10-amp charger and one maintainer should have room for a second maintainer. Classic cars, boats, RVs, and snow blowers all end up needing one eventually. The outlet strip should have spare sockets, and the shelf should have an empty spot.
Safety Habits That Come with the Station
A charging station concentrates electricity, batteries, and flammable material in one place. That concentration demands a few habits. First, the station should sit away from gasoline cans, solvent rags, and cardboard boxes. A garage fire that starts at the charging station will spread fast if combustibles are stacked nearby.
Second, the station needs a fire extinguisher rated for electrical fires within reach. A 5-pound ABC dry chemical unit mounted on the wall five feet from the station is the minimum. Checking the gauge once a month is a habit that takes five seconds.
Third, battery packs with visible damage, a cracked case, a swollen cell, or a melted terminal, do not belong on the charger. Setting a damaged pack on the charging bay is how fires start. The station should have a small bin labeled for damaged batteries, and those batteries should go to a recycling center, not back into the tool drawer.
Fourth, the station should be on a ground-fault circuit interrupter (GFCI) protected circuit. New garage codes require this, but older homes often lack it. A portable GFCI adapter at the outlet is a cheap fix. It may nuisance trip occasionally with a large transformer-based charger, but that trip is a warning sign about moisture or a leak, not an inconvenience.
A Clean Layout That Feels Natural
At this point the station has a shape: tool chargers on an upper shelf with open air around them, car chargers on a lower metal shelf or rolling cart, maintainers on a dedicated always-on outlet, and a clear floor area in front. The final detail is labeling. A label on each outlet strip section saying which charger plugs where saves the moment of unplugging the maintainer to plug in a drill charger and then forgetting to plug the maintainer back in. A simple label maker or even a Sharpie on masking tape works.
A charging station is not a purchase, it is a small construction project. The time spent measuring the load, choosing the right mounting hardware, and running dedicated power pays off every time a battery charges at full speed and a car starts after sitting all winter. The station becomes one of those quiet garage fixtures that works so well it gets forgotten, which is exactly what a charging station should be.