
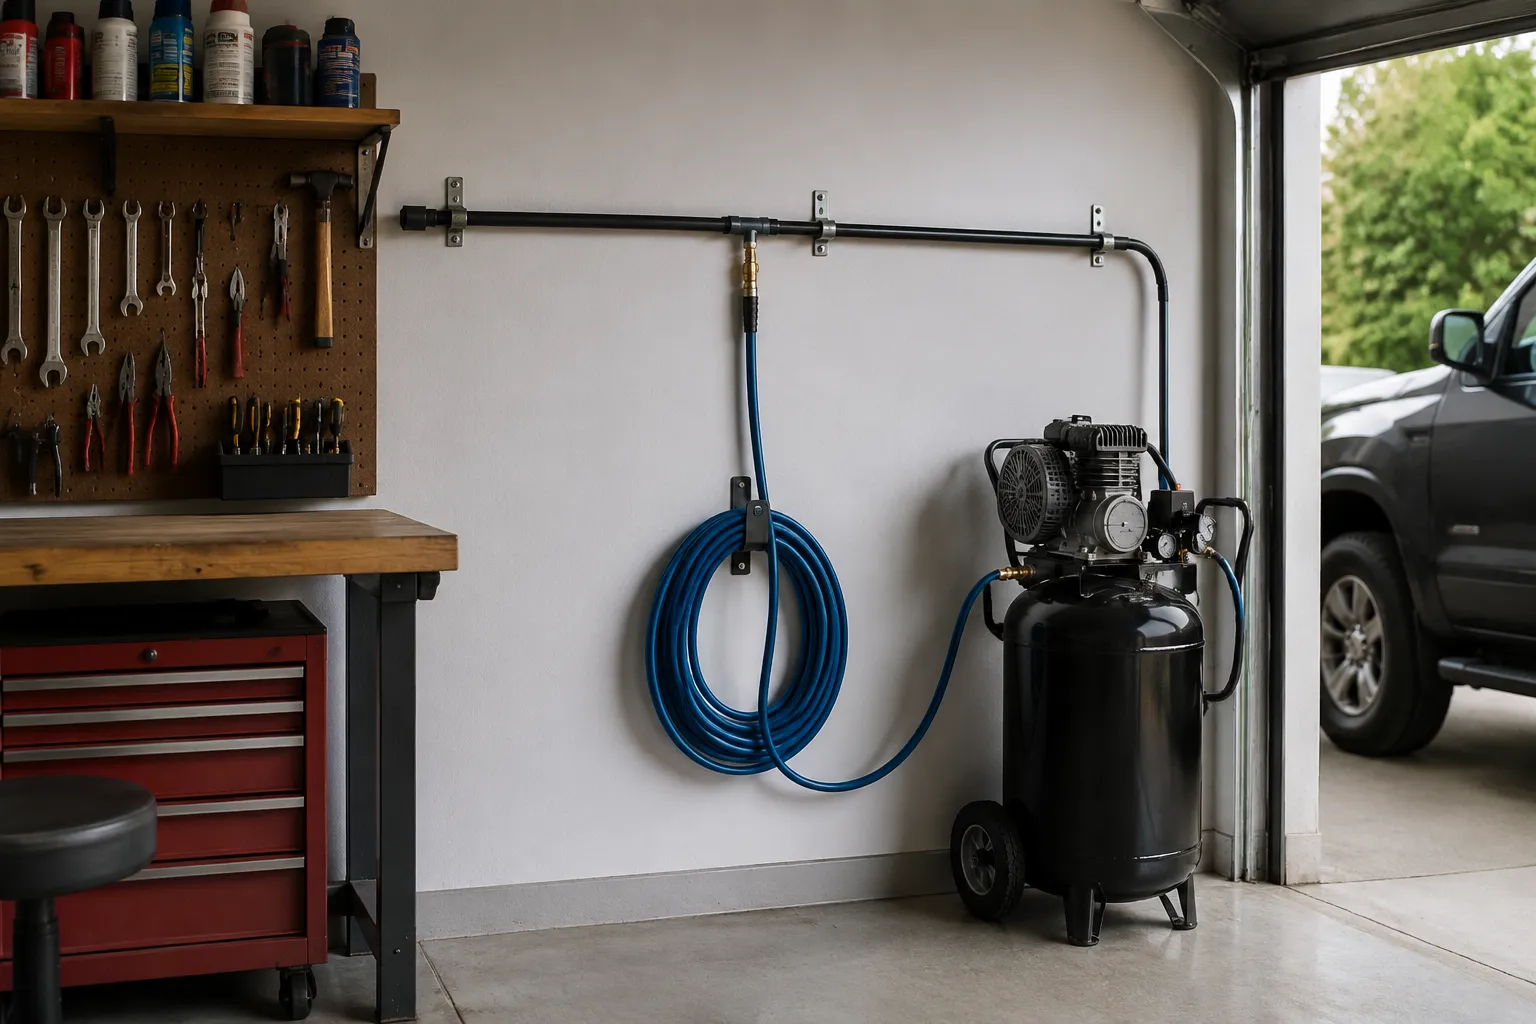
The humble air compressor hose is the least respected thing in most garages. A person will spend serious money on a two-stage compressor, agonize over CFM ratings, and then drape fifty feet of rubber across the floor like a garden hose left out after a storm. The compressor sits in the corner, pristine. The hose snakes everywhere and gets stepped on, kinked, and tripped over. It is the weakest link in the whole system, and it is the one component almost nobody plans for until they are on their back under a car with a hose wrapped around an axle.
Routing a hose properly is not about aesthetics, though a tidy garage is a fine side effect. It is about safety, hose lifespan, and whether the air tool at the end of the line actually performs. A hose that is coiled, pinched, or stretched across a walkway is a hose that fails early, or worse, a hose that sends someone to the urgent care. The fix is not complicated. It just requires treating the hose as a permanent part of the shop layout instead of a temporary annoyance.
The trip hazard that lives on the floor
Walk into any working garage and the floor is already a minefield. There are creeper boards, jack stands, oil drain pans, and the occasional socket that rolled off the bench. Adding a pressurized hose to that mix is asking for trouble. A hose on the floor is a rounded, low-profile object that blends in with everything else, and it is carrying enough pressure to whip violently if the fitting lets go or the tool catches an edge.
The common scenario is the compressor chained to the wall near the overhead door, with the hose stretched diagonally across the bay to reach a workbench. Every time someone walks through, they either step on the hose, which wears the outer jacket and eventually exposes the reinforcement braid, or they catch a toe and stumble. A stumble with a spinning grinder in hand is not a minor event. It is a dropped tool, a sliced glove, or a broken wrist on the concrete.
Floor routing also means the hose gets dragged over sharp edges. A steel workbench leg, the corner of a rolling tool chest, a chipped concrete edge. Each drag shaves a little more material off the hose. The danger is invisible because the damage is on the underside, hidden from view. A hose can look perfectly fine on top and be structurally compromised on the bottom, ready to burst at the exact moment it is flexed hard. Nobody plans for that failure. It just happens, and it happens at 150 psi.
Overhead is the answer, with real hardware
The standard solution is to run the hose overhead, along the ceiling or high on the wall, and drop it down at the point of use. This is not a new idea, but it is one that most people implement half-heartedly. A couple of nails with the hose draped over them is not an overhead system. That is a storage rack with extra steps, and the hose will sag, chafe against the nail heads, and eventually find its way back to the floor.
A proper overhead drop uses a hose reel or a fixed line with a swivel fitting. The ceiling mount needs to be solid, not a drywall anchor. A hose full of air weighs more than people expect, and a reel holding fifty feet of rubber can pull a cheap bracket right out of the drywall. The mount point should be a structural member, a steel beam, or a plywood plate bolted through the joists. This is a case where overbuilding is the correct approach.
The drop itself should be short, just enough to reach the tool comfortably without pulling the hose tight. A long vertical run that dangles to the floor recreates the same trip hazard, just with a vertical component. The ideal drop stops about chest high or waist high, and the user pulls the hose down to the work area. When finished, a light tug releases the reel and the hose retracts out of the way.
Retractable reels are worth the money
There are two ways to keep a hose off the floor: a fixed overhead line with a long drop, or a retractable reel. The reel wins, almost every time, for anyone who uses the compressor more than twice a month. The retraction mechanism keeps tension on the hose at all times, which means the hose never lies in a loose coil. A loose coil is where kinks form, and kinks are where the hose develops weak spots that turn into leaks or bursts.
The quality range in reels is enormous. A cheap reel from a big-box store will have a plastic housing, a spring that loses tension in under a year, and a hose that kinks at the reel outlet because the bend radius is too tight. A quality reel, from a brand like Reelcraft or Coxreels, has a steel housing, a replaceable spring cartridge, and a hose exit that does not pinch. The price difference is significant, often three to four times, but the cheap one is a disposable item. The good one lasts a decade or more.
There is a middle path for the budget-conscious. Some reels are designed for a hose that the user replaces over time, and the reel body itself stays mounted. That is a smarter buy than an all-in-one cheap unit. The reel housing takes the abuse, the hose is a consumable, and the total cost over five years is lower. The key is to mount the reel where the pull is straight, not at an angle. A reel mounted on a wall with the hose exiting toward a workbench on the left will bind and wear unevenly. The hose should leave the reel in the direction it will be pulled.
The whip hose and the strain relief chain
One detail separates a thoughtful installation from a sloppy one: the short whip hose between the fixed line and the tool. A whip hose is a short, flexible section, usually twelve to eighteen inches, that absorbs the movement of the tool without transmitting that motion to the main hose. Without a whip, the main hose takes the full force of every wrist turn and tool shift, which wears the coupling and can crack the fitting over time.
The other critical piece is a strain relief at the compressor end. Most people thread the hose directly onto the compressor outlet and leave it. Every time the compressor vibrates, the vibration travels down the hose and works the fitting loose. A short length of hose with a fitting on both ends, or a vibration-dampening loop, isolates the compressor from the rigid line. This is the same principle as a washing machine fill hose, which has a loop to absorb movement.
A strain relief chain, the small chain that connects the tool side of the fitting to the tool itself, is often included with new air tools and almost always ignored. It exists for a reason. If the tool slips out of a hand, the chain catches the load before the hose fitting takes the full weight of the falling tool. That prevents the fitting from snapping off and turning the tool into a projectile. It takes five seconds to hook the chain on. It takes one trip to the eye doctor to regret skipping it.
Hose material matters more than the color
Hose material choice is where a lot of people go wrong, usually by buying whatever is on sale. The two main options are rubber and hybrid polymer. Rubber is heavier, more flexible in cold weather, and more resistant to abrasion. Hybrid hoses are lighter, coil up smaller, and are cheaper. For a fixed overhead installation, rubber is the better choice. The weight is not a factor when the hose is supported, and the abrasion resistance matters when the hose rubs against ceiling joists or wall corners.
The hybrid hoses have their place, which is portable use. A person dragging a compressor to a job site wants the lightest hose possible. But in a fixed garage installation, the light weight is not an advantage. The hybrid hose is also more prone to kinking at the reel outlet, especially in cold garages during the winter months. A rubber hose stays flexible down to much lower temperatures, which matters for a garage that is not heated.
The diameter, not the color, determines performance. A 3/8 inch hose is the minimum for general workshop use. A 1/4 inch hose chokes off the air supply to any tool that needs real volume, like a die grinder or an impact wrench. The pressure at the tool drops because the hose cannot deliver the CFM the tool demands. A 1/2 inch hose is for long runs over fifty feet or for high-consumption tools. The rule is simple: the longer the run, the bigger the diameter needed to maintain pressure. A small hose on a long run is a recipe for a tool that stalls and a person who blames the compressor instead of the hose.
Quick couplers and the pressure drop they cause
The fittings at both ends of the hose are where the system leaks, and they are where the pressure drops hide. A standard quick coupler has an internal restriction that reduces the effective bore of the hose. On a 3/8 inch hose, a restrictive coupler can drop the flow to that of a 1/4 inch hose. High-flow couplers, the ones with a larger internal passage, are not a marketing gimmick. They are a measurable improvement for any tool that runs continuously, like a spray gun or a sandblaster.
The other issue is coupler compatibility. There are several standards, and they do not all mate correctly. An industrial-style coupler will sometimes partially engage with an automotive-style plug, creating a connection that holds pressure but leaks air. The hiss is annoying, and the constant compressor cycling to make up for the leak wastes electricity and wears the pump. The fix is to standardize the garage on one coupler type and one plug type, and to throw away any mismatched pieces. The fifteen minutes it takes to swap fittings is worth it, and it is a job for a thread sealant, not Teflon tape wrapped haphazardly.
Routing around heat and sharp edges
An overhead hose route passes near things that can damage it. Hot water pipes, exhaust vents, and flue pipes are the obvious hazards. A rubber hose in contact with a hot surface will soften, blister, and eventually fail. The hose should be routed with at least a few inches of clearance from any heat source, and if the route passes over a hot pipe, a heat shield or a section of fiberglass sleeve is a reasonable precaution.
Sharp edges are subtler. A steel joist with a burr, a metal strap with a cut edge, a conduit clamp with a rough edge. Over time, vibration and movement will saw through the hose jacket. The damaged area may not leak immediately, but the reinforcement layer is compromised, and the hose will eventually bulge and burst. The route should be inspected once a year, and any contact point should be padded with a rubber grommet or a split loom sleeve.
In a garage that shares space with a vehicle, the hose should also be routed away from where the car door opens. A hose that runs along the wall at door height is one bad swing away from being pinched and sliced. The ideal route is high, above the door arc, or the hose is mounted on a spring-loaded arm that swings it out of the way. The goal is to make the hose invisible during normal use and only present when needed.
The pressure test that reveals the truth
After the routing is done, the installation should be tested, not trusted. A quick test is to pressurize the system, shut off the compressor, and listen for leaks. A hissing sound means a fitting is loose or a coupler is mismatched. A more thorough test is to apply soapy water to every joint and watch for bubbles. This takes ten minutes and finds leaks that the ear misses, especially the slow ones that only show under pressure.
The test also reveals whether the hose diameter is adequate for the tools that will be used. A person can check the pressure at the tool with an inline gauge, or simply run the tool and watch the compressor gauge. If the pressure drops significantly under load, the hose is too small or the route is too long. The compressor and the tool are both fine. The hose is the bottleneck, and the only fix is a bigger line or a shorter route.
The final check is the physical one. The hose should not pull tight at any point along its route, and the reel should retract smoothly without any binding. The whip hose should flex freely, and the strain relief chain should be attached. This is the moment to walk the path a person takes through the garage, carrying an imaginary tool, and confirm the hose never crosses a walkway. If it does, the route needs adjustment before the first real job, not after.